List of Suppliers
To view all suppliers, navigate to Inventory -> Suppliers.
Erply will display a list of your suppliers. Click on a supplier to view or edit their information.
You can search for a specific supplier or filter through your list of suppliers.
Create a Supplier
To create a new Supplier, click the New at the top of the list of suppliers. This will open a blank Supplier Card.
Mandatory fields are indicated with asterisks * and red text. Name, Type of business entity, and Group are the mandatory fields.
You can fill out more information located in the gray column on the left hand side.
If you'd like to create multiple suppliers at once, read our guide on importing suppliers.
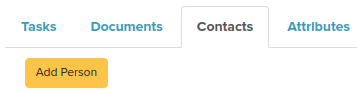
Contact Person
A contact person is that person that you communicate with in a supplier company.
To add a contact person, open a supplier in the back office. Click the Add person button within the Contacts tab.
Fill out the required fields. You can enter contact information and custom notes to a contact person’s profile.
Save when you are done.
Supplier Price List
To view and create supplier price lists, navigate to Purchase -> Supplier Price Lists.
Enter the following information:
- Price list name
- Supplier that the price list will be associated with
- Start and End date (optional)
To ensure that the price list is Active, mark the checkbox. You may uncheck the box to turn off a price list.
Save the price list when you are done to start adding products and discounts to the price list.
Add items
Click the Add items button to add items.
This will open a menu labeled Add items to price list. Here, you can add items individually or by group, category, brand, or supplier.
Save when you are done. Erply will prompt to make sure you want to discount these items. Press Ok.
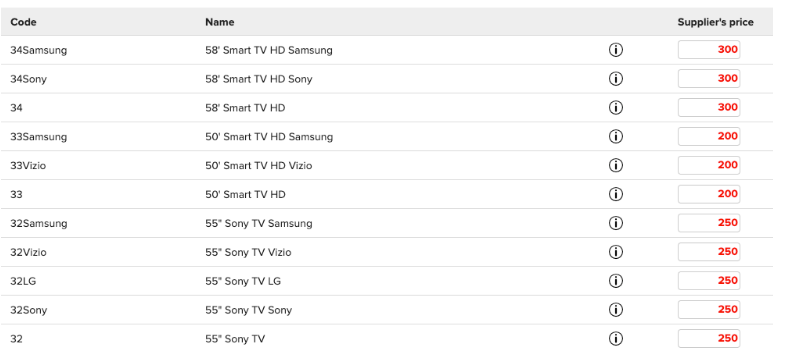
Erply will add the selected items to the price list. If you selected a group, category, brand, or supplier, all items in that group will be added to the price list as individual items.
You can edit prices in the Supplier price column.
Save when you are done.
Creating orders with supplier price list
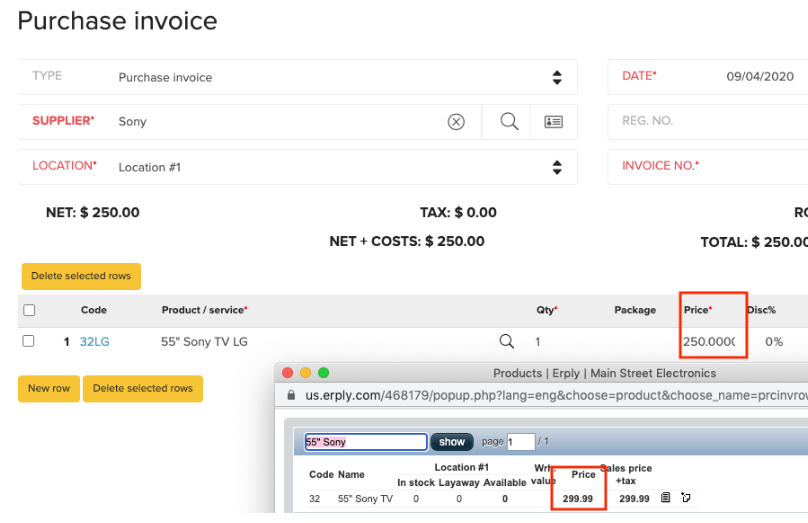
When creating a purchase order or purchase invoice, the price list will apply to the items in the order.
Press the magnifying glass to search and add items to the order. You’ll notice that the price there reflects the pre-pricelist price.
Tax-Free Suppliers
Method 1: Indicating Tax-Free Status During Supplier Creation
Navigate to ERPLY Backoffice by selecting the Inventory Tab -> Suppliers -> Add a Supplier to create a new supplier.
While creating the supplier, you can specify their tax-free status.

Method 2: Modifying Tax Rate for Existing Suppliers
Access ERPLY Backoffice and go to Inventory Tab -> Suppliers. Locate and select the supplier you wish to edit.
Within the supplier's profile, locate the tax rate drop-down menu. Choose the Tax Free option from the drop-down list.
Don't forget to save your changes by clicking the Save button.

If you haven't set up any tax rates yet, refer to our article Tax Rates within Erply for guidance on that topic.
By following these steps, you can easily set suppliers as tax-free in your ERPLY Backoffice, ensuring accurate taxation for your business transactions.