Erply allows you to create a customer both as a private customer and as a company.
In the Back Office, the customer can create all the benefits of CRM. You can gather valuable information when creating your sales and marketing strategy.
Erply customer data includes location information, sales history, reward points and more.
Benefits of Customer Data
Understand purchasing habits
Adding customers in Erply gives you all of the benefits of a full retail CRM. Collect valuable customer data to inform your sales and marketing strategies.
Customers entries in Erply can hold demographic information, sales history, loyalty point balances, and much more.
Build a detailed CRM
While customers can be created right at the POS, creating a customer in the back office allows you to add even further details or associate that customer with a company (great for wholesalers).
Due to the General Data Protection Regulation, the data of a private customer is not reflected in the reports where the customer is identified.
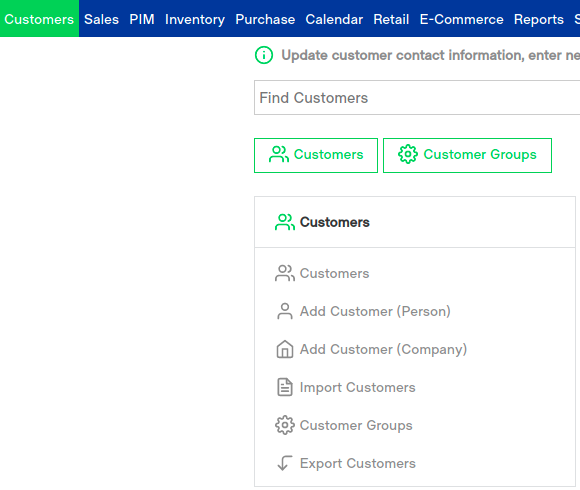
Adding and Editing Customers in the Back Office
New customers can be added in Customers -> Add customer(person)/Add customer(company).
A new customer card opens up. When adding private customers, the form Person opens up.
It is now possible to add the customer's first name, last name, e-mail, mobile, address, etc. The required fields are shown in red.
It is also possible to create a new Customer Group -> Add new on the Customer card.
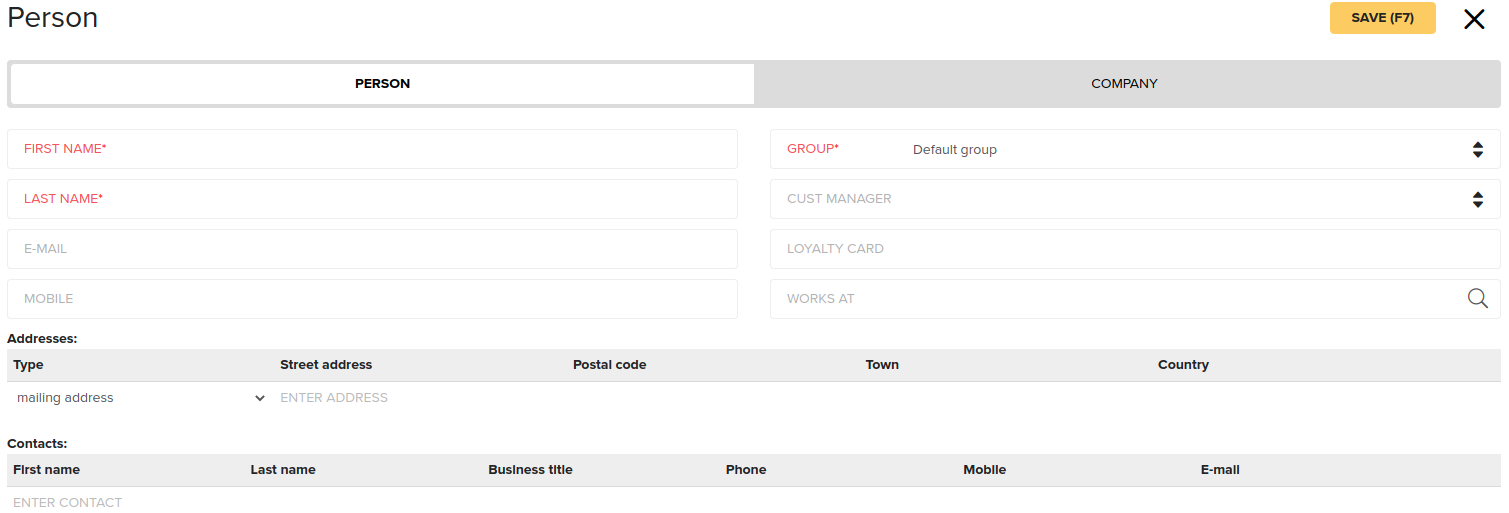

When adding a company, the form Company opens up. You can add addresses and contact information to the company. The required fields are shown in red.

Additional information can be added in the menu bar on the left. In case of a private customer, for example, title, national ID, date of birth, etc.
In case of a company, for example, registry code, VAT, type of company, etc.
For a company, you can also add Contact Persons, which can be a sales representative or other manager.
Note: Contact Persons are not visible in Customers search and vice versa.
When all the necessary information has been added to the customer card, press Save and a new customer has been created.
Customers can be edited in Customers → Customers by clicking on their name.
If you wish to import larger amounts of clients, please read our customer importing guide.
Additional customer information
The gray left-hand menu allows you to configure additional, detailed customer information for your CRM records. These fields are the same for customers and companies as customers.
General information
Configure general customer information, including payment details.
Much of this information is used when you’re editing a company as a customer.
Contact information
Add additional contact information, not used for invoicing or other sales documents.
Points and coupons
Adjust a customer’s loyalty point balance and fine-tune their loyalty/coupon eligibility.
Sales
Determine sales information, such as a customer’s active price lists, their payment terms, credit limit, and preferred delivery time (such as dropshipping).
Category
Configure additional country and activity information for your records.
Web shop
Fill in a customer’s username or password for your online store.
Customer creation settings
In Settings -> Configuration -> Customer, two settings can be found.
The first one "Registry Code / ID Code must be unique" helps to make sure that duplicate customers aren't being added.
The second, “Check email address format on creation” helps to make sure that email addresses are correctly entered.
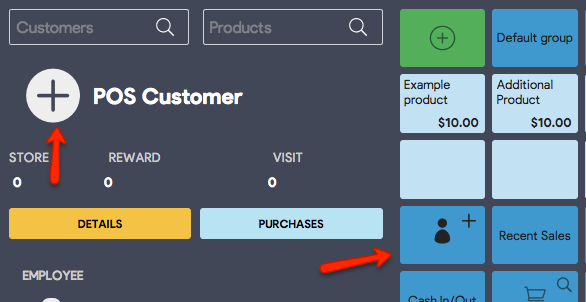
Adding Customers at the POS
When logged into the Point of Sale, you can add a new customer by clicking the Add Customer button.
Add customer is the dark blue function button and has a silhouette of a person.
You can also use the large + sign next to your Default Customer to pull up this card.
From here, you can fill in all the information you wish to, the required fields are shown in red.
You can also toggle between adding an individual customer or a business customer (company). If this new customer is a company you will be doing business with directly, you can simply choose the appropriate tab to add them as such.
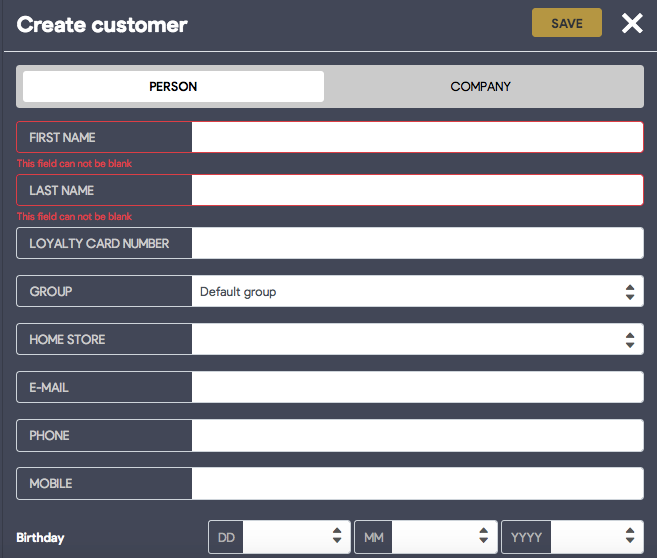
Press Save in the top right corner to save all changes made. This will create a new customer card and will select them as the customer for the current sale.
Frequently Asked Questions
Will customers added at Point of Sale sync to Erply Back Office?
Any customer created at the POS will be automatically added to Erply’s back office database.
Can I edit current customers from the POS?
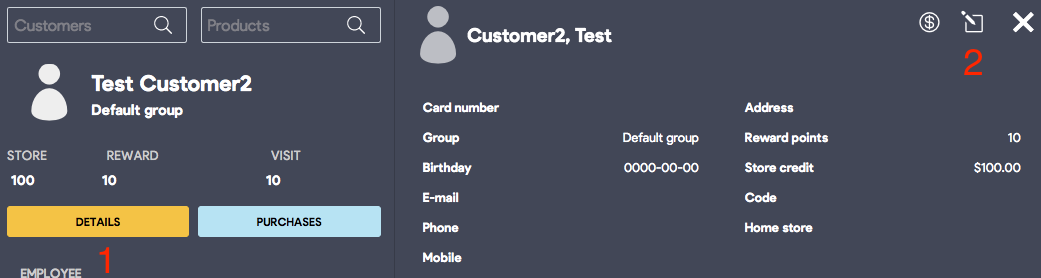
You can! When you have a customer selected at the point of sale, edit their data by clicking the Details button (#1 in the image below).
Select the edit icon to pull up the editable fields (#2 in the image below).
Why can’t my cashier add a customer at the point of sale?
Cashiers must have proper user rights in order to have the ability to add customers at the point of sale.
Note: You can manage user rights in the back office Settings -> User Groups page.