Hardware requirements:
To use ERPLY's new Customer Display app, one must have an additional screen. Usually, that would be a tablet.
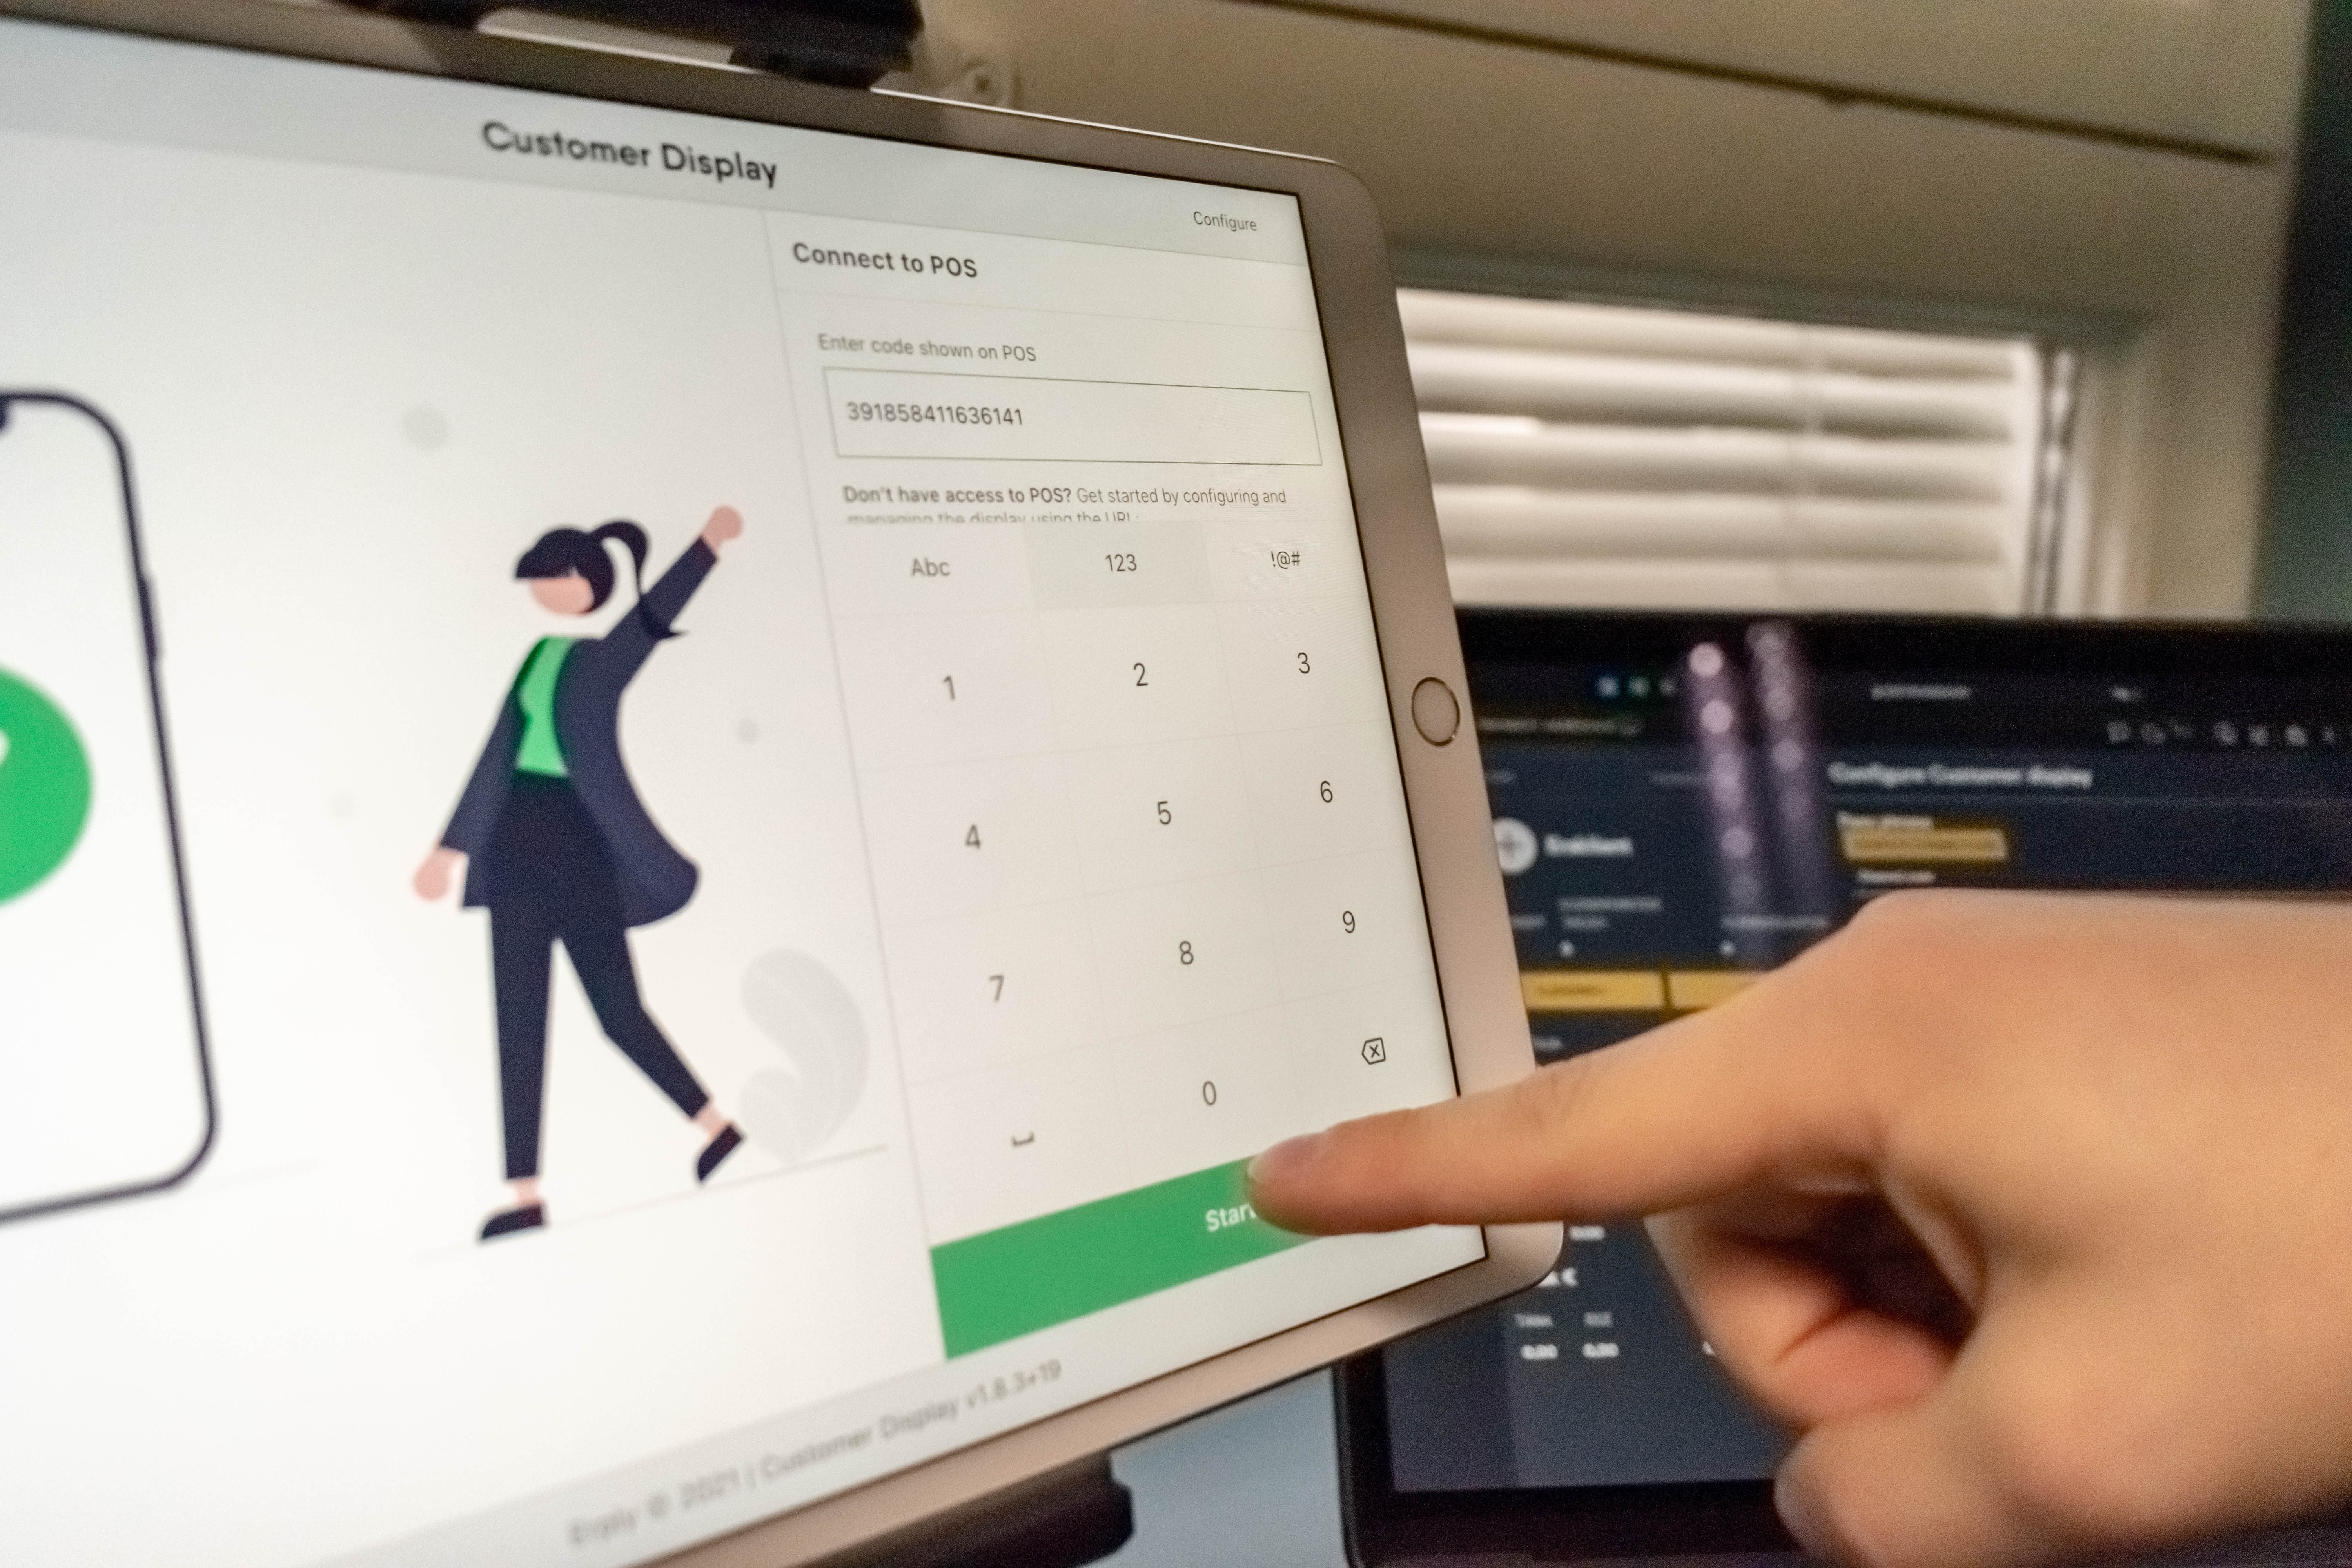
Setup
Navigate to POS Settings -> Plugins -> Customer display and select Configure plugin. Under the category Pass phrase, click on Generate channel code.
This will generate a unique channel code that you must insert into the code field on the customer display screen. Press Start to begin using Erply Customer Display.
Configure the Customer Display Plugin
The default configuration of the Customer Display allows users to start using the integration by just entering the channel code to the Customer Display code field. With more settings, the user can achieve the full potential of the Customer Display service. A quick overview follows.
The customer display offers a wide variety of features to use. All the features of the Customer Display are customisable from the POS Settings -> Plugins -> Customer Display -> click on the Configure Plugin button.
Note: After customising the settings, the Customer Display plugin will require a restart to apply the settings. Simply turn off the plugin then turn it on again.
Customer creation form
Customer creation configuration is a simple checkbox system used to configure the fields. The Customer Display will receive the customer creation form according to the set configuration.
For example: selecting First name and Last name will only display named fields in the customer creation form.
Text fields are configurable.
Workflow configuration
The preset after-sale workflows are as listed:
- Show email input
- Show QR code with receipt link
- Show QR code with a custom link
All of the text that is present in the Customer Display is configurable from the configuration page. Some of the fields are set with variables from the POS, while others are static text that can be changed to anything one desires.
After configuring, it's important to save the configurations by clicking on SAVE CONFIG.
Brand
LOGO LINK - Insert a link to the logo of your choice.
LOGO TYPE - File type. Should usually be JPG or PNG
TEXT - Will be displayed at the upper centre side
Donation
AMOUNT REPLACEMENT ID - Should usually be a variable _amt_
CANCEL TEXT - Cancel the donation
CONFIRM TEXT - Confirm the donation
OK TEXT - Donation successful
CONFIRMATION SUBTITLE - Subtitle for the confirmation
CONFIRMATION TITLE - Title for the confirmation
INPUT PLACEHOLDER - Donation amount insertion field
SUBTITLE - Subtitle for the donation
THANKING TEXT - Thank-you text after completing the donation
TITLE - Title for the donation
Coupon
CANCEL TEXT - Cancel the coupon insertion
CONFIRM TEXT - Confirm the coupon
OK TEXT - Coupon read success
CODE APPLIED SUBTITLE - Coupon applied subtitle. Can include a variable _couponDiscount_
CODE APPLIED TITLE - Coupon successfully applied
CODE DISCOUNT ID - Should be a variable _couponDiscount_
CODE FAILED SUBTITLE - Coupon read fail
CODE FAILED TITLE - Coupon application failed
CODE PLACEMENT ID - Should be a variable _couponDiscount_
CONFIRMATION SUBTITLE - Request to confirm the coupon. Can include a variable _coupon_
CONFIRMATION TITLE - Request to confirm the coupon
INPUT PLACEHOLDER - Code insertion field
SUBTITLE - Coupon code subtitle
TITLE - Coupon code title
Customer lookup
EMAIL OK TEXT - Email read successfully
EMAIL PLACEHOLDER - Email insertion field
EMAIL SUBTITLE - Subtitle to insert the email
EMAIL TITLE - Title to insert the email
PHONE OK TEXT - Phone read successfully
PHONE PLACEHOLDER - Phone insertion field
PHONE SUBTITLE - Subtitle to insert the phone number
PHONE TITLE - Title to insert the phone number
Customer registration
CANCEL TEXT - Text to cancel customer creation
CONFIRM TEXT - Text to confirm customer creation
CONFIRM SUBTITLE - Customer creation confirmation subtitle
CONFIRM TITLE - Customer creation confirmation title
FAILED TEXT - Customer creation failed
SUCCESS TEXT - Customer creation successful
TITLE - Title for customer creation form
Product upsell
ADD TEXT - Add products
CANCEL TEXT - Cancel the purchase
CONFIRM TEXT - Confirm product upsell
CONFIRM SUBTITLE - Confirm the purchase subtitle
CONFIRM TITLE - Confirm the purchase title
PRICE TEXT - Offer price
FAILED TITLE - Purchase failed
SUCCESS SUBTITLE - Product purchase successful subtitle
SUCCESS TITLE - Product purchase successful title
TITLE - Product upsell title
General
SUMMARY DISCOUNT TEXT - Discount total
SUMMARY NET TEXT - Net total
SUMMARY TAX TEXT - Summary tax
SUMMARY TOTAL TEXT - Total summary
PRODUCT CODE - Code of the product
PRODUCT DISCOUNT - Discount of the product
PRODUCT PRICE - Price of the product
PRODUCT NAME - Name of the product
PRODUCT AMOUNT - Quantity of products.
SHOPPING GRATITUDE TEXT - Gratitude text after the purchase
Settings
PHONE SMALL KEYBOARD STATE - NUMBERS - a type of keyboard to show when typing a phone number
PURCHASE INACTIVITY TIMEOUT - Timeout in seconds
DEFAULT CONTENT - show default content
Nice to know: every field is configurable.
Configuring custom ads
Customised videos and images can be displayed on the Customer Display app. We urge you to upload the displayable media source to a server of a trusted service provider.
QR code
Once configured, a QR code could be displayed with a title and a subtitle. Setting a timeout (in seconds) will show the QR code for a set time.
Showing the QR code with a custom link is possible. Modify the data field to change the QR code's endpoint.
Creating a product for donation
A donation product is mandatory to collect tips/donations from the customer and needs to follow the criteria:
- Non-refundable
- Zero priced
- Not discountable
After the donation product has been created, a search for the designated donation product is possible. Click on "SEARCH" to reveal the list of all products. If the product couldn't meet the criteria set for the donations, product selection is not possible. An indicator showing the currently selected product acting as a donation is also visible.