Locally Integration Setup
In order to integrate your Erply account with Locally you must first reach out to our support representatives who will activate the Locally Integration plugin on your Erply account. You can reach our support by writing to support@erply.com
Once the integration plugin is added to your Erply account you need to perform the following steps:
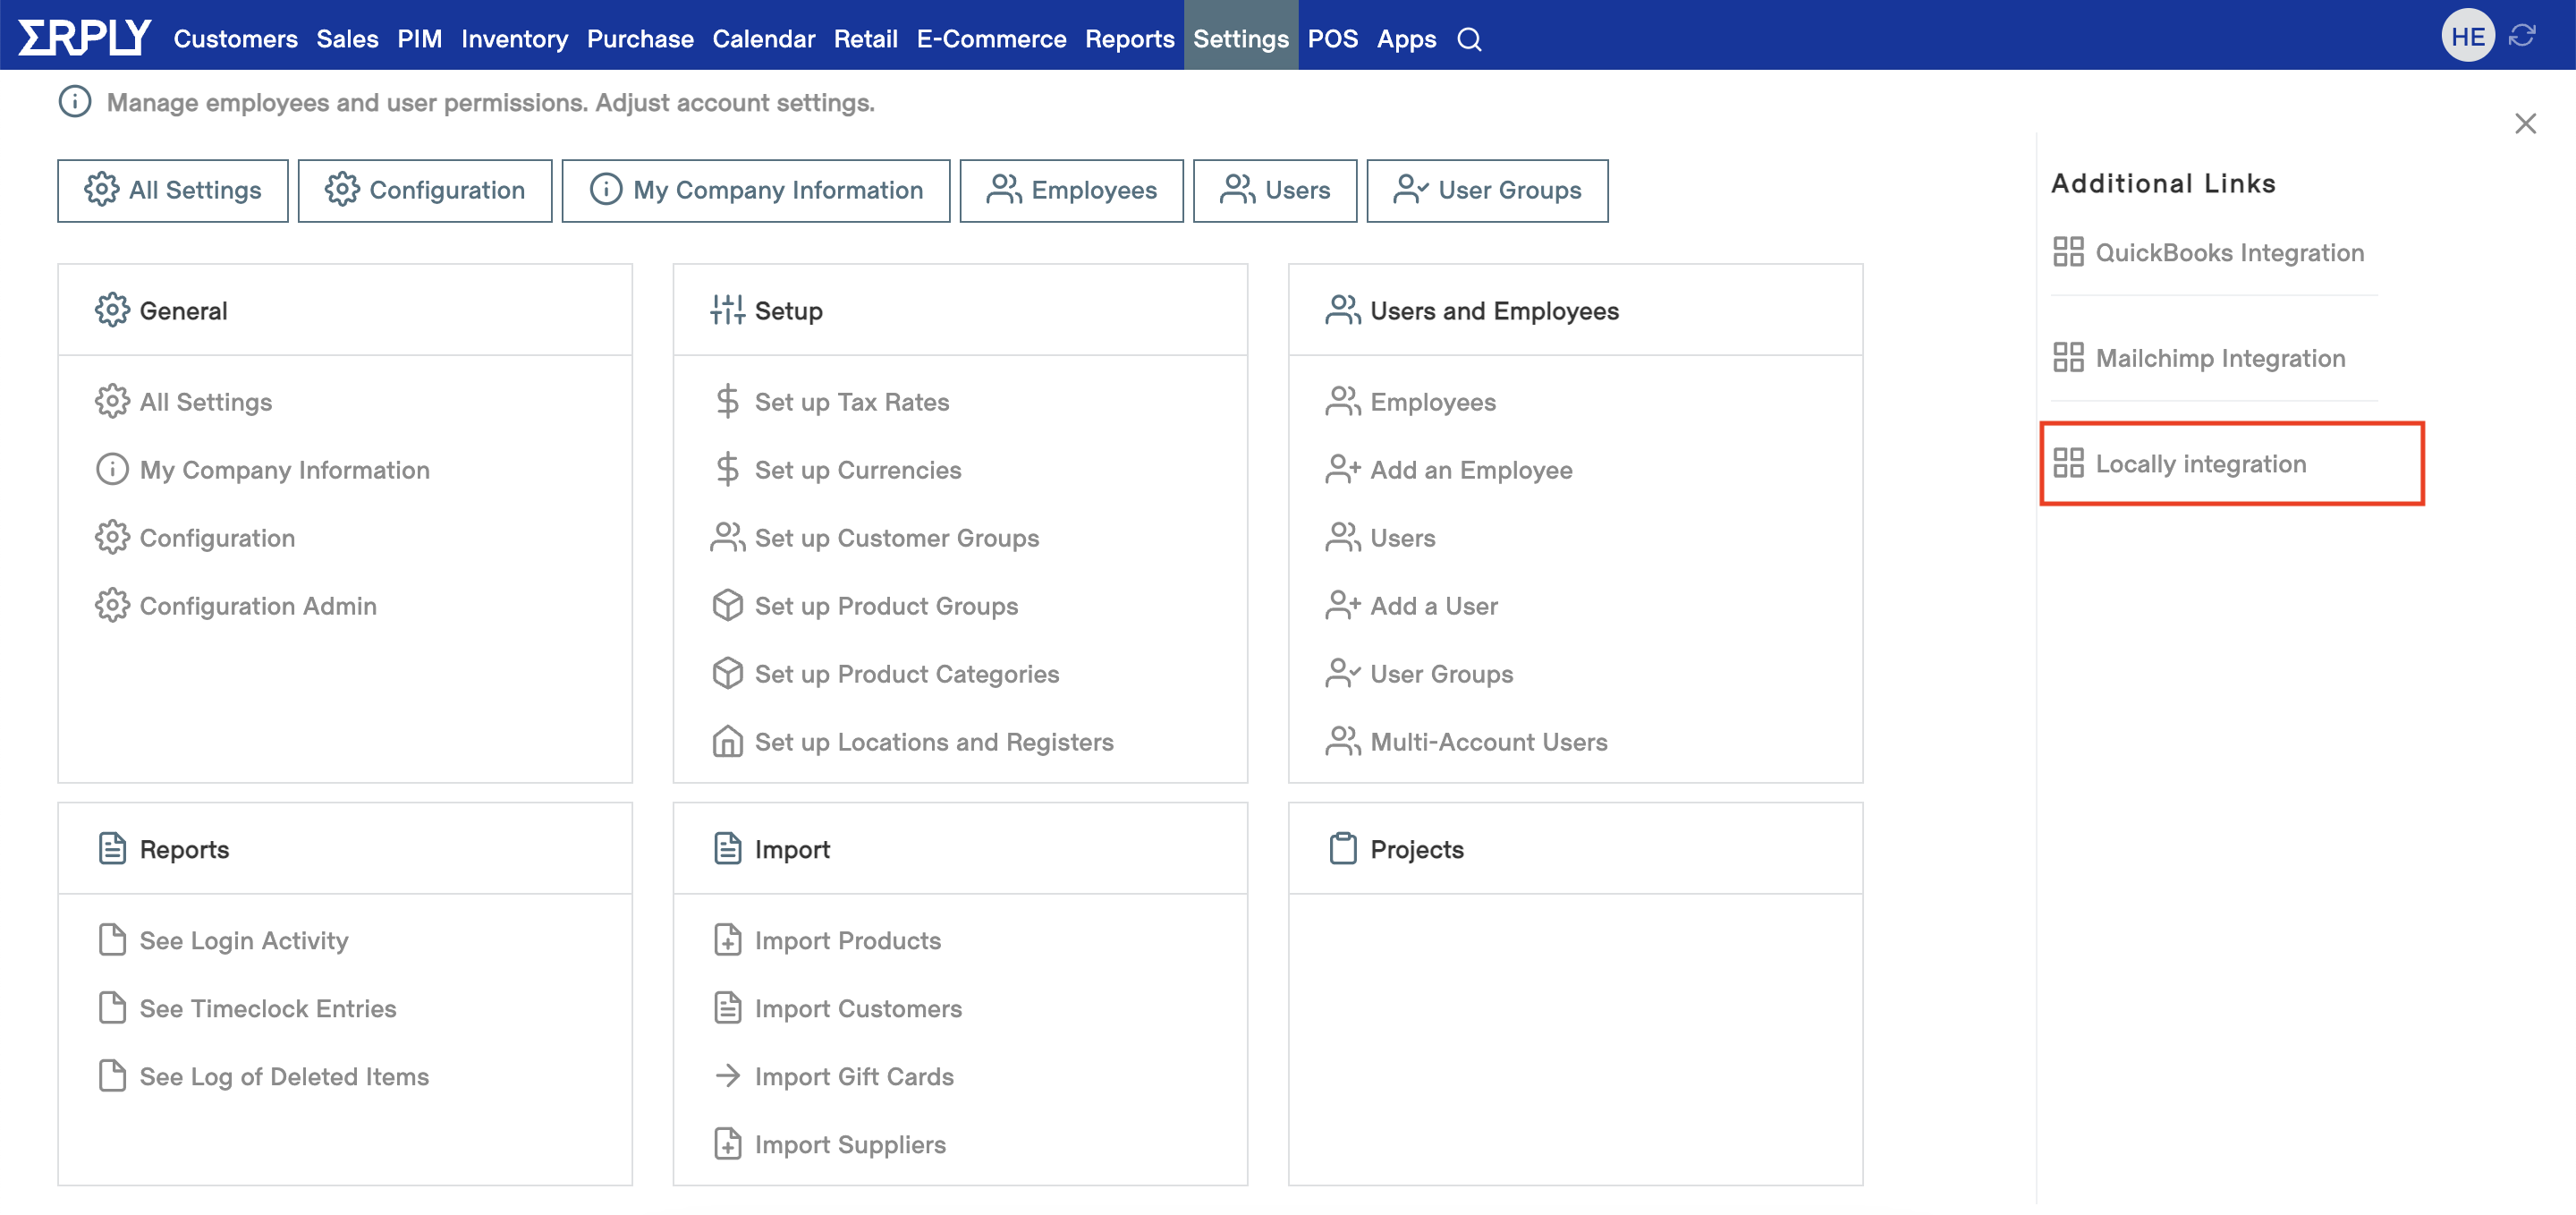
Open Erply backoffice and navigate to: "Settings -> Locally Integration" (see attached screenshot below)
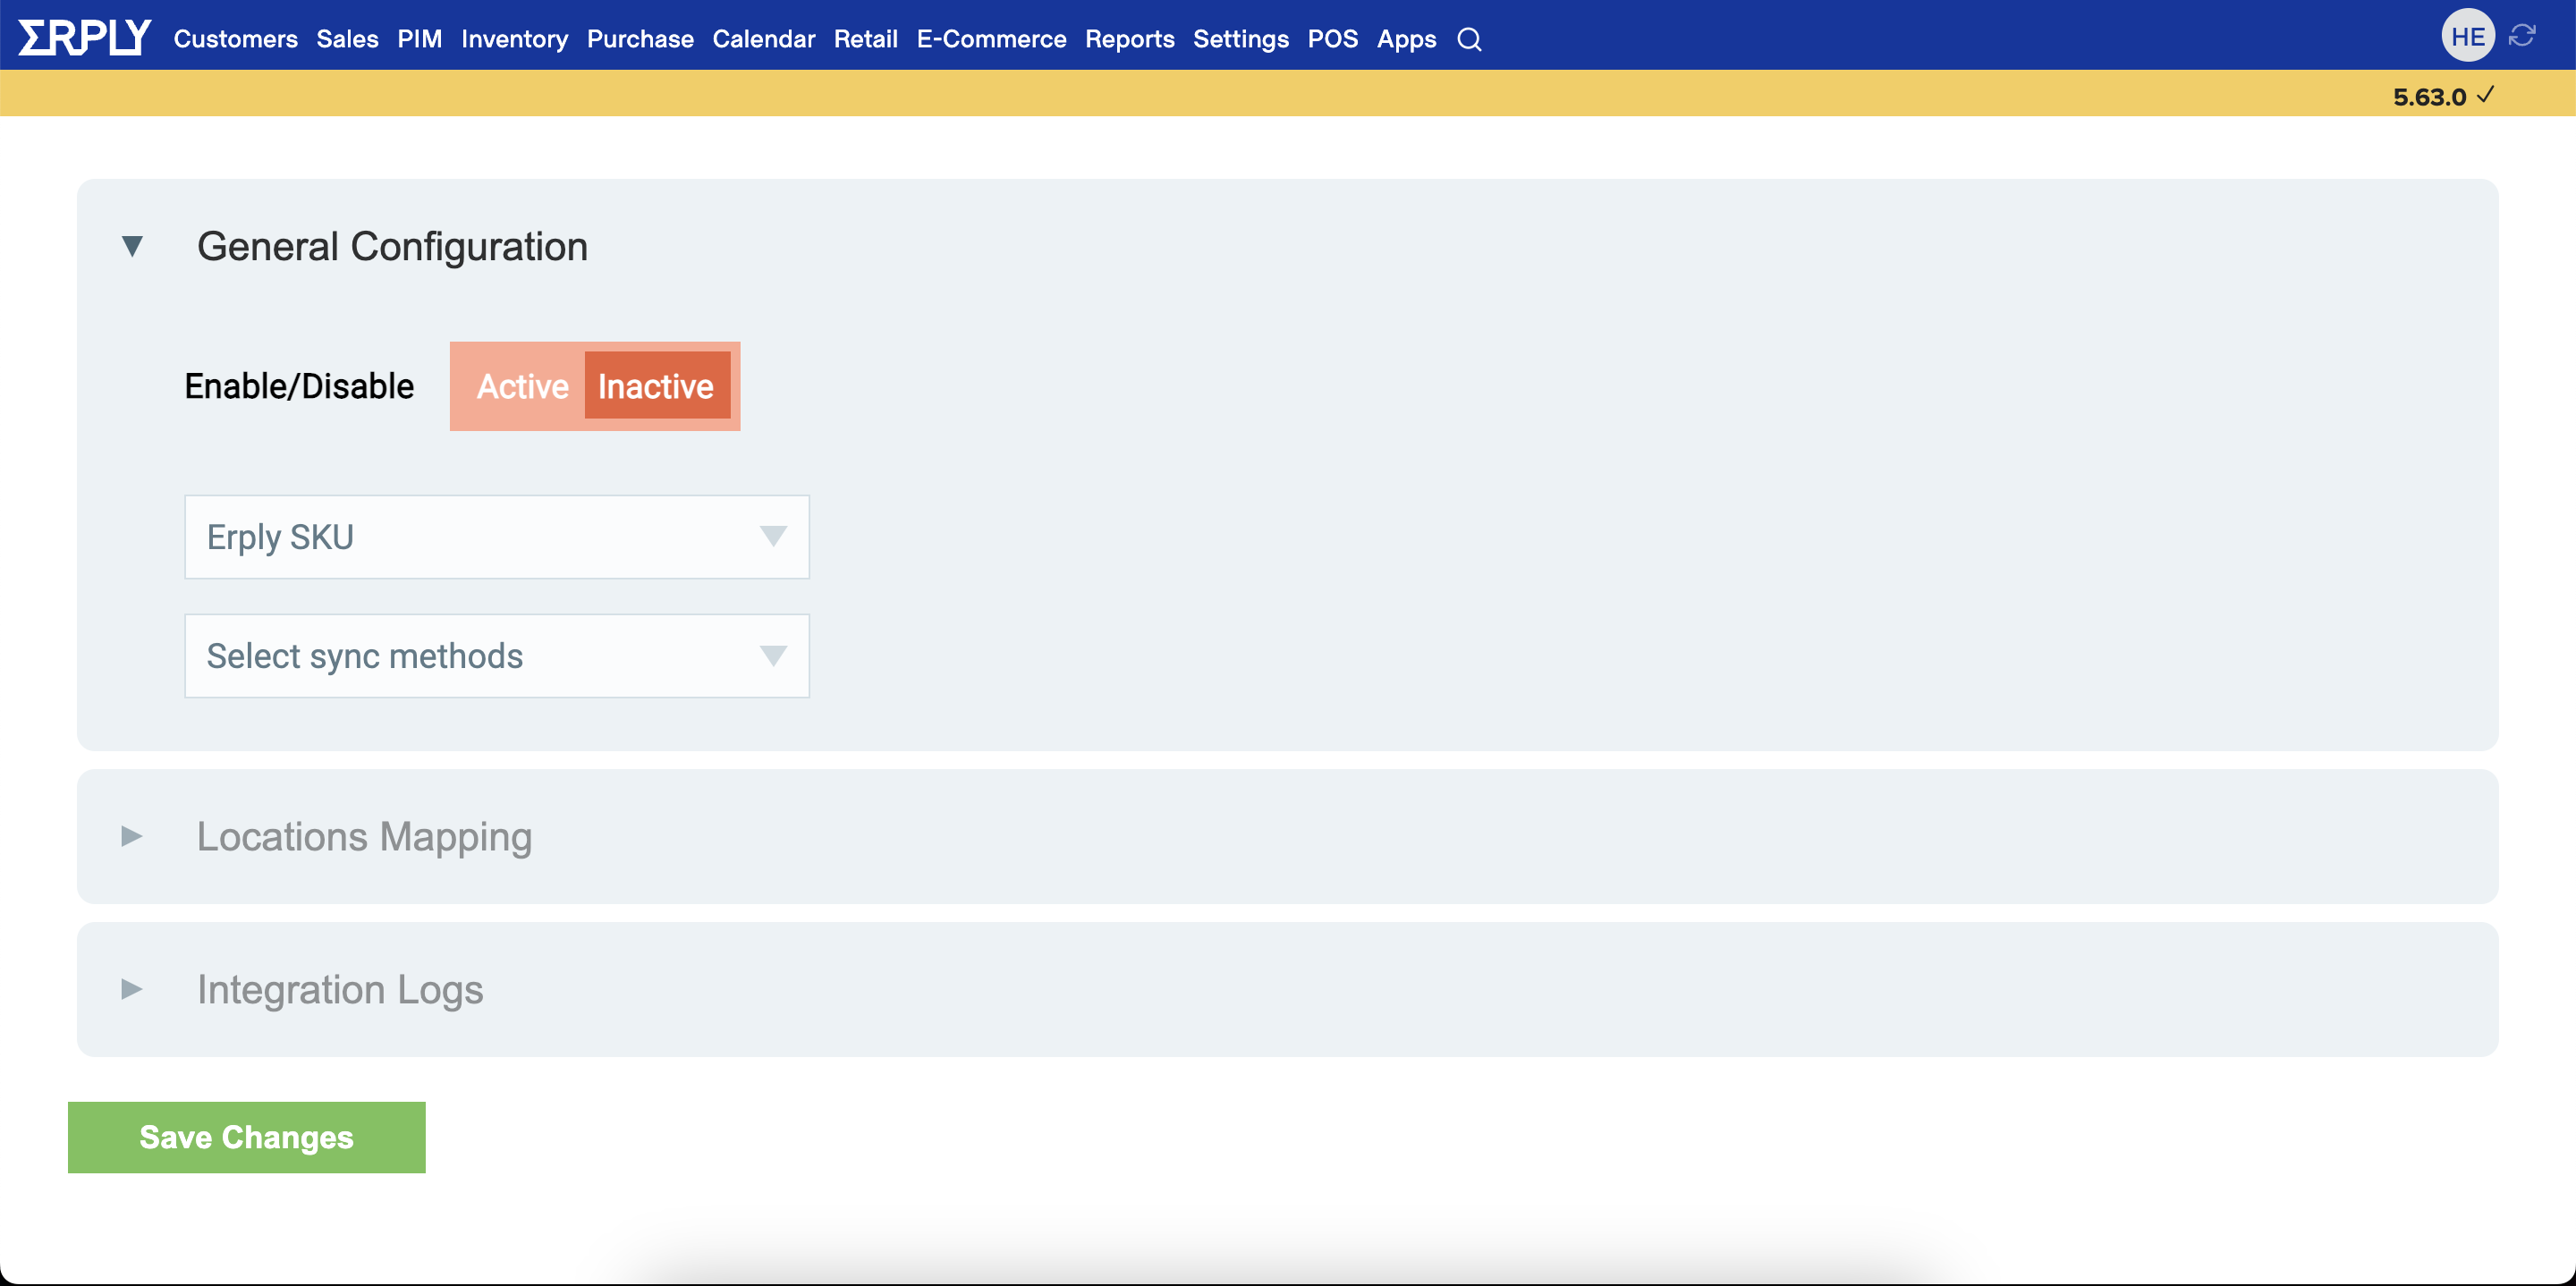
Configure your integration settings
From the General Configurations tab you are able to:
- Enable / Disable the integration
- Select which code from Erply will be used as the SKU value when generating the CSV file that is sent to Locally
- Select if you wish to send all your products to Locally or products from a specific assortment.
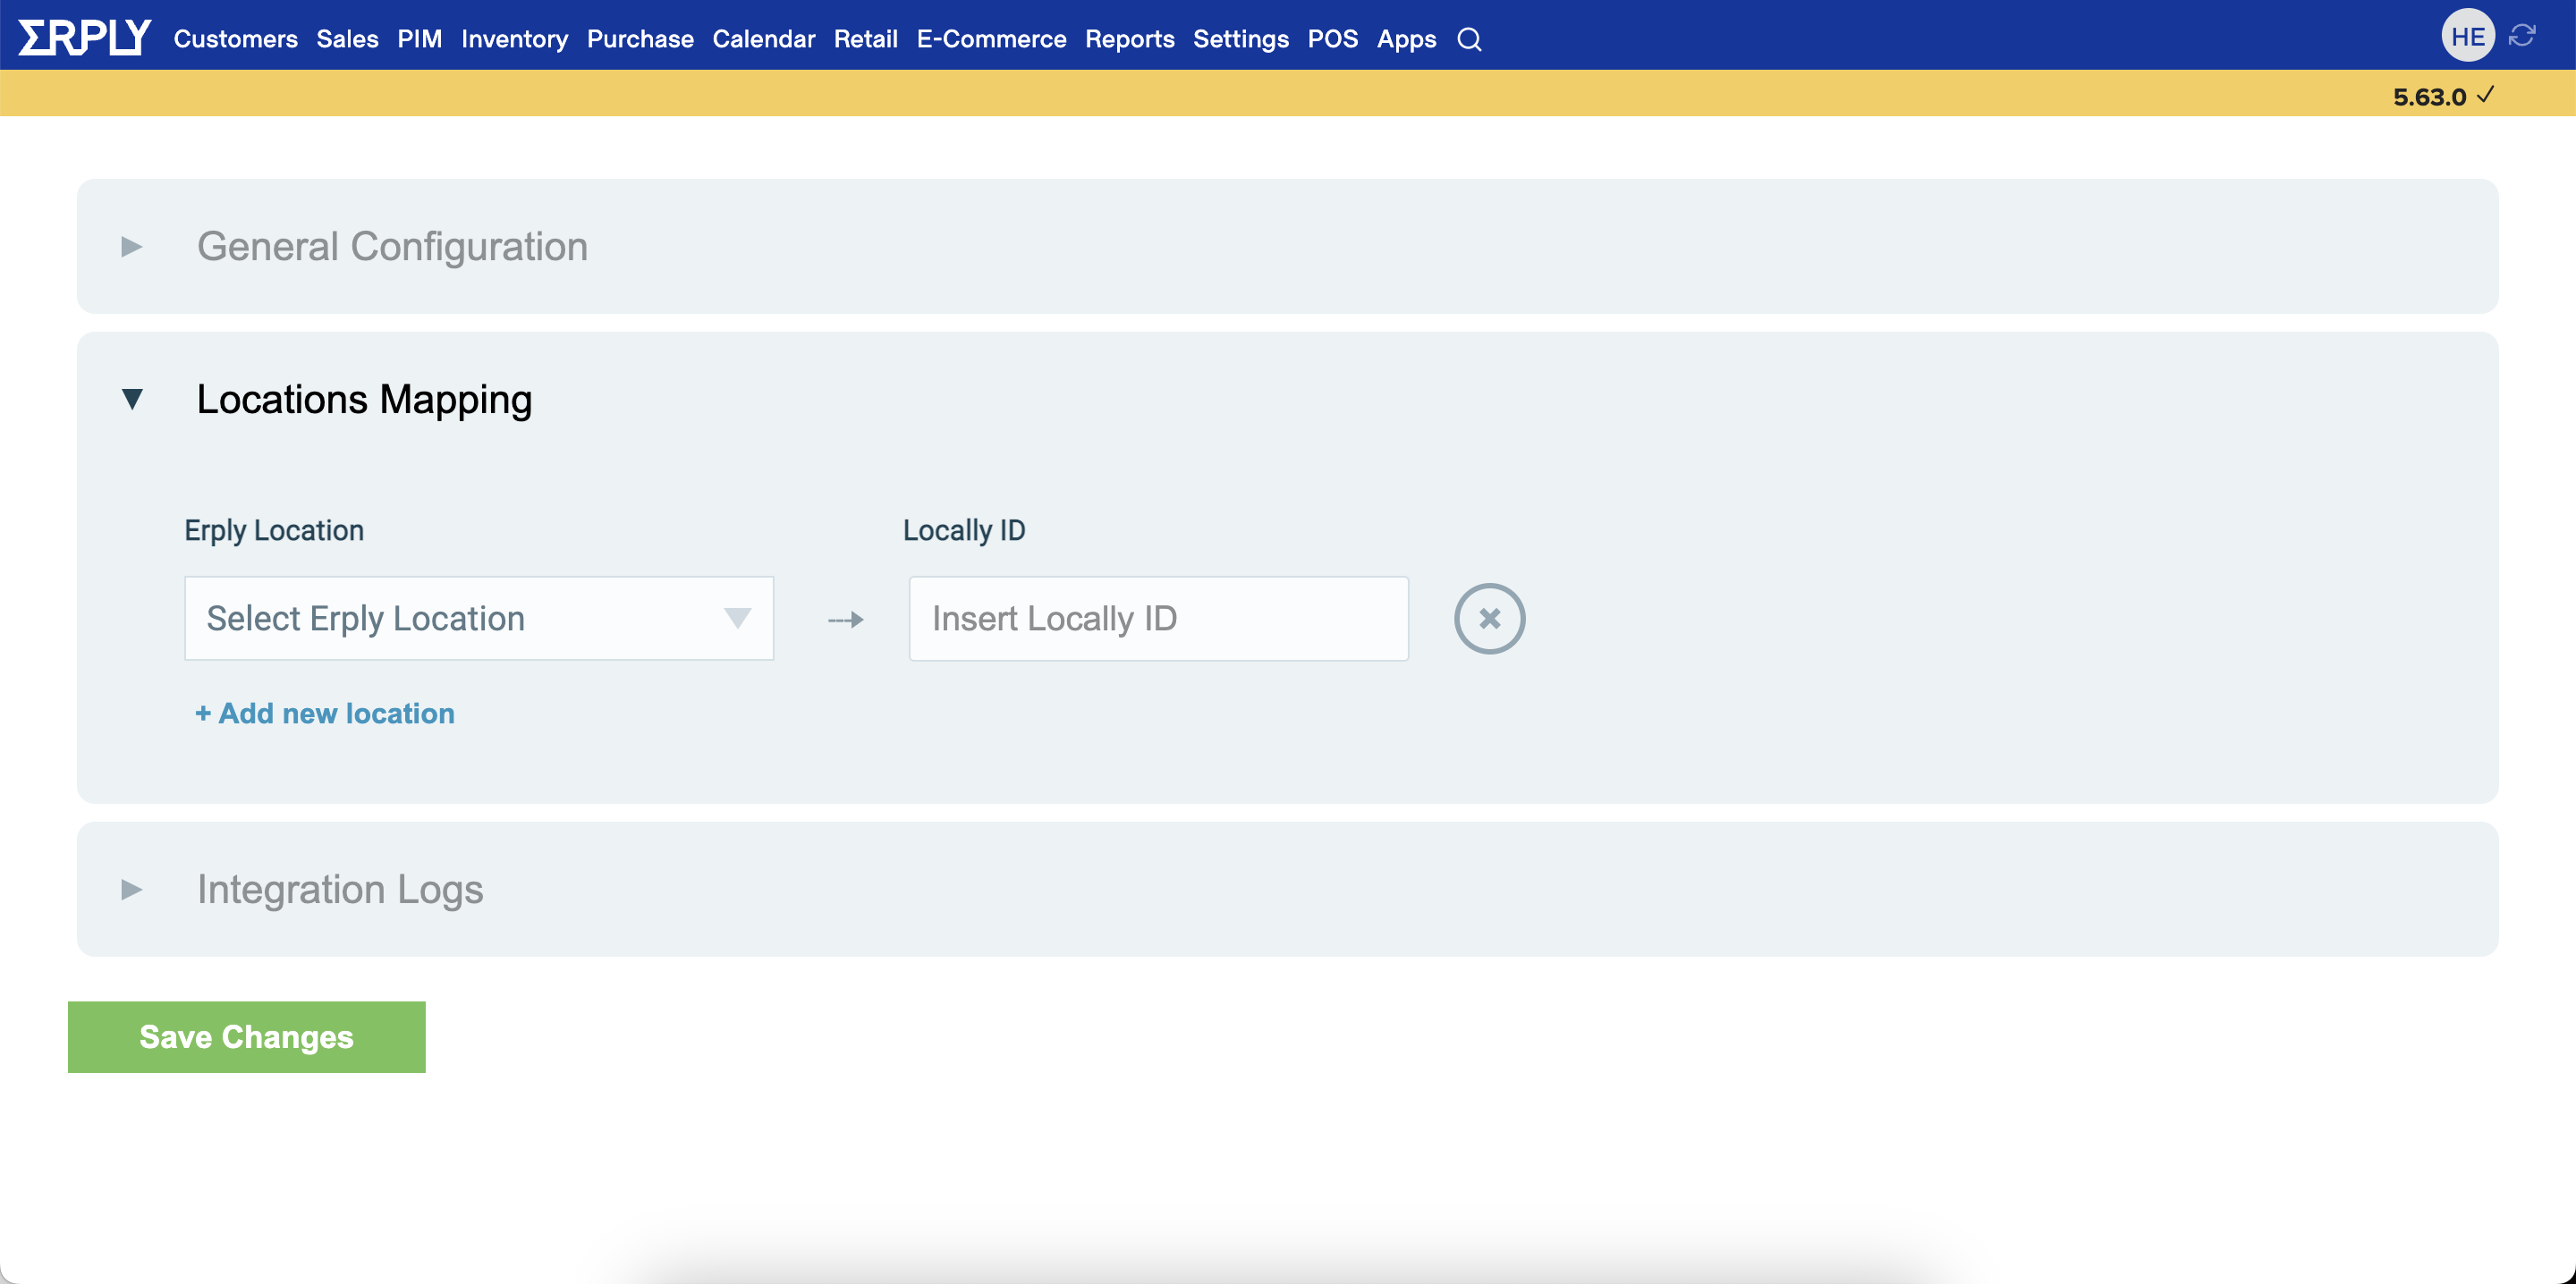
Locations Mapping
The integration enables you to generate a location specific products file to Locally. In order to do so, you must map together your Erply locations with the unique store/location specific ID-s that Locally will provide you for each store/location.
You can either choose to use only one store/location or multiple stores/locations by simply clicking on “+ Add new location”, selecting your desired store/location and providing the unique Locally store/location ID for it.
Integration Logs
From the Integration Logs tab you are able to see if and when there have been any issues with either generating the products file, updating it or any other issues that might prevent your products from reaching Locally.
Finalise the Integration
Once you have completed the above steps just click on “Save Changes” and your integration is saved and/or updated.
Data exchange times
The integration between Erply and Locally will run once per hour - meaning that every hour the integration will request for all the products in a specific location that you have chosen to include in the integration and send an updated list of products, quantities and prices to Locally.