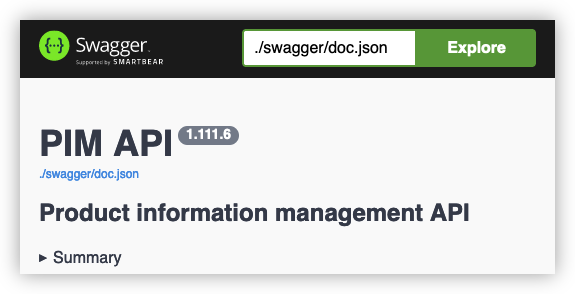
New Erply APIs offer a web interface called Swagger.
A Swagger page:
- Contains the documentation of that API: which calls are available, what is the structure and meaning of the input and output.
- Serves as an interactive workbench for testing out the API calls. On a Swagger page, it is possible to make queries and send commands, and inspect the output of both.
Each API has its own Swagger page.
The following is a step-by-step tutorial that shows how to make calls though a Swagger interface.
Identify the API
Common APIs are listed on this page.
Identify the Datacenter
American, European and Australian customers are served out of different datacenters. There is a different API URL in each datacenter, and therefore you have to use an appropriate Swagger page as well.
If you pick the wrong Swagger page, all API calls issued from that page will return an error: "Database not found", “Connection Refused” or something else similar.
If you already know which datacenter your account is located in, you might find a link to the respective Swagger page from these articles. The most correct way to identify the right URL is to make a "getServiceEndpoints" query, as explained here.
Authenticate
You will need your account number and a session key.
A session key is a short-lived (1 hour to 1 day) random identifier that is issued to you when you log in with a username and password. This token represents you as the user and lets you interact with APIs.
Do not share it with anyone else or post it online. A session key lets others impersonate you (even though for a limited time only) and do everything on your Erply account that your permissions allow.
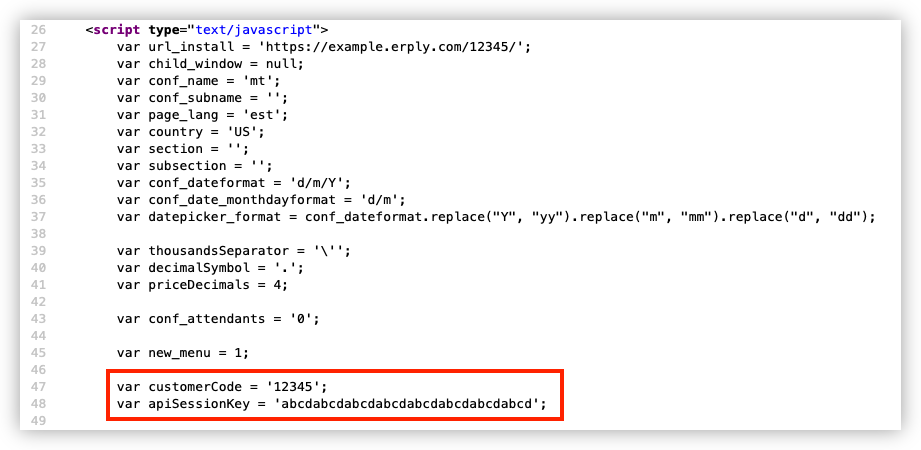
The quickest way to get a session key is to log into back office, right-click anywhere on an empty area of the page, and select "View Source" from the context menu. Scroll a bit down and you see your current session key listed among other variables. Copy the part between the single quotes.
Alternatively, re-authenticate with Erply API call verifyUser (using an API exploration tool such as Postman). This call takes your username and password as input, and returns a new session key.
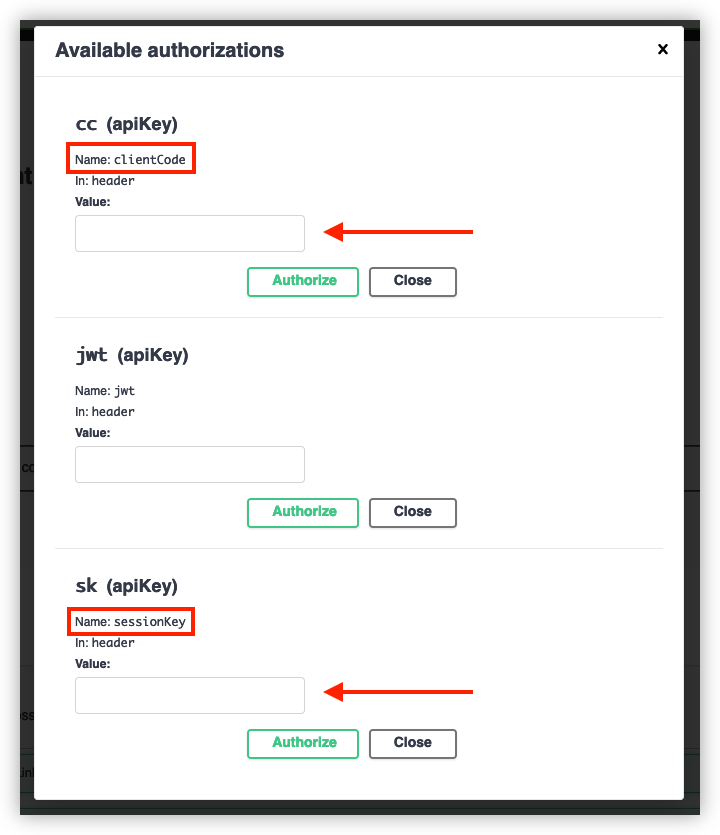
When you have retrieved your session key, click the "Authorize" button at the top of a Swagger page, or the "padlock" icon next to any call.
Fill in the fields clientCode (your account number) and sessionKey. Click the "Authorize" buttons under both fields. Close the dialog.
Sometimes, this screen contains additional fields (such as a field for entering a "JWT", a JSON Web Token). Leave these fields empty.
Find the Call
The calls in an API are organized into groups. Each group contains the calls for retrieving, creating, modifying and deleting records of a certain type: product groups, cash in-cash out operations, employees and so on.
Each call has a type, helpfully color-coded by Swagger:
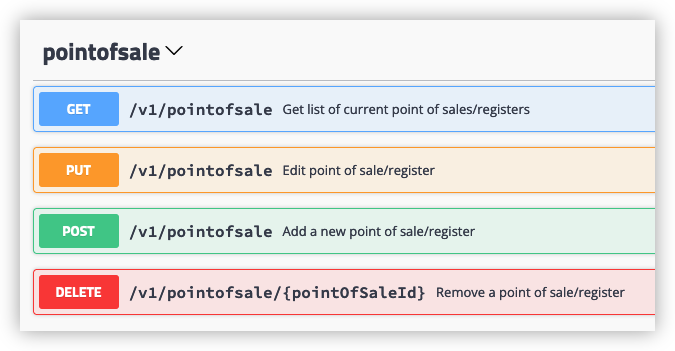
- GET indicates a query. It returns a list of records and lets you optionally specify various filters.
- POST is either a command for creating a new object, or some other transactional command that makes something "happen" on the server.
- PUT and PATCH are commands for modifying an already saved object. These require you to specify the ID of the record you want to modify.
- DELETE is a command for deleting records. It requires you to specify the ID of the record you want to delete, or IDs of multiple records.
Test a Call
Click on a call to expand its documentation, then click on the "Try it out" button.
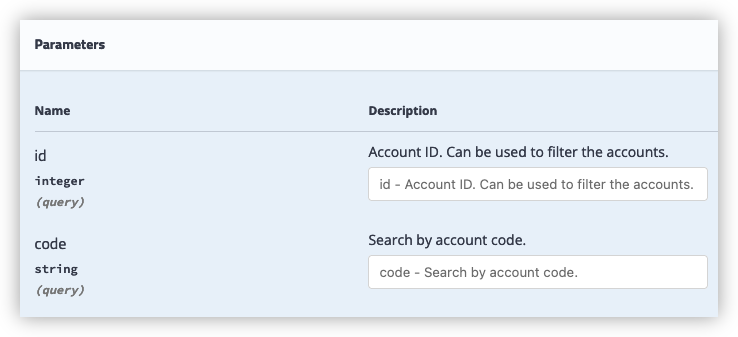
GET and DELETE calls typically ask you to specify input parameters. If the field is not marked as required, you can leave it empty.
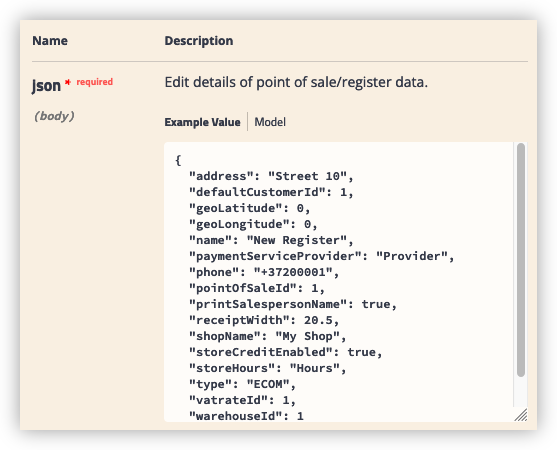
POST and PUT calls require you to prepare a JSON object containing the data that you want to send to the server. There is a sample structure already provided; change the values as appropriate. Do not change the field names; change values only.
"string"indicates a text field; make sure to preserve the quotes.0can be changed to an arbitrary integer (or sometimes decimal) value.trueorfalseindicate yes/no flags.
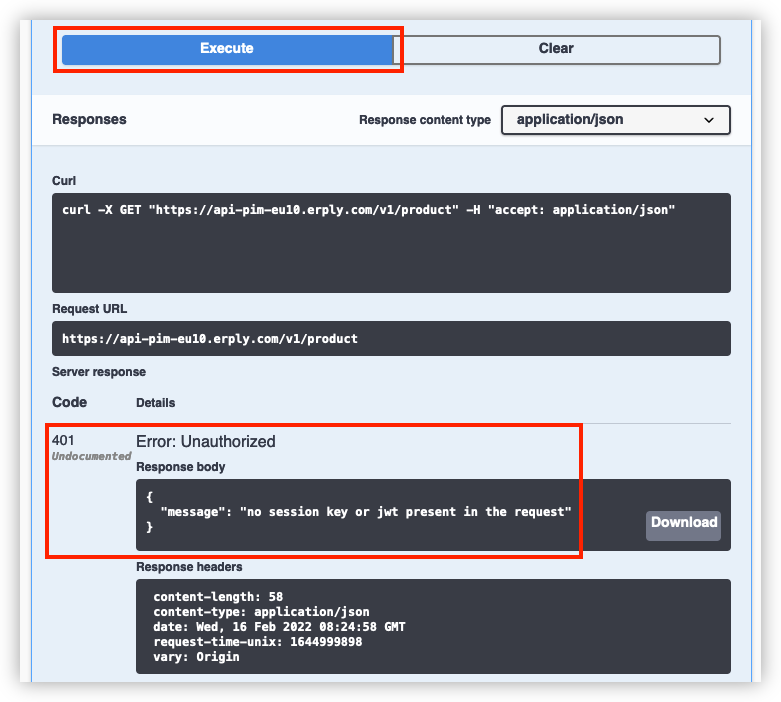
When you have finished preparing the input, click the blue “Execute” button.
Results of the command or the query appear below, under the title "Server response". There are multiple similar sections there. “Server response” contains the actual response for the query you just made; the section titled “Responses” contains abstract examples of what the server's response might be in various conditions. Ignore the latter!
The result might be either an error:
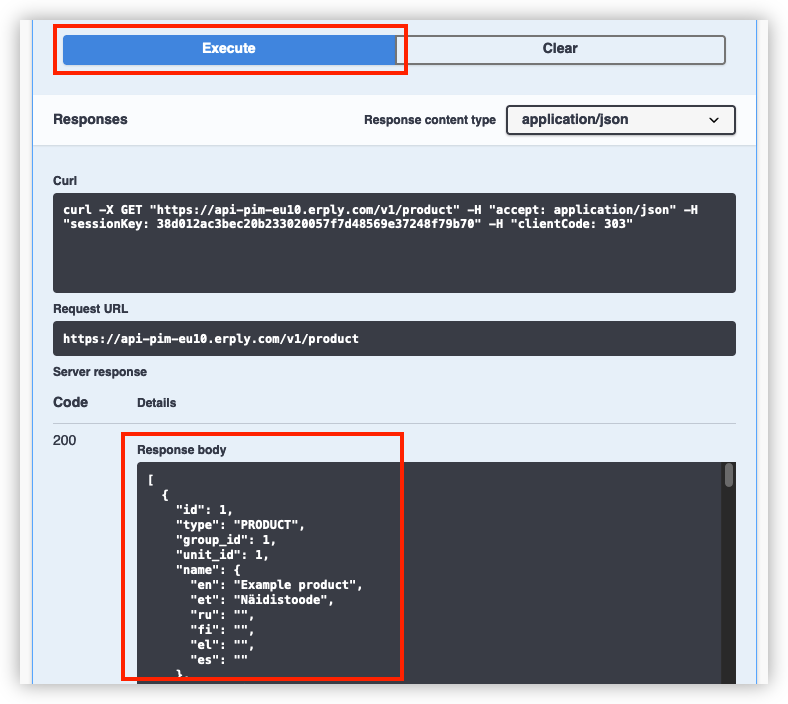
Or contain the requested information:
JSON Data Format
The APIs expect input in JSON (Javascript Object Notation) and return results formatted in JSON.
Square brackets indicate an array: enclosed within the square brackets you will find a comma-separated list of similar "things". An array can be empty, too: [].
GET queries return records as an array.
Curly brackets indicate an object. Enclosed within the curly brackets are a series of comma-separated fields. A quoted field name is followed by a colon and the field's value.
Each record returned by API is formatted as a JSON object.