Step 1 : How to connect your Genius e285 to your network :
● From the home screen, press 1, 5, and 9 on the keypad at the same time.
● Tap Supervisor and use the keypad to type the password, then press Enter. The default password is 1166832.
● Tap Administration and then tap Communications
● Tap WiFi, then tap WiFi Scan. If your Genius e285’s WiFi is turned off, the e285 prompts you to turn on its WiFi.
● ‒ If successful, your device notifies you that it has saved the network.
● Tap OK and then press the Cancel button.
● Tap WiFi Configuration and in the PSK field, type the network password.
● ‒ To switch between capital letters and numbers, press the # button.
● Press the Cancel button to return to the WiFi menu.
Configure a static IP address
When your Genius e285’s IP address changes, your Genius e285 can no longer communicate with the POS. To prevent this from happening, we recommend that you configure your Genius e285 to use a static IP address. To configure a static IP address, complete the following steps
● Tap WiFi Interface IPv4.
● From the Mode drop-down menu, select Static.
● From the Autostart drop-down menu, select On.
● Provide values for the following fields:
○ ‒ IP address
○ ‒ Broadcast
○ ‒ Mask
○ ‒ Gateway
○ ‒ DNS 1
○ ‒ DNS 2
● In the Status field, tap

to connect to the network. When your Genius e285 connects to the network, the Link status shows Connected.
● Press the Cancel button four times to return to the Main menu.
● To return to the Genius home screen, on the Main menu, swipe up and then tap Run Applications
Step 2 : Adding the Integrations to the POS
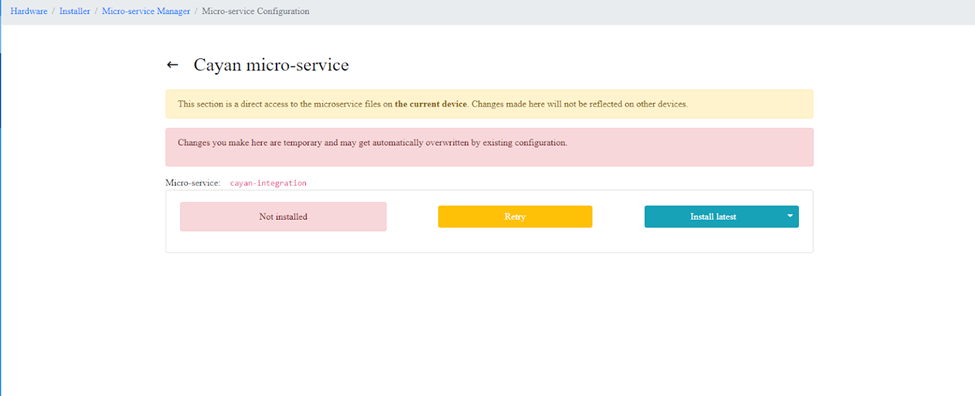
Open the POSOW application and navigate to the Microservice manager page, choose the desired microservice and click “Install latest”

The microservices that are required for the register:
● cayan-integration
Now the installation is complete and the microservice configuration has to be set.
Logging
Under microservice configuration, make sure that the microservice is collecting log files and the following parameter is set:
● "logTarget": "FILE"
Note: since v1.5.16 the microservice by default is set to collect log files.
Setting up the microservice
CAYAN
Note : Installed microservices now need a configuration for the connection with POS and peripheral.
In Erply Wizard, navigate to the “Integrations” from the menu on the left. From the top select POS level.
Click on the payment Terminal box and select the POS that you need to configure the hardware for. Click Continue from below. Now select the integration “Cayan” from the dropdown and click add.
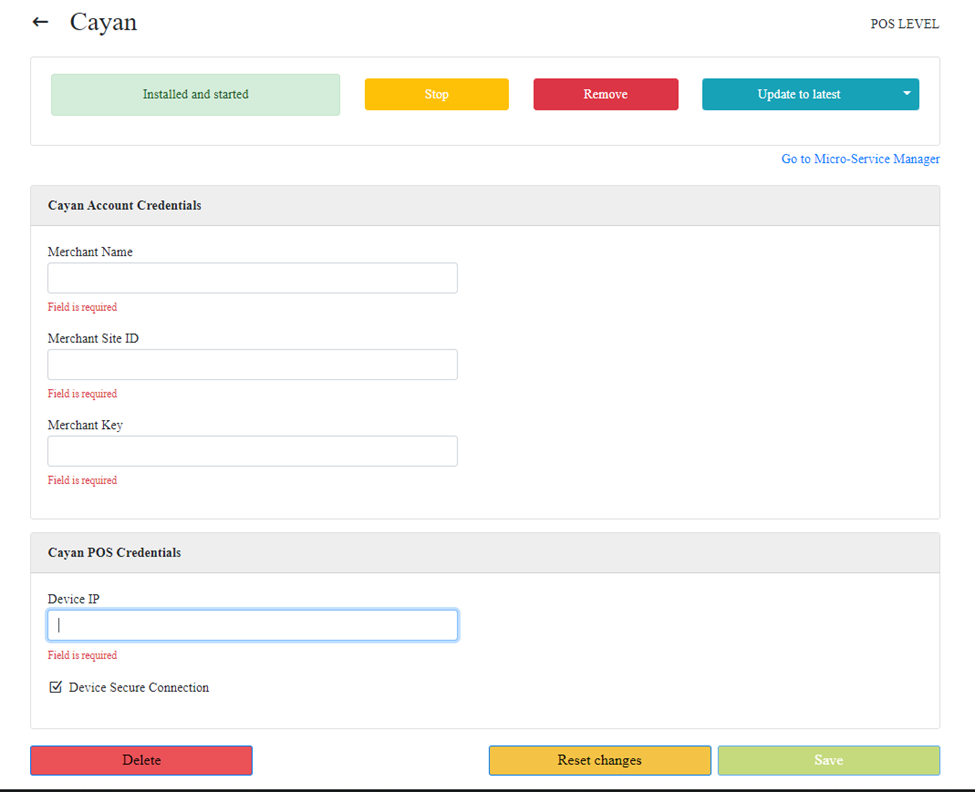
A detailed view of the configuration will show where it is possible to configure:
Set the following parameters (then Hit Save once done):
● Merchant Name
● Merchant Site ID
● Merchant Key
● IP (Visible from terminal)
