Adyen payment integration should ONLY be used with secure connection (https). This means that Erply POS must be running in https://epos.erply.com
Register Adyen account
Go to Adyen's website and register your device following the steps below. You will need to associate each of your terminals to an account on the Adyen platform.
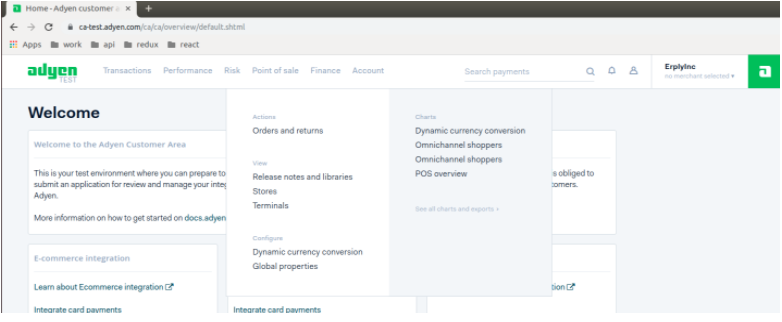
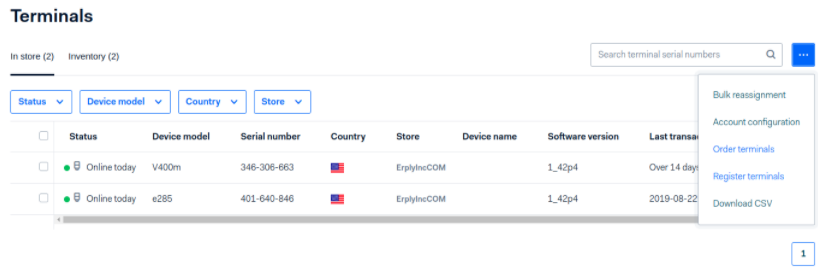
Open the Customer Area and go to Point-of-sale -> Terminals.
Click the blue menu button and select register terminals.
How to set Adyen passphrase (Adyen key)
Open the Adyen customer area and go to Point-of-sale -> Terminals.
Click the row of the terminal you want to configure to open its configuration page.
Click View decrypted properties.
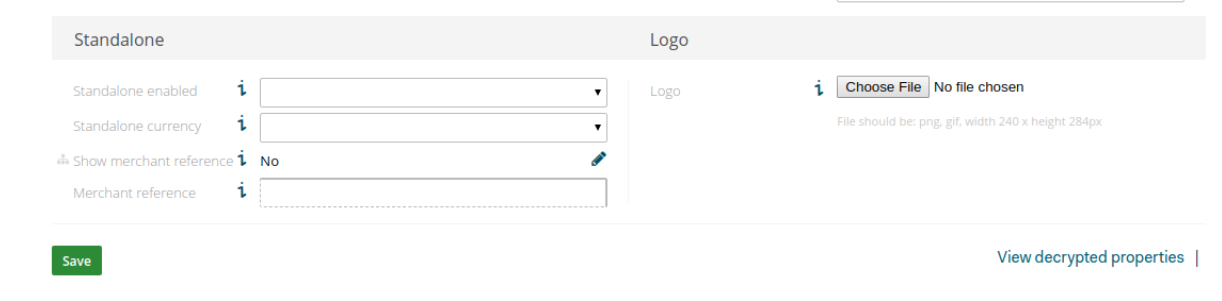
*The page refreshes and returns you to terminal API menu.
Click the Terminal API tab.

Click Edit.
Enter the encryption key identifier (must be: erplyKey), key passphrase (Must be 32 characters long), and key version (must be 0)
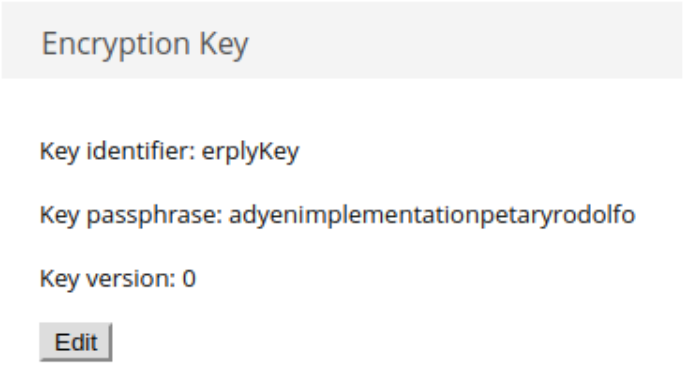
Click Save.
How to retrieve the Admin PIN for the terminals from the Customer Area
Follow the steps to retrieve your Admin PIN:
- Log in to your Customer Area:
- Live terminal: go to your live customer area
- Test terminal: (your terminal's home screen says "Test") go to your test customer are. In your company-level OR merchant-level account navigate to Point of Sale -> Terminals
2. In your company-level OR merchant-level account navigate to Point of Sale -> Terminals.
3. Search for the terminal by serial number.
- You can look up the terminal serial number:
- On the back of the terminal, above the barcode. For example, S/N:123-456-789.
- By pressing 5 and then

on the terminal keypad. The second line on the display shows the model and serial number. For example, V400m-123456789.
4. Click on a terminal’s row to view its details.
5. Click View decrypted properties. The page refreshes.
6. Click the Advanced tab. Your terminal Admin PIN is displayed in the Admin menu pin field
** If the Admin PIN is not visible, your user account doesn't have the POS admin role. Contact your Adyen company's admin user.
Create account and company in Identity Admin in Erply Apps
- Go to Erply Apps.
- Create an account or log in to your existing one.
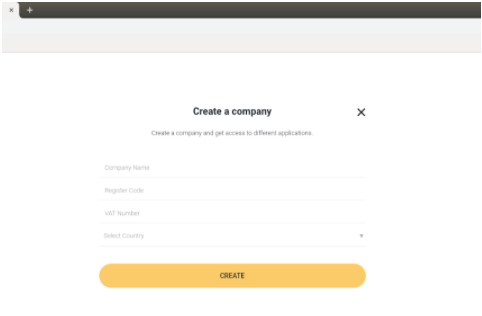
- Once you are logged in, click on Create a company on the top right.
4. Fill up the form and save. Your company should be created now and you can use your login credentials (email, password) in the following steps in POS Berlin.
Adding terminal IP address to “hosts” file
In order to be able to send requests to Adyen terminals, it is necessary to specify the IP address of each terminal and a domain in the “hosts” file of your operating system. To do that you can follow the instructions according to the operating system you are using (Windows, Mac, Linux).
To obtain the IP address of a terminal you can follow these steps.
Note A: If the IP address of the terminal changes, only the IP address needs to be updated in the “hosts” file with the new one.
Depending on your network and security requirements, you might need to add Adyen domain (Adyen.com) and IP addresses to your firewall's whitelist
Add Adyen terminal on Windows
If you are using a Microsoft operating system like Windows 10, Windows 8, Windows 7, and Windows Vista you must run Microsoft Notepad as an administrator.
Windows 10 and Windows 8
- Press the Windows key.
- Type Notepad in the search field.
- In the search results, right-click Notepad and select Run as administrator.
- From Notepad, open the following file:
c:\Windows\System32\Drivers\etc\hosts - Make the necessary changes to the file. You will need to enter the IP address of the terminal or terminals you want to use separated by at least one space and then you should write the ID of the terminal followed by the domain: .test.terminal.Adyen.com (You do not need to erase other data that is already present in your “hosts” file):
- Select File -> Save to save your changes.
Windows 7 and Windows Vista
- Select Start -> All Programs -> Accessories.
- Right-click Notepad and select Run as administrator.
The Windows needs your permission UAC window appears. - Click Continue to grant permission.
Notepad opens. - In Notepad, select File -> Open.
- In the File name field, enter the following path:
C:\Windows\System32\Drivers\etc\hosts - Select Open.
- Make the necessary changes to the file. You will need to enter the IP address of the terminal or terminals you want to use separated by at least one space and then you should write the ID of the terminal followed by the domain: .test.terminal.Adyen.com (You do not need to erase other data that is already present in your “hosts” file):
- Select File -> Save to save your changes.
Windows NT, Windows 2000, and Windows XP
- Select Start -> All Programs -> Accessories -> Notepad.
- Select File -> Open.
- In the File name field, enter C:\Windows\System32\Drivers\etc\hosts.
- Select Open.
- Make the necessary changes to the file. You will need to enter the IP address of the terminal or terminals you want to use separated by at least one space and then you should write the ID of the terminal followed by the domain: .test.terminal.Adyen.com (You do not need to erase other data that is already present in your “hosts" file):
- Select File -> Save to save your changes.
Once the Adyen integration setup was done you can proceed with the POS setup part.