Adyen account in Adyen platform
Before setting up the Adyen microservice in the Wizard make sure that you have already Adyen account and the terminal. If not, please contact Erply support for assistance.
Supported terminals
- P400(series)
- V400m
- S1F2L
- S1F2
- AMS1
- SFO1
Install the Installer App
Here you can find the Installer App installation guide. If you already have it installed, please skip this step.
Setting up Adyen microservice in the Wizard
In order to establish the connection between the POS and Adyen terminal we need to install the microservice and configure the service to use the specific terminal.
Go to the Erply Wizard to install the microservice:
Navigate to the Hardware -> Installer App -> Microservice Manager.
Select “Adyen" from the dropdown.
Click Continue.

Click Install Latest

Once the microservice is installed, click “Start”:

Go to Hardware -> Integrations.
Select POS level and pick the POS you want to configure the terminal for.
Click on the Payment Terminal.
Click Continue.
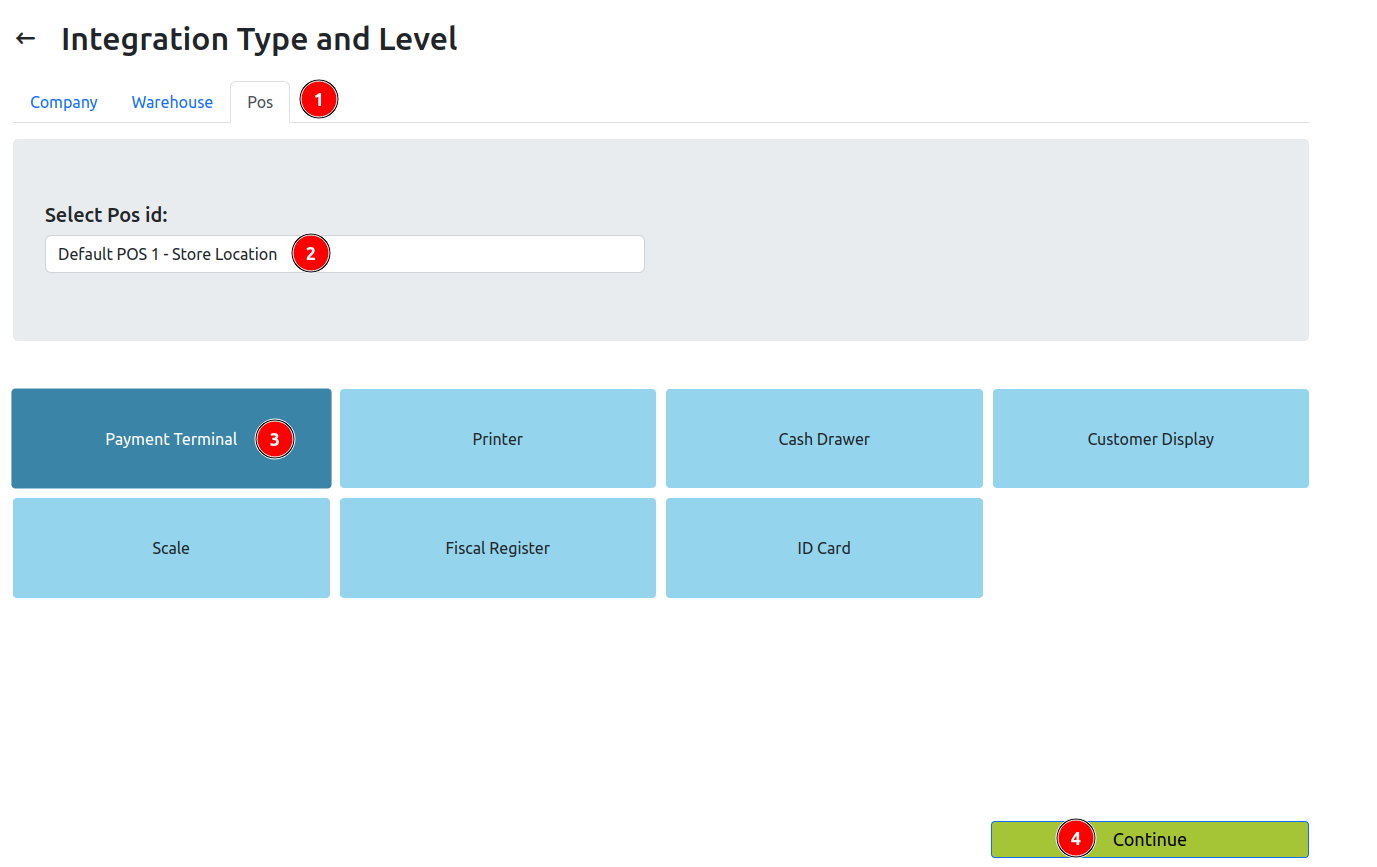
Select Adyen as integration type, click Add

PS: if there is no “Adyen” in the list please check it below in the “Available Integrations for POS level” and click ‘select’ button

Once the integration was selected the Wizard will direct the user to the microservice configuration:
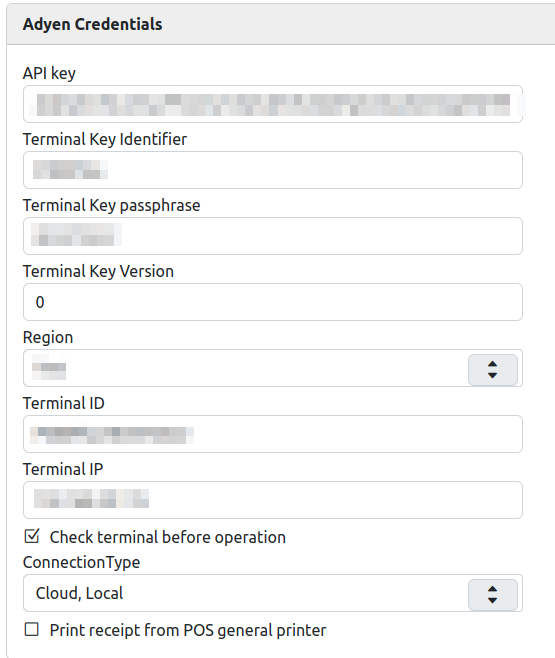
Fill out the following fields, with information provided by the terminal provider:
- “API Key” field according to your Adyen API key;
- “Terminal Key Identifier” field according to your Terminal Key identifier;
- “Terminal Key passphrase” field according to your Terminal key passphrase;
- “Terminal key version” field according to your Terminal key version;
- “Region” field according to your Region
- “Terminal ID” field according to your Terminal ID. Check the terminal’s information with the IP address:
- P400 (series) - press 5 and then OK [5->OK];
- S1F2L model - go to terminal Settings -> enter the password -> find Device info -> scroll o the IP address
- “Terminal IP Address” field according to your Terminal IP(note: this is optional - needed for Local connection);
- “Check the status of terminal before operation” field - this will perform diagnostic request before each financial request - this is recommended to be turned on;
- “Connection type” field according to your desired connection type - cloud is connecting to terminal via cloud - therefore no terminal IP needed, if you use local it will connect to terminal using local network. Cloud, local means that first it will try to connect via cloud and using local as backup connection;
- “Print receipt from POS general printer” - if you have terminal without printer or for some reason you don’t to print terminal receipts from terminal - use this setting to print Adyen receipts from general receipt printer.
Once everything has been configured click Save.
Setting up Adyen microservice in the POS
Navigate to the Brazil POS https://epos.erply.com/latest/ and login with your Erply credentials.
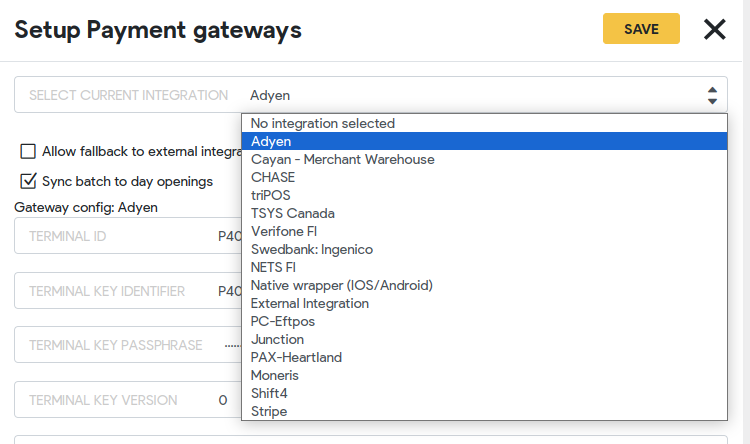
Then go the POS Settings -> Payment Configuration -> Setup Payment gateways
Select current integration: Adyen
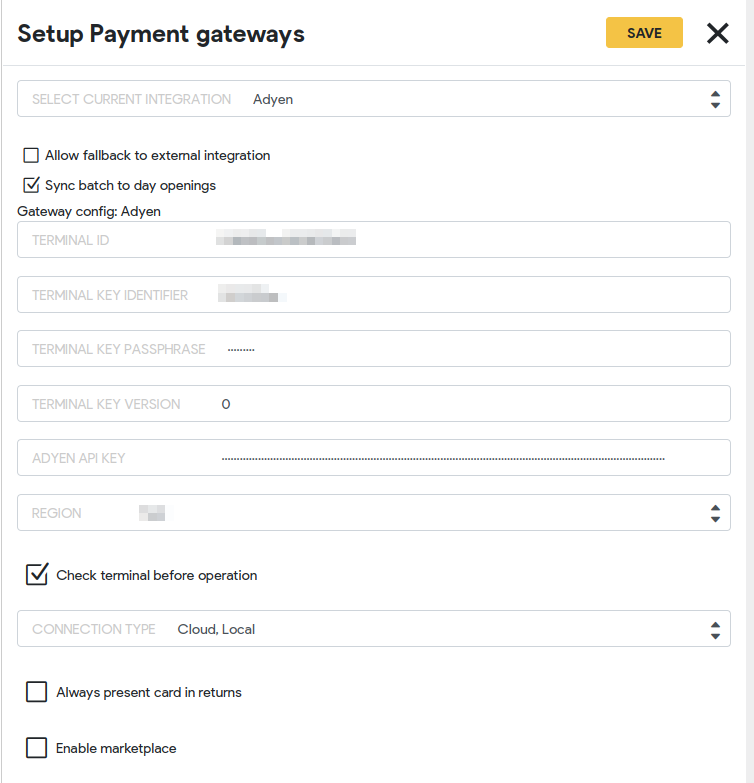
Check the terminal information. Make sure that all required fields are filled!
If the terminal information corresponds to configuration from the Wizard click Save.
Please make a test sale in order to make sure that the terminal is properly configured and works with your POS system.
How to check additional information on the adyen terminal?
For v400m and p400Plus
- To see the terminal’s information with the IP address, press 5 and then OK [5->OK].
- To see Payment menu, press 8 and then OK [8->OK]. Enter PIN code. Note: in case you do not have the PIN please contact Erply Support team.
- To access the terminal’s Administrative menu, press 9 and then OK [9->OK]. Enter PIN code and press OK to continue [code->OK]. Note: in case you do not have the PIN please contact Erply Support team.
- To access Network, press 9 and then OK [9->OK]. Select Network and enter PIN code. Note: in case you do not have the PIN please contact Erply Support team.
For S1F2/S1F2L/AMS1
- To see the terminal’s information with the IP address, go to the Settings -> Device info.
- To see Payment menu, go to the Transactions.
- To access the terminal’s Administrative menu, go to the Settings -> Configuration. Enter PIN code and press OK to continue [code->OK]. Note: in case you do not have the PIN please contact Erply Support team.
- To access Network, go to the Settings -> Network. Select Network and enter PIN code. Note: in case you do not have the PIN please contact Erply Support team.
Note: PIN codes to access transactions and configuration views can be found in Adyen portal -> In-person payments -> Terminals -> select terminal -> Passcodes.
Frequently asked questions
I am unable to finalize the sale with Adyen integration. I got the followinf error in the POS payment window. What should I do?
“Terminal connection is not OK! Terminal conncetion error: diagnosis operation error: request, communication error: request error: raw request, server error: Unautorized. The request has not been applied because it lacks valid authentication credentials for the target resource.”
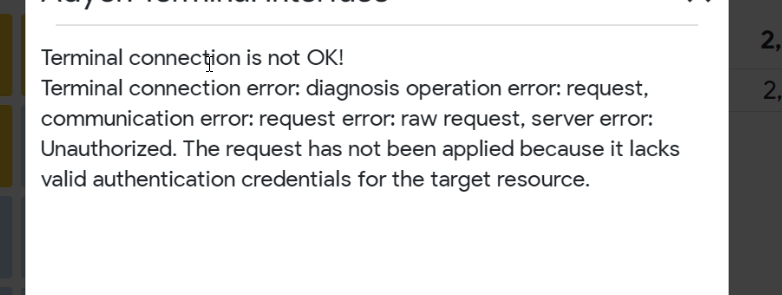
Explanation: Adyen API key is wrong or invalid.
Resolution: The first thing you can do is to recheck provided you API key. In case it still does not work and API key is the same as was provided, please contact ERPLY support.
What means the following error?
“Current paymentstatus: payment operation error: terminal diagnostic error: diagnosis operation error: responce error: terminal did not answer (empty header was received)”
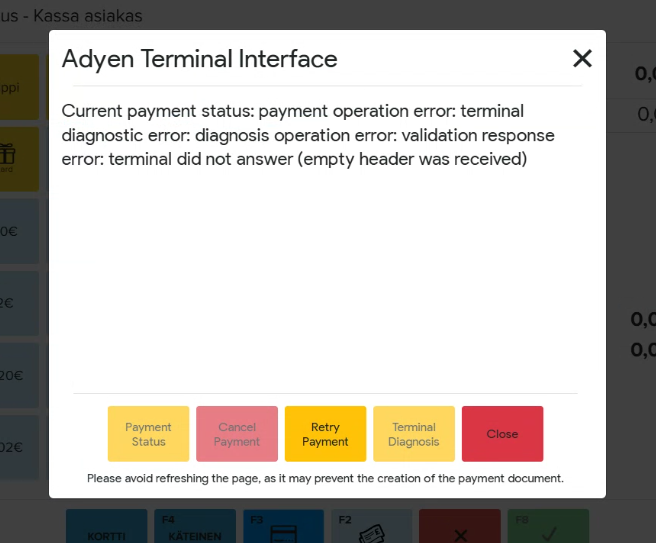
Explanation: issue between cloud and terminal. Most likely there is some issue with your network connection. It may happen if you had your router changed or network outage.
Resolution: Check the connection. HERE is a guide how to perform a test connection. In case of unsuccessfull connection, please refer to this troubleshooting guide.