Products may be imported with package amounts as either “box,” “crate,” or “pallet.”
Corresponding amounts, UPC/EAN codes, net weights, gross weights, lengths, widths, and heights may also be imported against these package types.
Import File
For this, you will need to create a spreadsheet with all of the necessary information. An example excel import file might look like this:
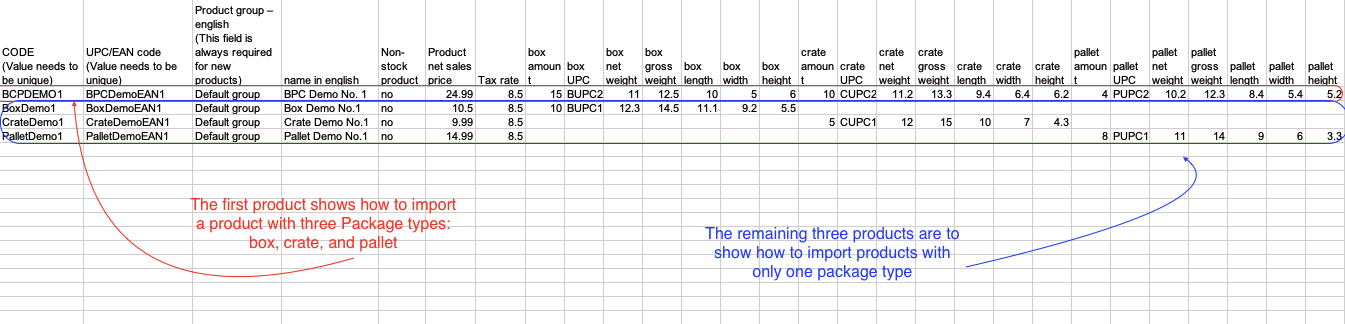
The first row is an example of a product that has three package types associated with it: box, crate, and pallet.
The rest are examples of products that have either box, crate, or pallet associated with it.
Import
In order to do the import, a user should navigate to the Back Office → PIM → Import Products.
Once you select your file in the correct format, either .CSV or .XLSX make sure to indicate that the file has headers. Then select Create.
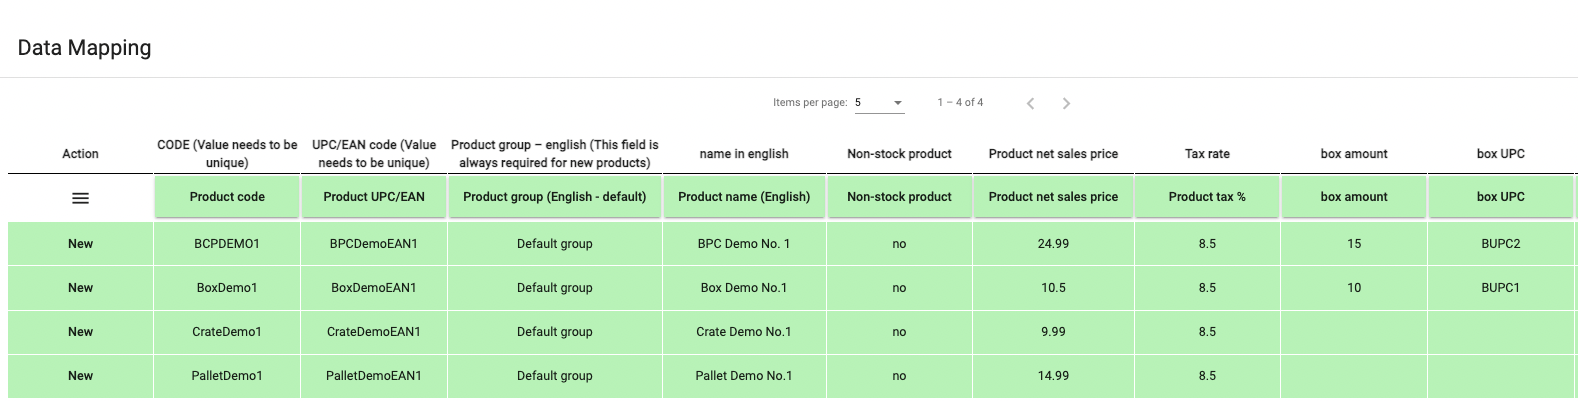
Your Data Mapping fields should match the information in the header row.
You will then want to select Apply and validate configuration.
Once that is done, you will be able to select Confirm and start import.
You will get a screen confirming you have the proper user rights to confirm this import. Select Confirm.
After your import is successfully completed, you will be able to see your products in the Back Office once you enter the code and select packages.
Package Types
Different package types may also be imported against but must first be set up in the Back Office under Settings → Configuration → Package Types.
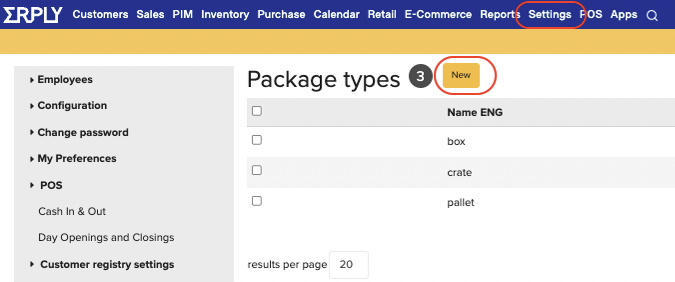
For example, when a new Package type called large box is created, you can then import against that but those fields will only appear in the importer once you’ve first created the package type in the back office.
Only after this package type is created will they be available in the product importer tool to be imported against.