Downloading and installing the app
Access the POS QR CRM App in your applications dashboard by going to this link:
https://automat-us.erply.com/(Clientcode)/en/store
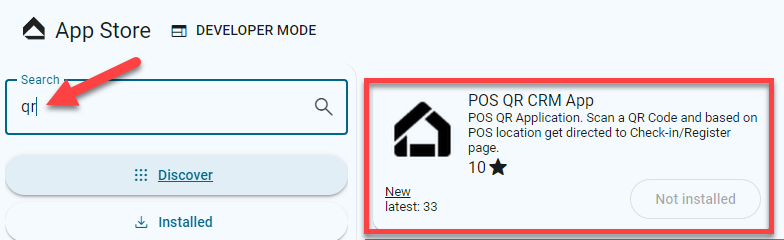
1. Type the keyword "qr" in the search bar then, you should be able to see the QR application
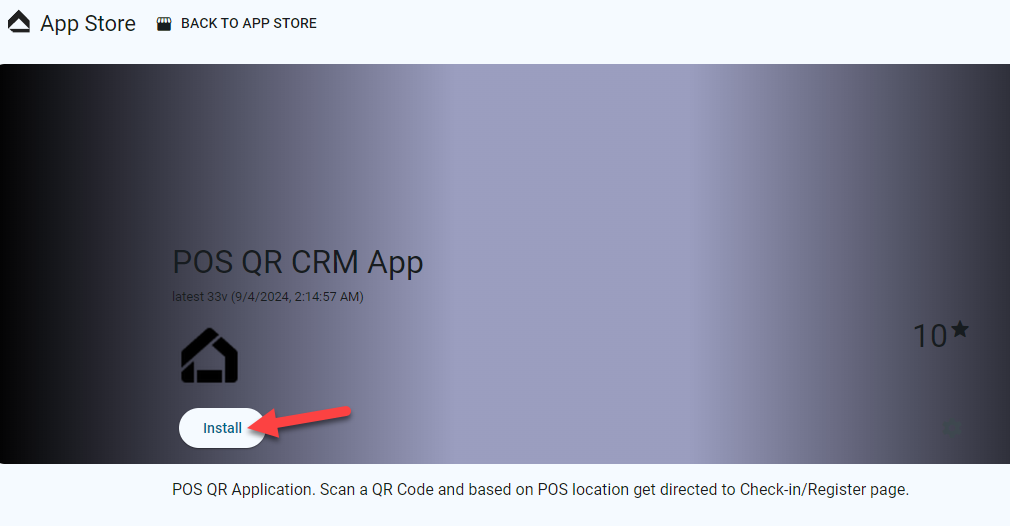
2. Once you click it, it should bring you to an installation page.
Hit the Install button.
3. Click Open then select "pos-users-qr-admin-age"
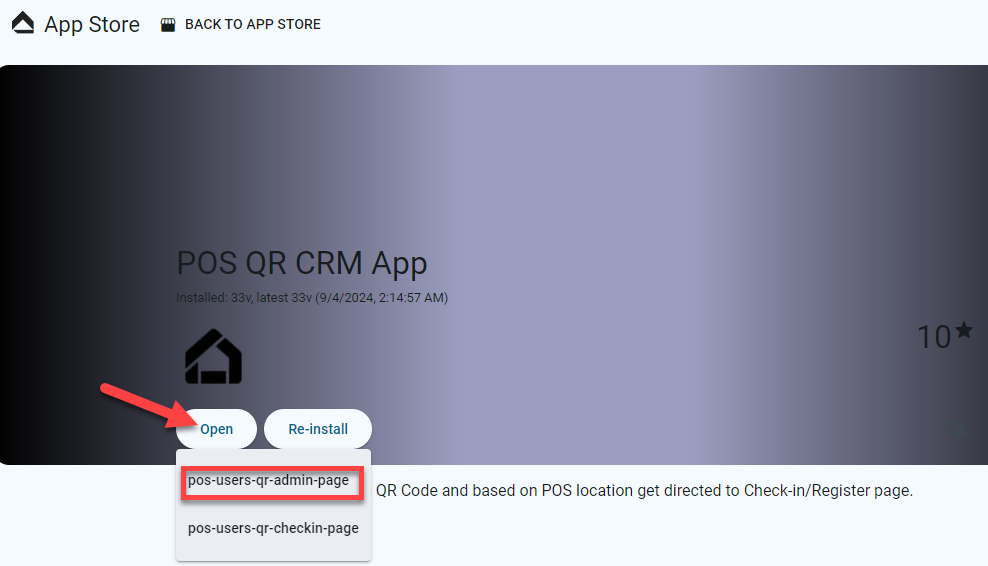
4. This should bring you to the Admin panel where you can create a QR code.
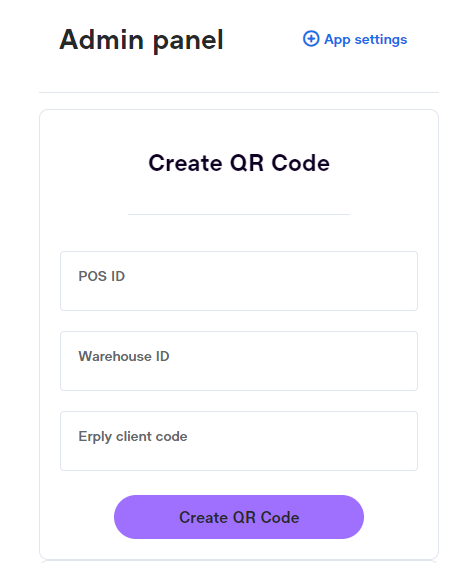
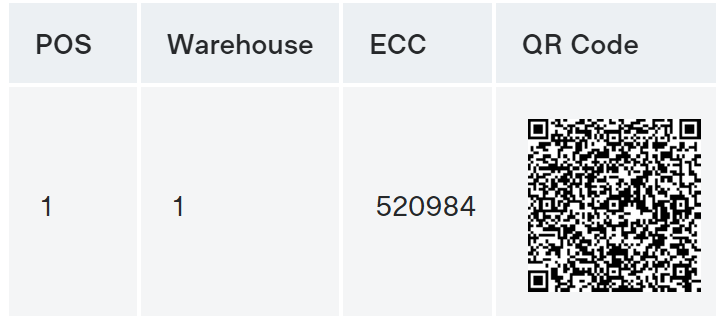
What and where to get the data above:
POS ID: is the number ID of the register where you would like the accept/decline prompt to show.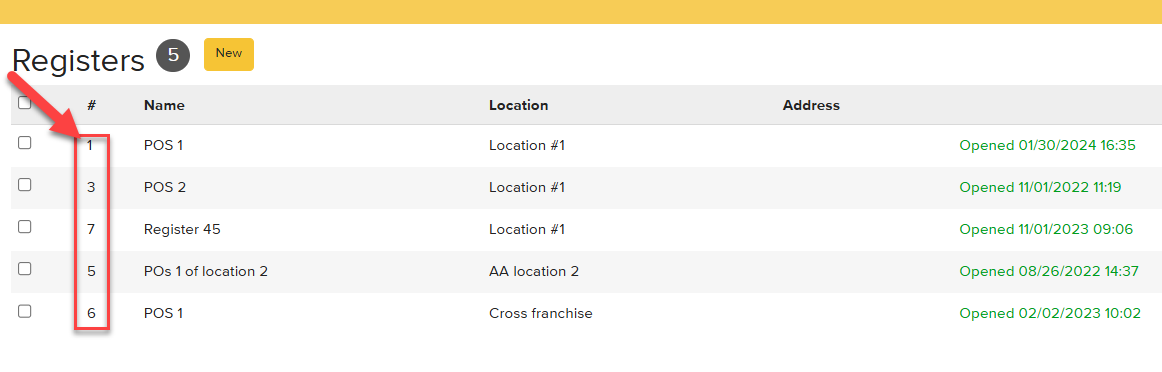
From your BackOffice go to Retail Chain > Registers
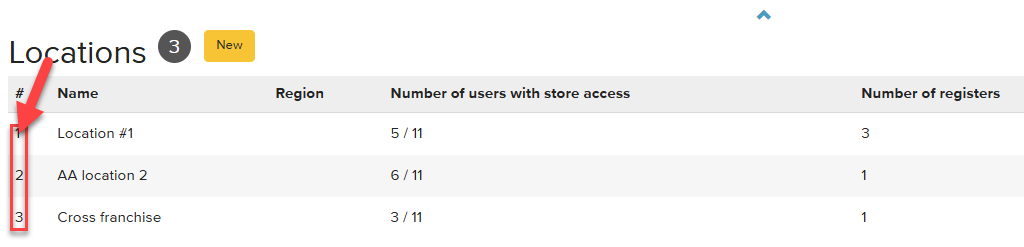
Warehouse ID: is the number ID of the location where your register/s is created.
From your BackOffice go to Retail Chain > Locations
Erply Client Code: this is basically your account's client code.
How to use the app
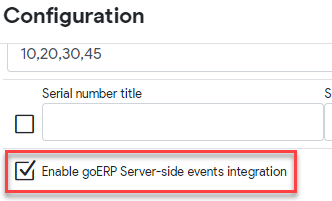
Pre-requisite: Make sure that the Flax integration is on.
From your POS > Go to Settings > Configuration
Check this setting below:
Create/register a customer
Now, once the data has been filled out, then you will hit the "Create QR Code" button.
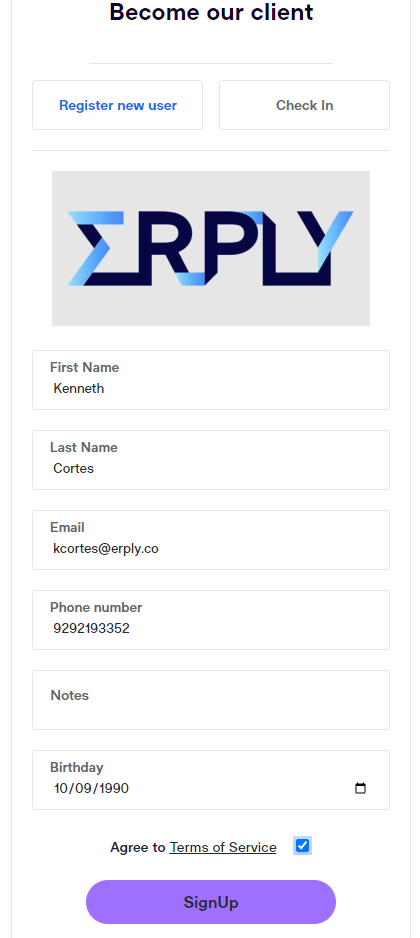
This will create a QR code that will redirect the customer to a signup link.
1. Have the customer scan the QR code from their phone.
They will be prompted from the registration page with the link from the QR:
2. Customers have to fill up the registration page > Check the Agree of terms of Service > Click SignUp

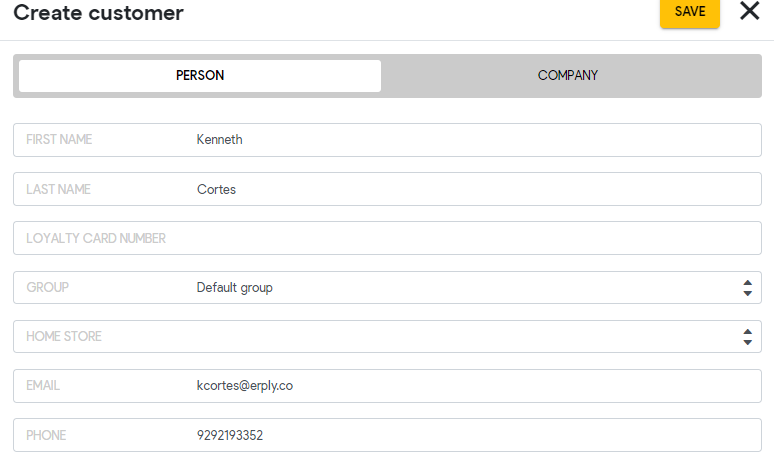
3. Your POS will have an accept and reject button prompt to accept the customer's registration.
Once you hit accept it will redirect you to the POS customer creation page.

4. The customer's data will be populated from the customer creation page > Hit the "SAVE" button to create the customer.

Checking in a customer
1. The customers can scan the same QR code from a different/same phone.
2. Click the "Check In" button from the top.
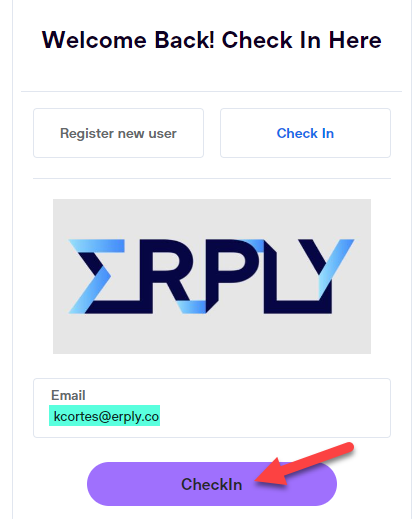
3. Type your email > Then hit the purple "CheckIn" button.
4. Your POS will have an accept and reject button prompt to accept the customer's check in.
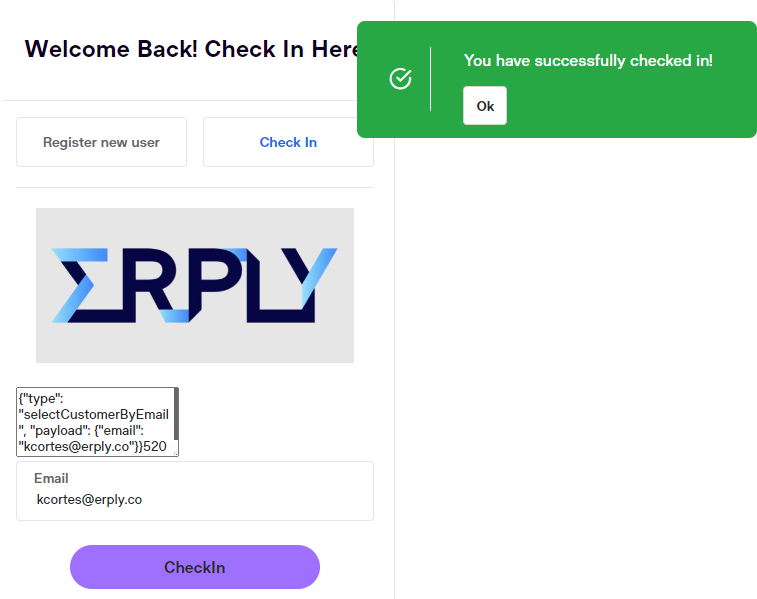

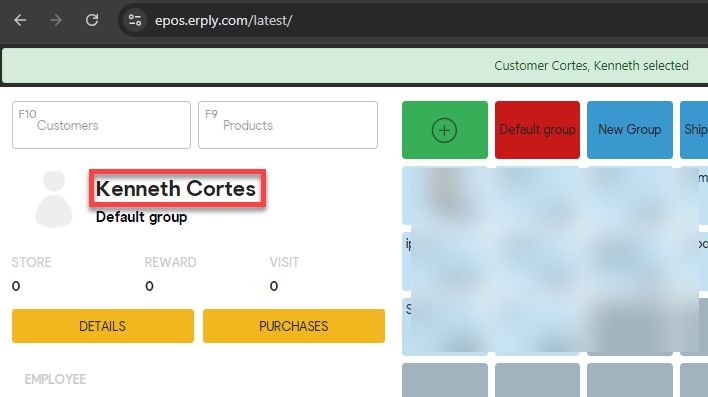
5. Once you hit the Accept button it will automatically ring the customer up to your POS screen.