This setup assumes that you have already installed the installer app that Erply uses to integrate with TSYS/Cayan.
You can refer to this wiki documentation.
Important Note: Cayan is now completely owned by TSYS. You might see Global Payments integrated and Genius from the terminal but they are all owned by TSYS.
This guide will still show Cayan integration until our developers update everything to TSYS.
Hardware Terminals from TSYS:
Genius e285: How do I set up my Genius e285? - Global Payments Integrated Help Center - L-Cayan and TSYS
Genius V400m: How do I set up my Genius V400m? - Global Payments Integrated Help Center - L-Cayan and TSYS
Genius M400: How do I set up my Genius M400? - Global Payments Integrated Help Center - L-Cayan and TSYS
Genius P400: How do I set up my Genius P400? - Global Payments Integrated Help Center - L-Cayan and TSYS
Verifone MX915/925: No longer supported, replaced by Verifone Engage P400, M400, and e285.
Genius Mini: For iPad POS
TSYS/Cayan Microservice installation for Windows OS
I. From the Onboarding Wizard
1. Go to this link: https://posow.erply.com/hardware/integrations or
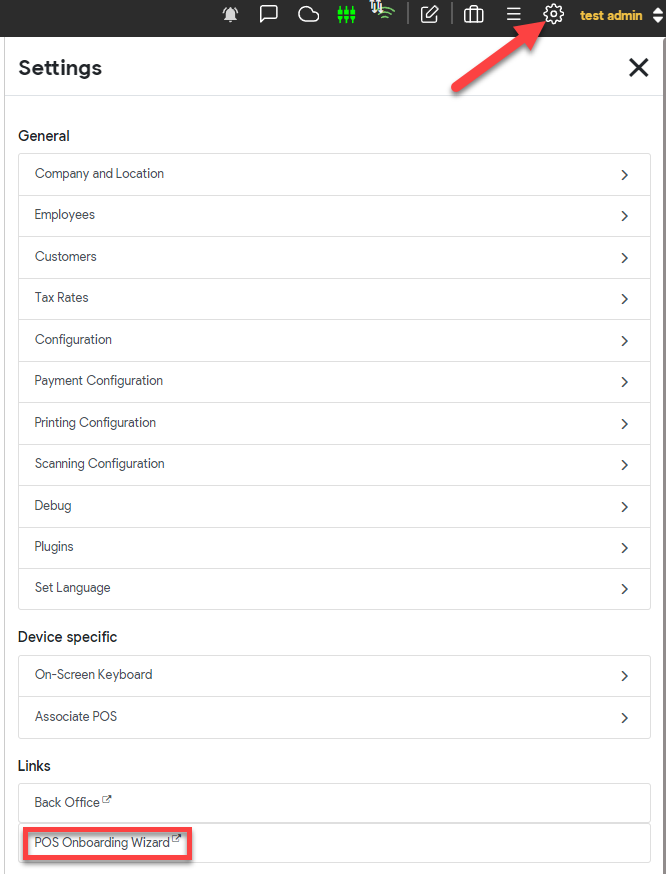
From your POS go to Settings (Gear icon) > then scroll down to POS Onboarding Wizard
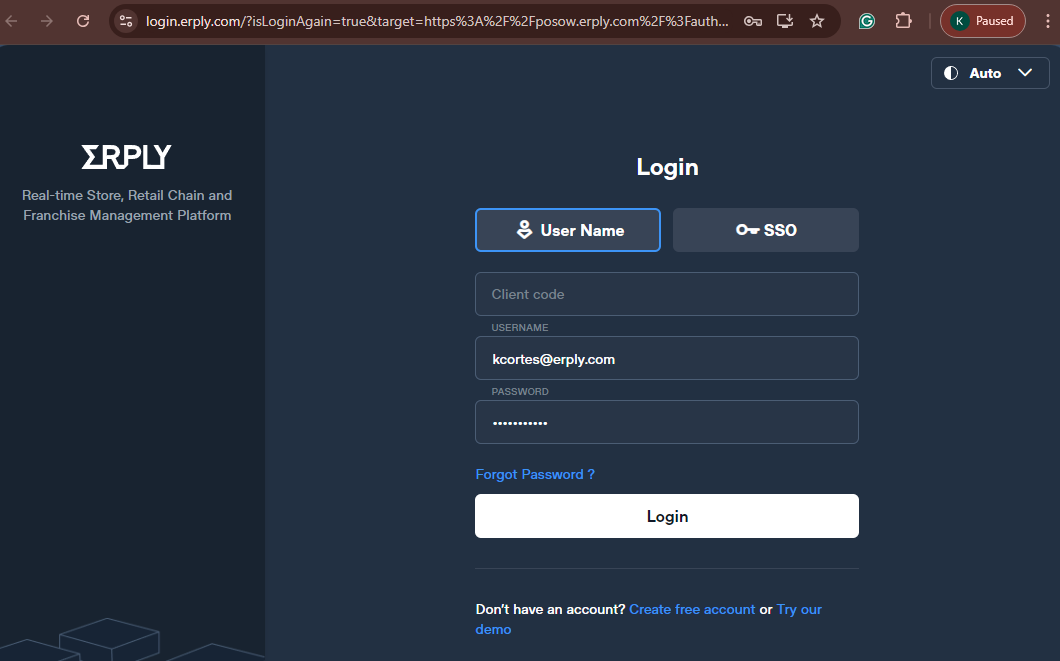
2. It will bring you to the Erply login page, and you have to login with your account that has admin access.
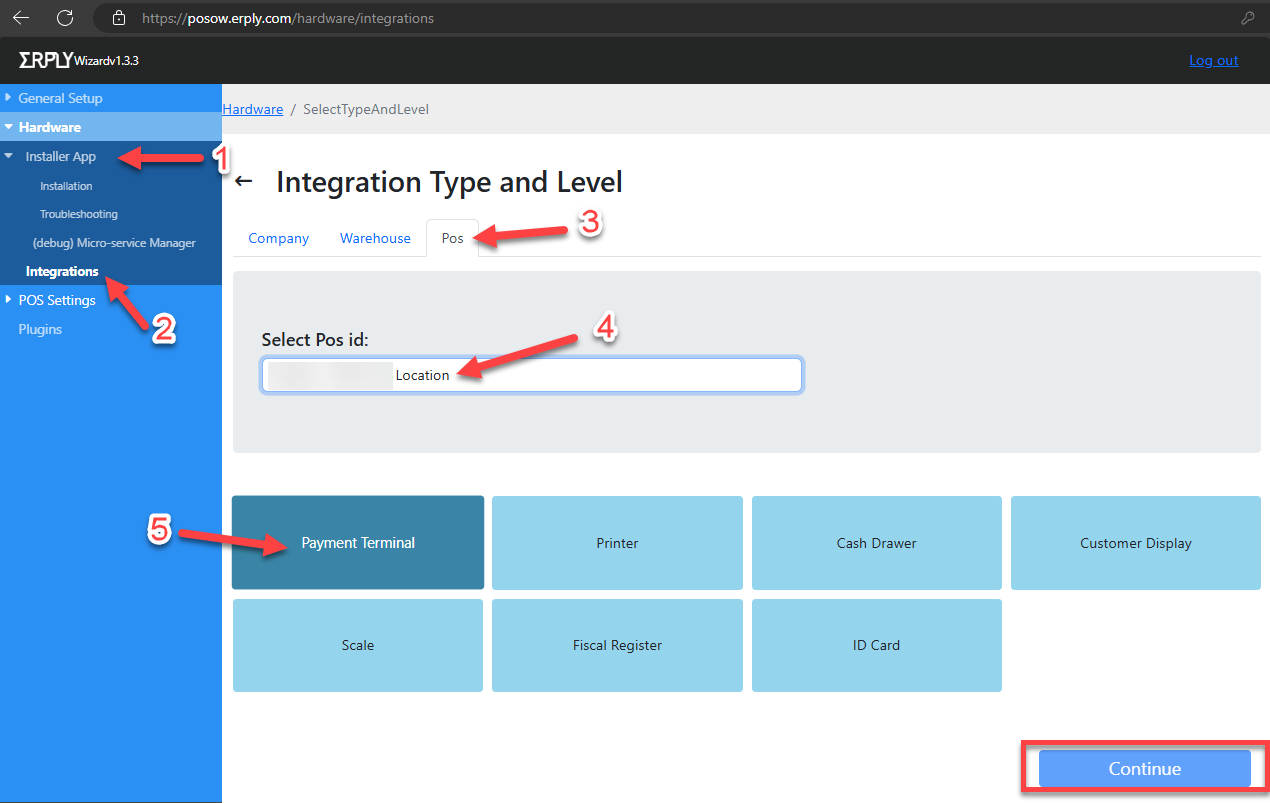
3. On the Onboarding Wizard page do the following:
- Click Installer App
- Select Integrations
- Select POS level
- From the dropdown select the POS/register you are trying to set
- Select Payment Terminal then hit Continue
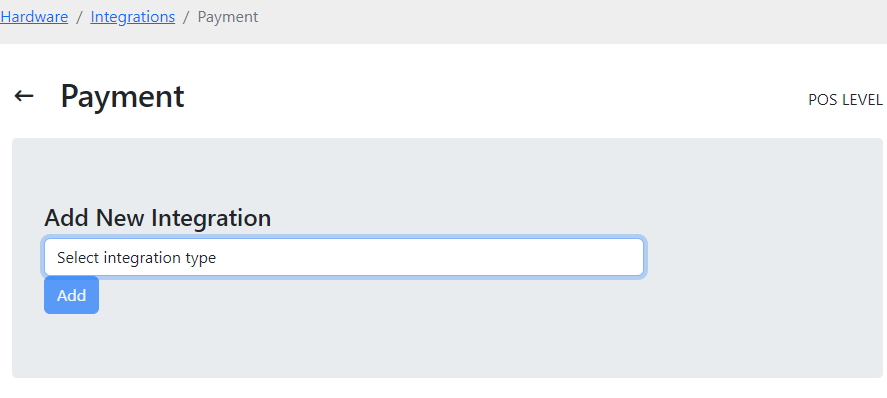
4. From the POS Level Payment integration Select Cayan in the dropdown menu of Add New Integration > Hit Add
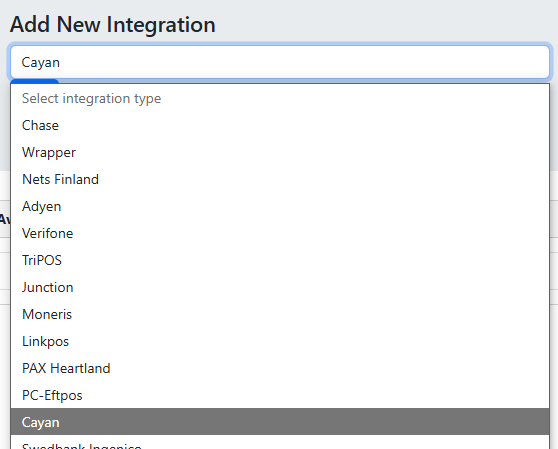
5. Install Cayan integration by hitting the "Install latest" button

6. Wait for it to be downloaded and installed then click Start to start the microservice.

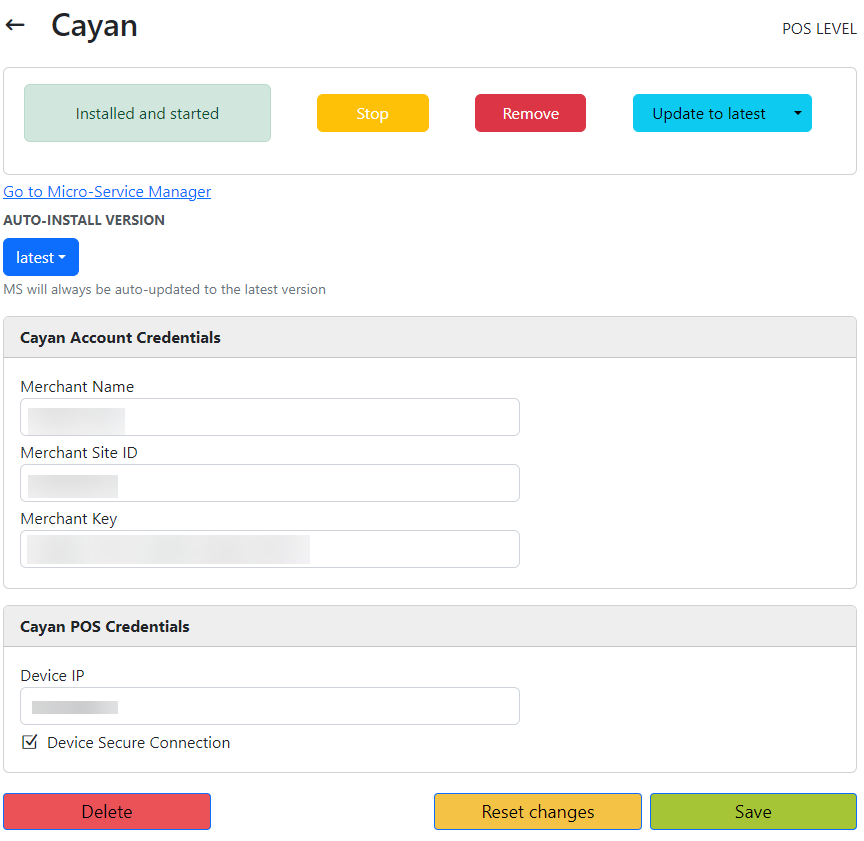
Once started it shows like this:

Note: To confirm that the Cayan microservice is running you have to:
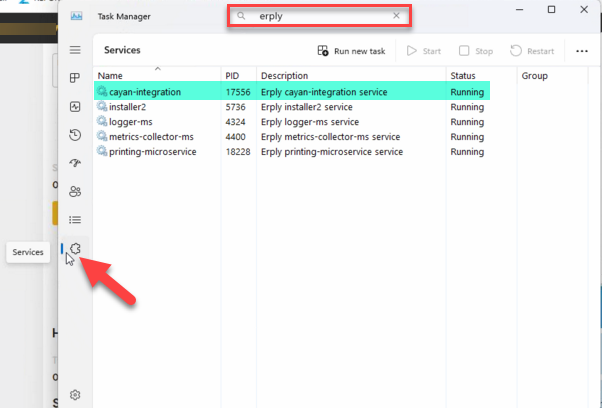
Check your Task Manager to see if your cayan-integration is running.
You can press Ctrl+Shift+Esc to open Task manager then go to Services and look for the service "cayan-integration".
For windows 10:

For windows 11:
- Click the services button on the left panel.
- Type "erply" in the search box above
- Now you should be able to see the "cayan-integration" microservice
Cayan credentials configuration
1. From the POS level Cayan config, you can enter your credentials and the terminal's IP here.
Getting the terminal's IP:
- Press 0 (3 times) in the terminal.
- It will ask for a passcode they have to type in 9416557
- Device info will be displayed and it should show the Terminal's IP.
Note:
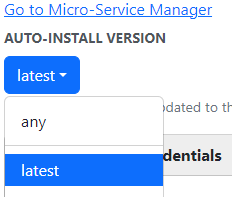
It would be best if you could always set the Auto-Install Version to "latest" so it will automatically install it once there is an update with the microservice.
2. Once done, hit Save.
II. From Erply POS
Setting POS payment configuration to TSYS/Cayan
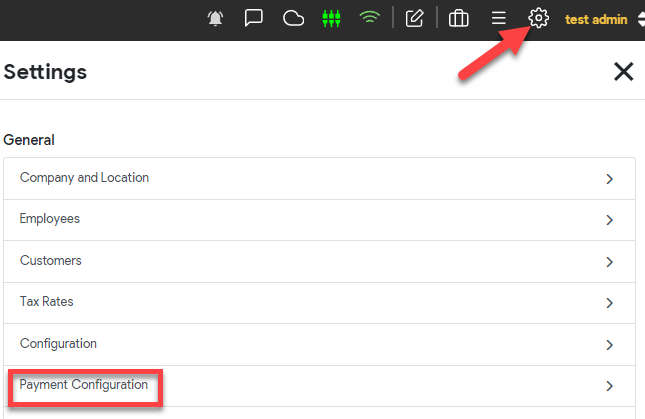
1. In your POS (epos.erply.com/latest) go to Settings (gear icon) > Select Payment Configuration
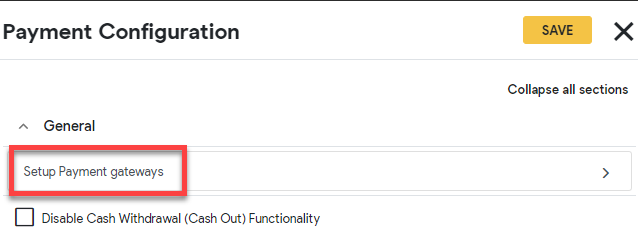
2. In the Payment Configuration page from General Select Setup Payment gateways
3. In the Setup Payment gateway page click the "Select Current Integration" dropdown and select Cayan - Merchant Warehouse

4. Once Cayan is selected, you should see a form with the credentials you typed coming from the Onboarding Wizard.
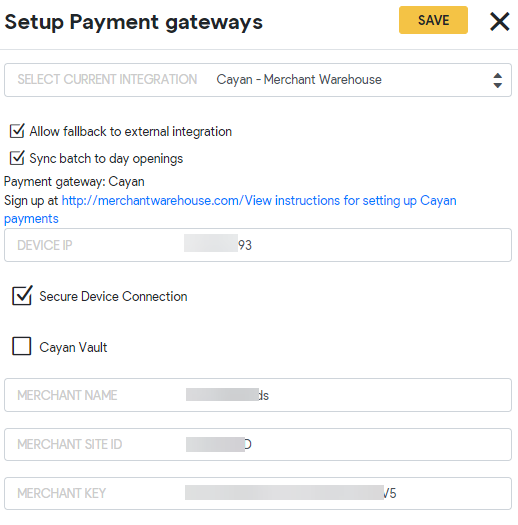
5. Hit the Save button to confirm changes.
III. TSYS from iPad
1. Download the SuperWrapper application:
2. Once downloaded, open the application and login like usual.
3. Go to Settings > Payment Configuration > Setup Payment gateways > Then select Native wrapper (IOS/Android)
4. Select "Open Payment Settings"
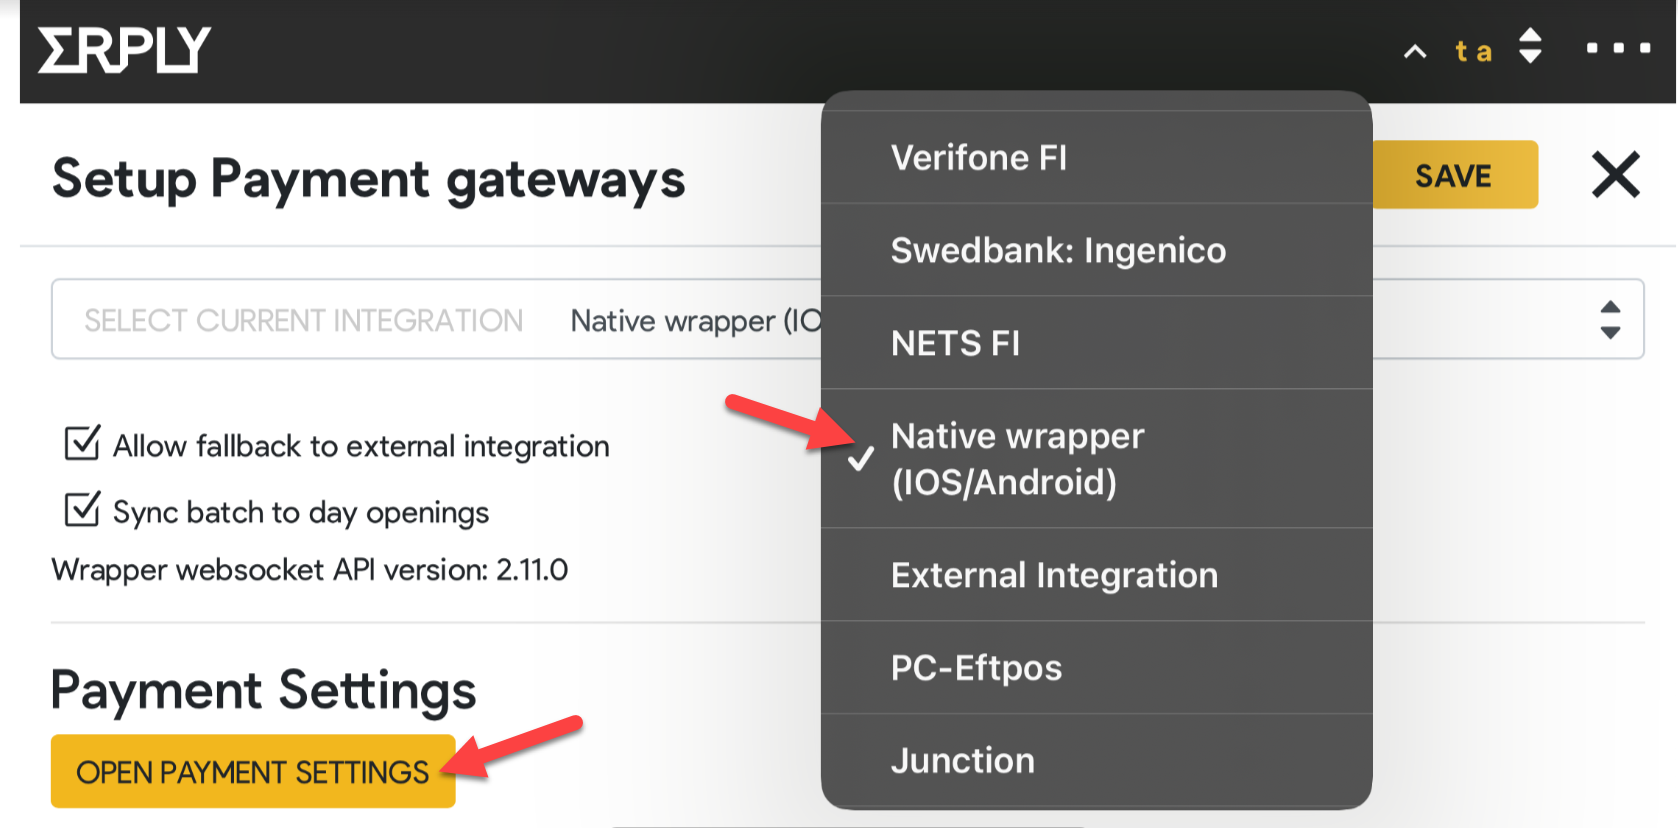
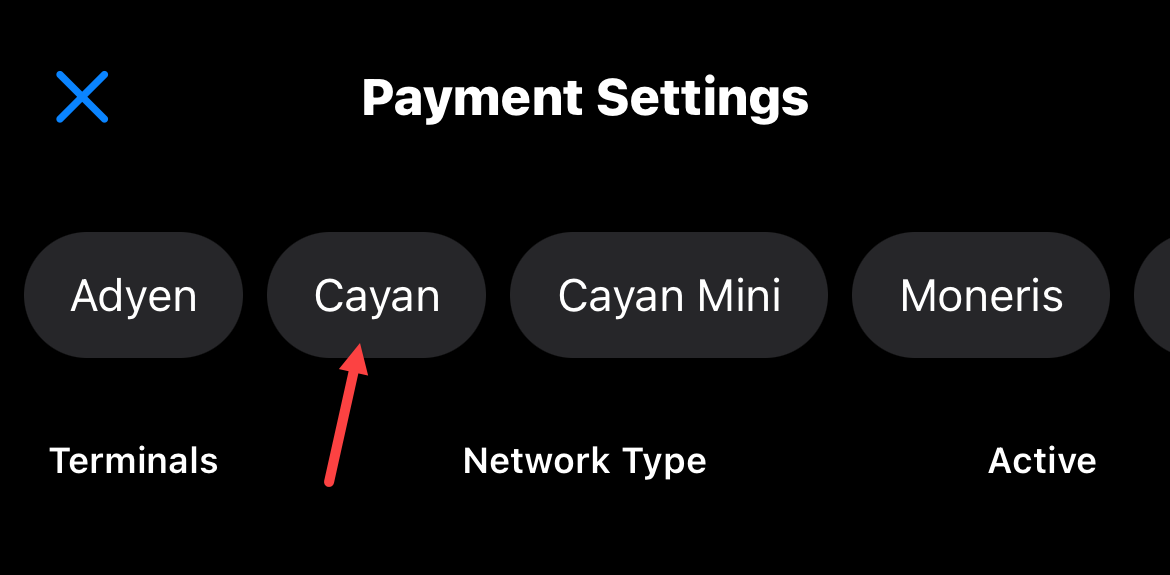
5. Select Cayan (TSYS) from the list and enter your credentials.
Credentials are provided by TSYS support and should be emailed to the client.
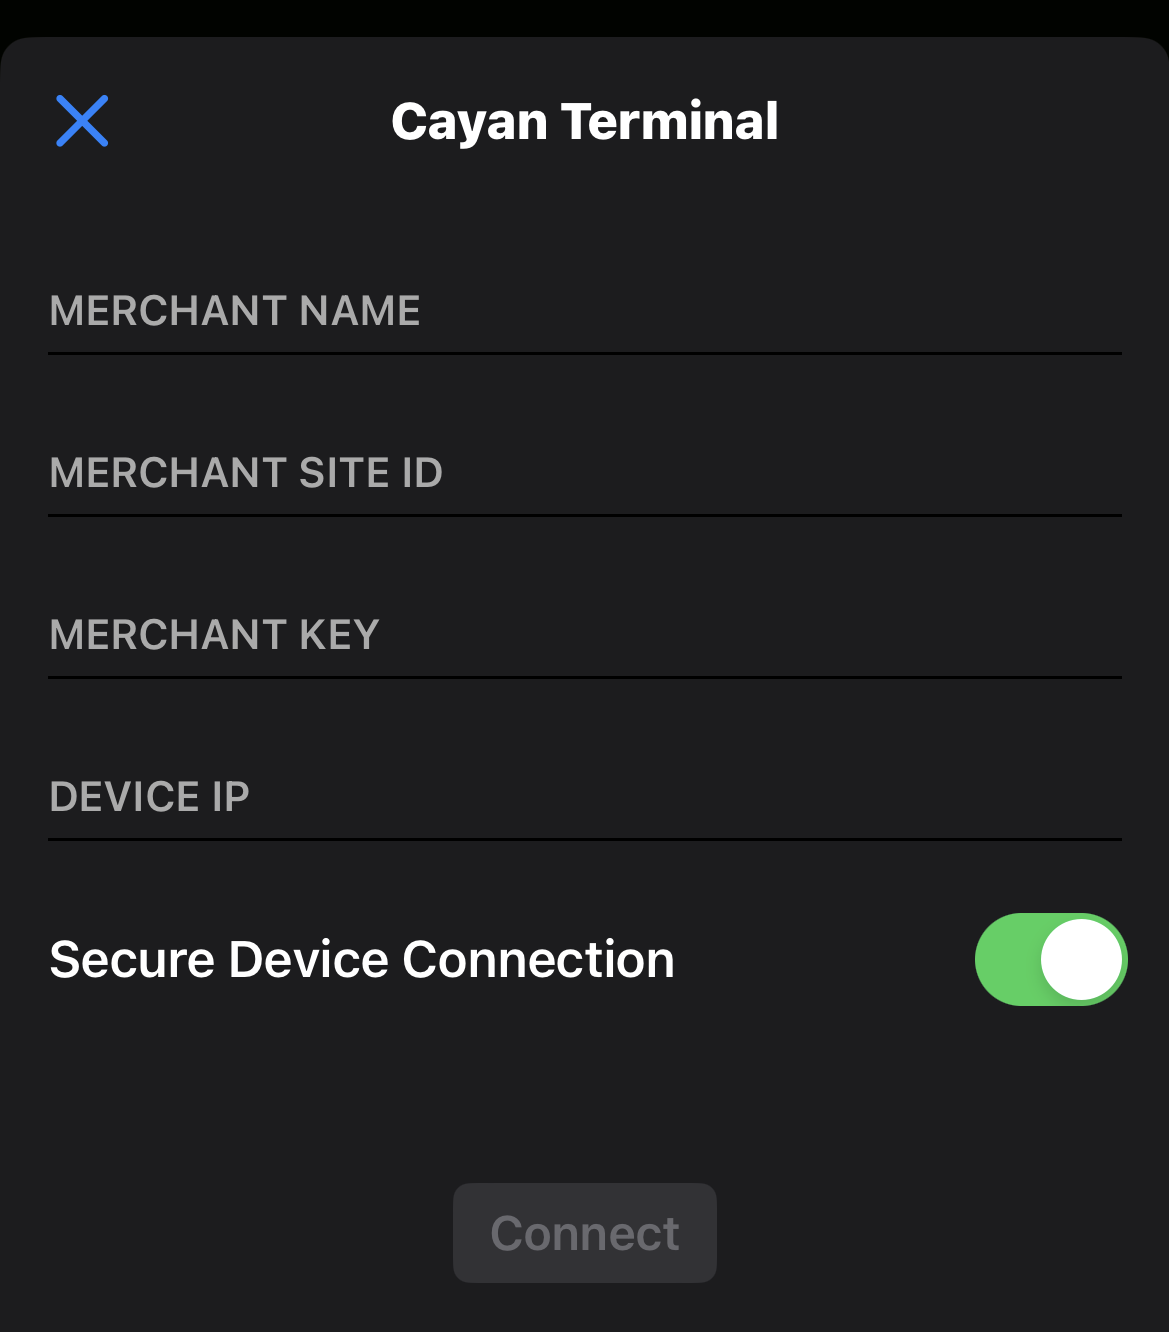
Make sure to enable "Secure Device Connection"
How to get the terminal's IP:
- Press 0 (3 times) in the terminal.
- It will ask for a passcode they have to type in 9416557
- Device info will be displayed and it should show the Terminal's IP.
6. Hit the "Connect" button and wait for it to establish a connection to your terminal.
