The following guide will help you configure your integration between Erply and WooCommerce
Configure your e-commerce site server
Open your server settings through FTP or SHH and find .htaccess file.
Above the #BEGIN line enter the following data:
- php_value memory_limit 256M
- php_value max_execution_time 300
Save when you are done
IF for any reason setting this up from .htaccess does not work then you can try the alternative steps and edit the wp-config.php file:
Raise Execution time limit
Add the following to the wp-config.php file:
set_time_limit(300);
Raise Memory Limit
Add this to the top, before the line that says, “Happy Blogging” in wp-config.php:
define('WP_MEMORY_LIMIT', '256M');
Your woocommerce store must have a SSL certificate and support HTTPS
Generate WooCommerce API keys
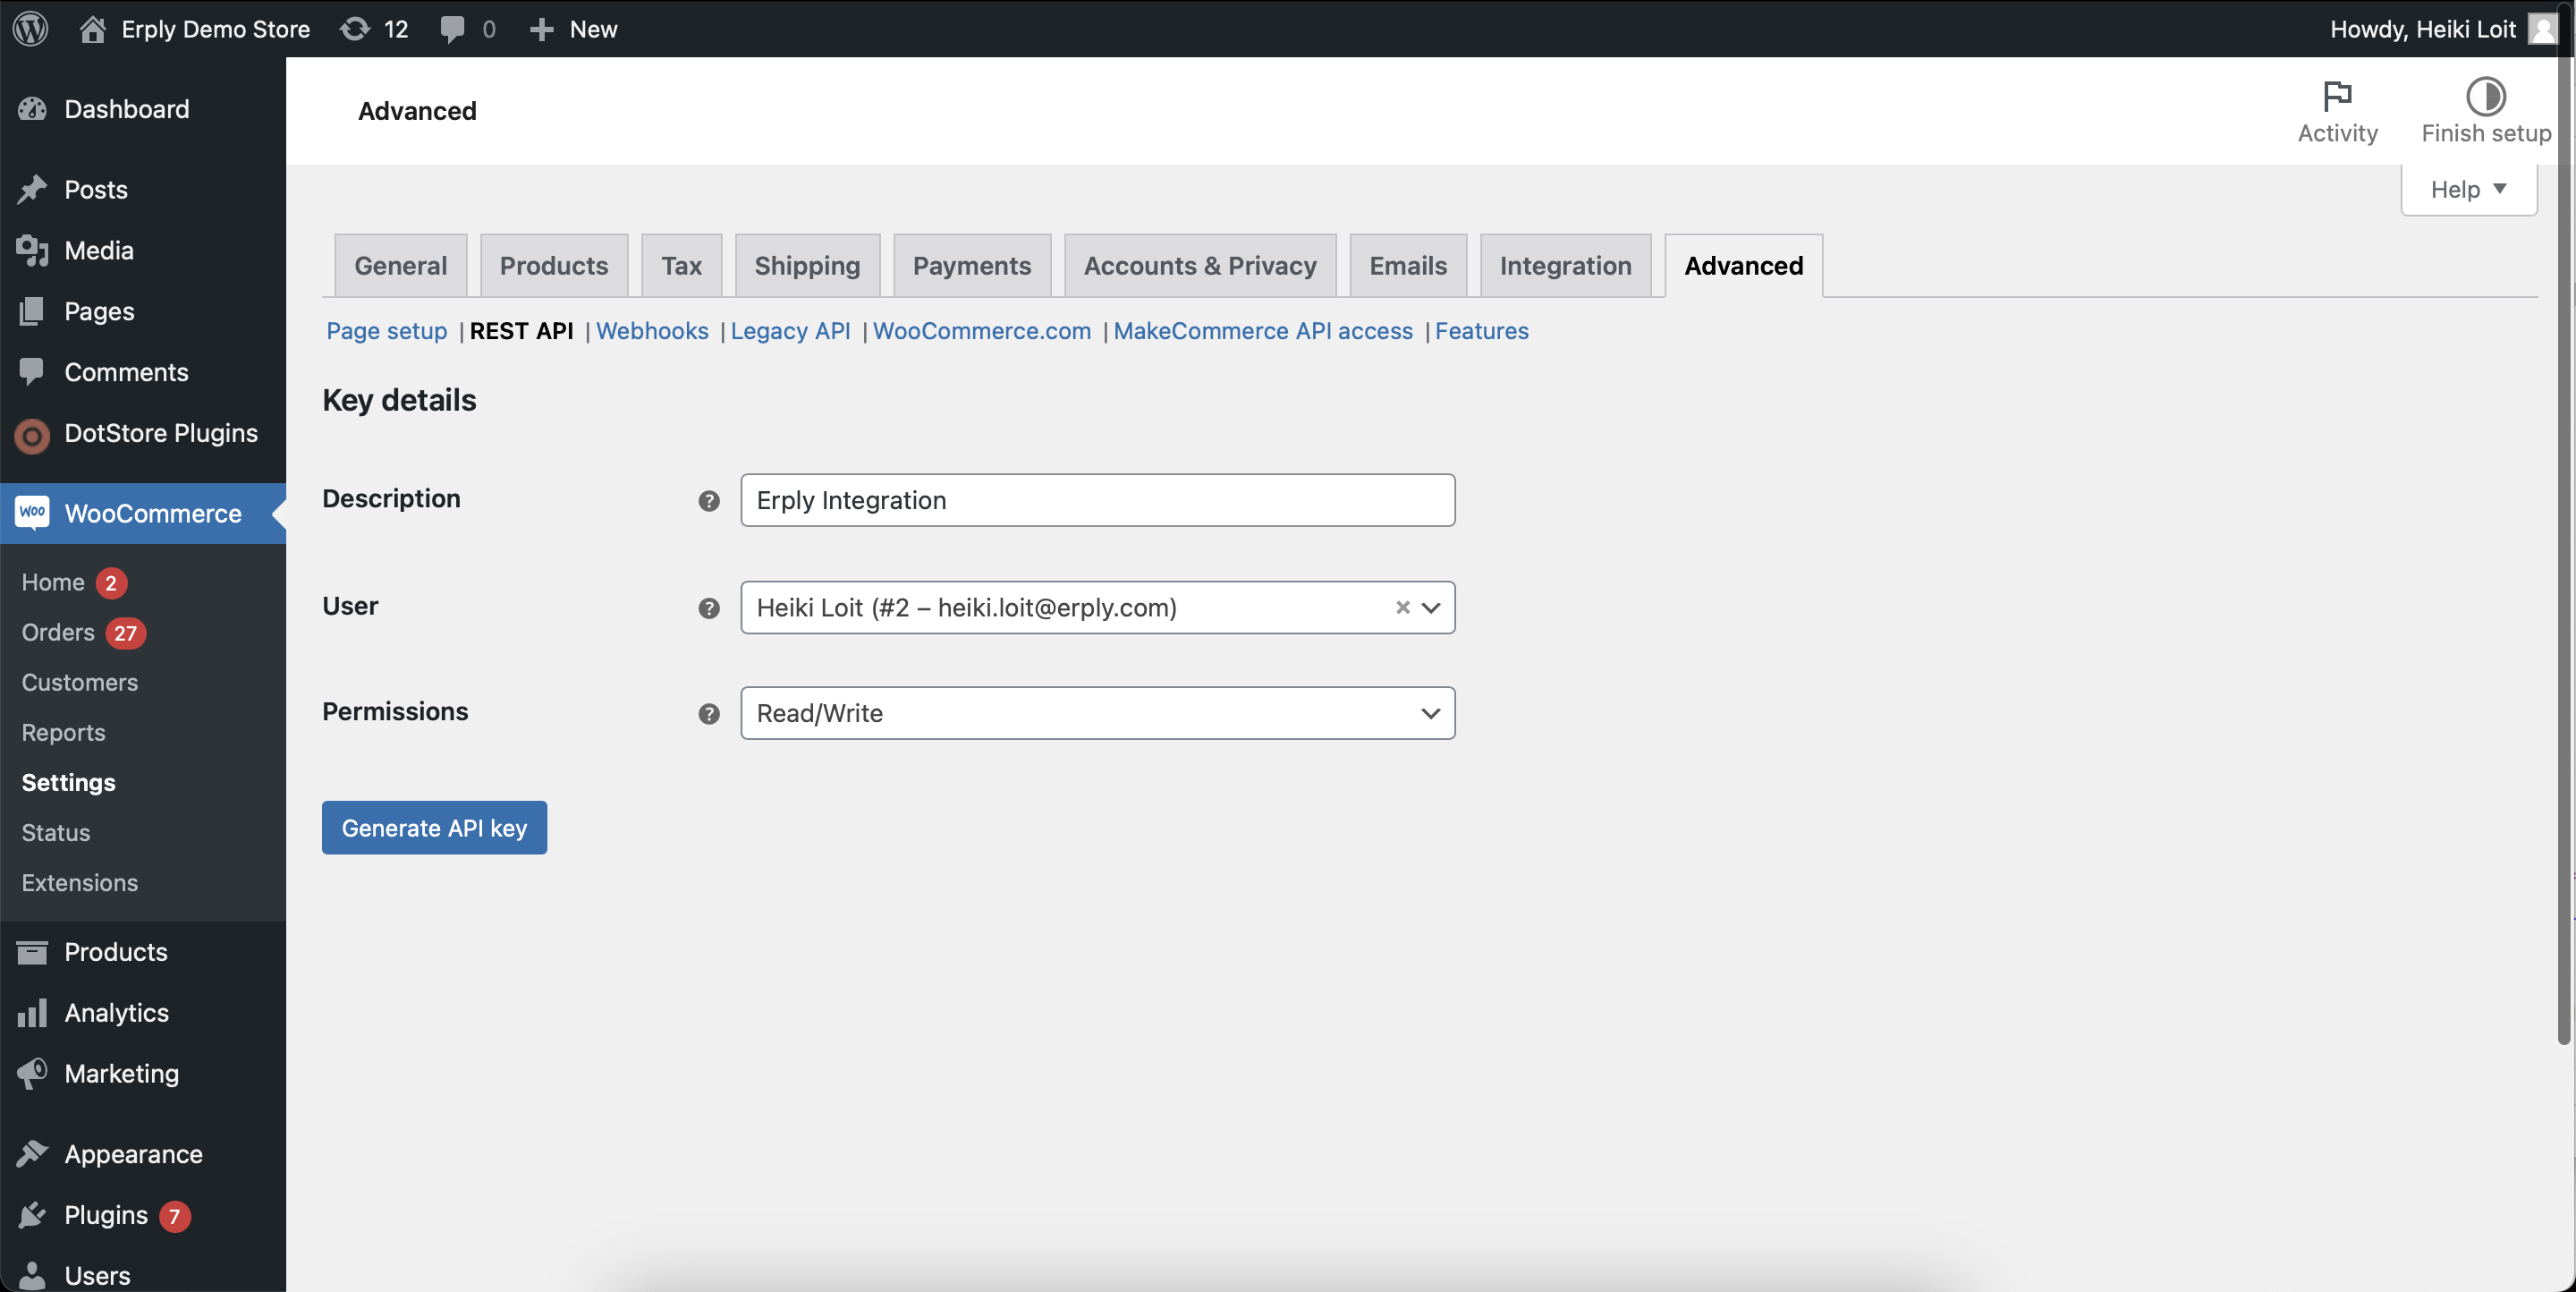
Open your wordpress admin and navigate to: “WooCommerce -> Settings -> Advanced -> REST API” and press “Add Key”
Make sure that the key has read&write permissions enabled.
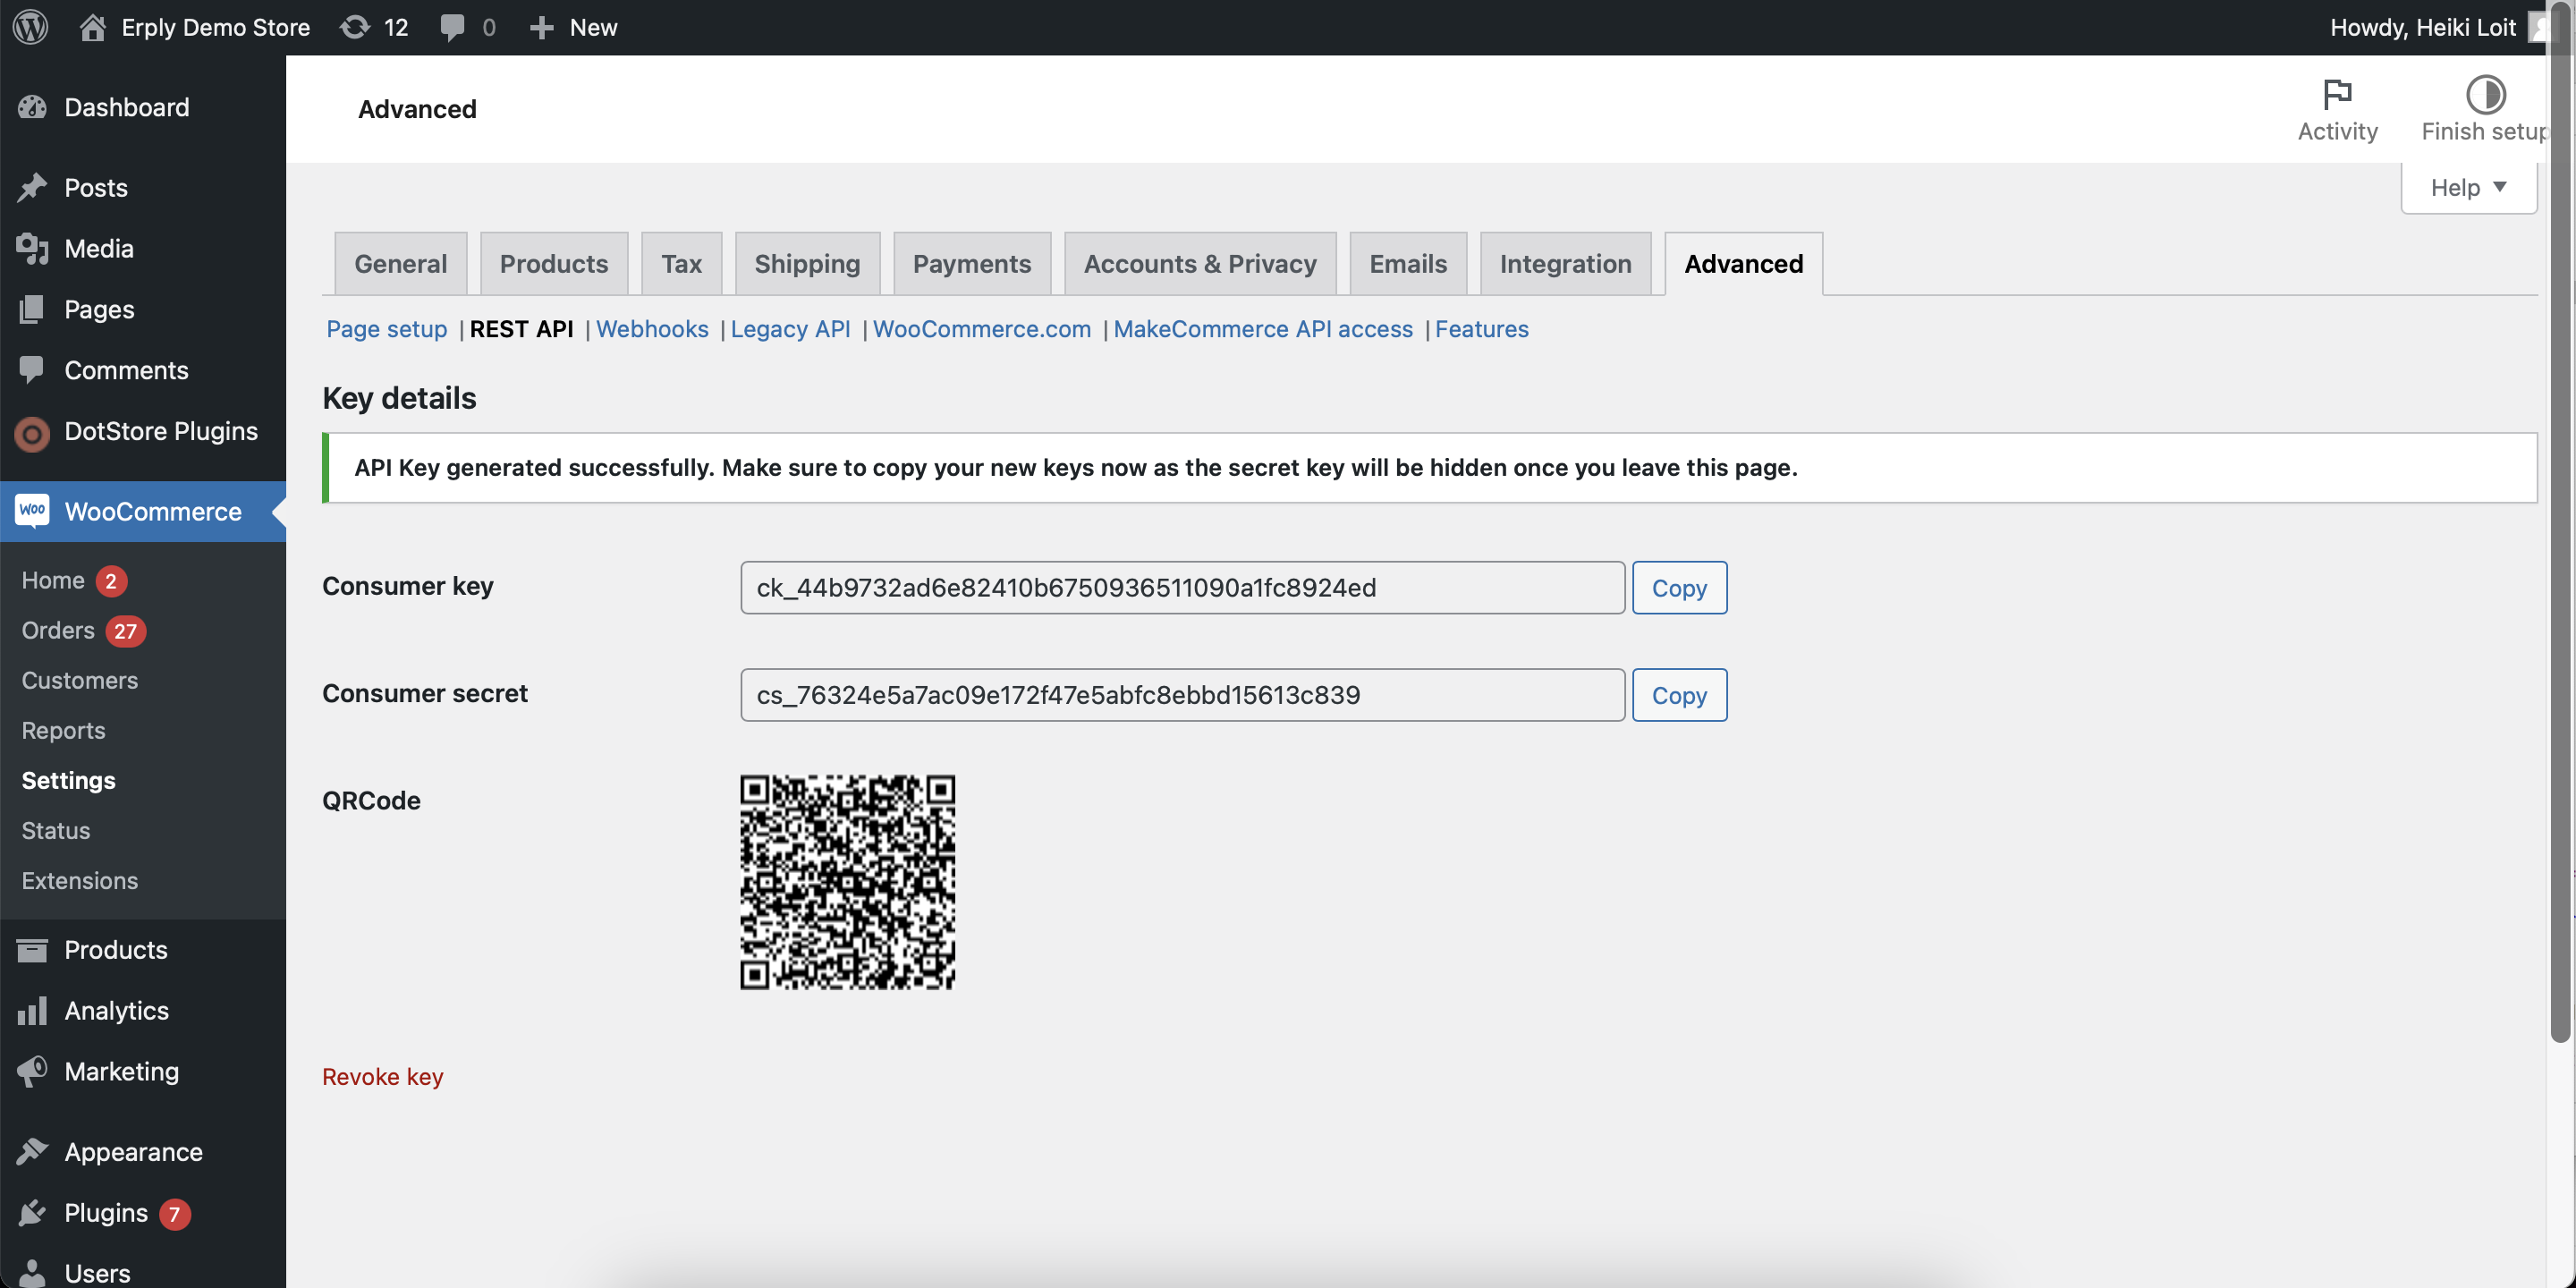
Fill in the required data. Be sure to save or write down the consumer key and consumer secret — you will need these later.
Configure Webhooks
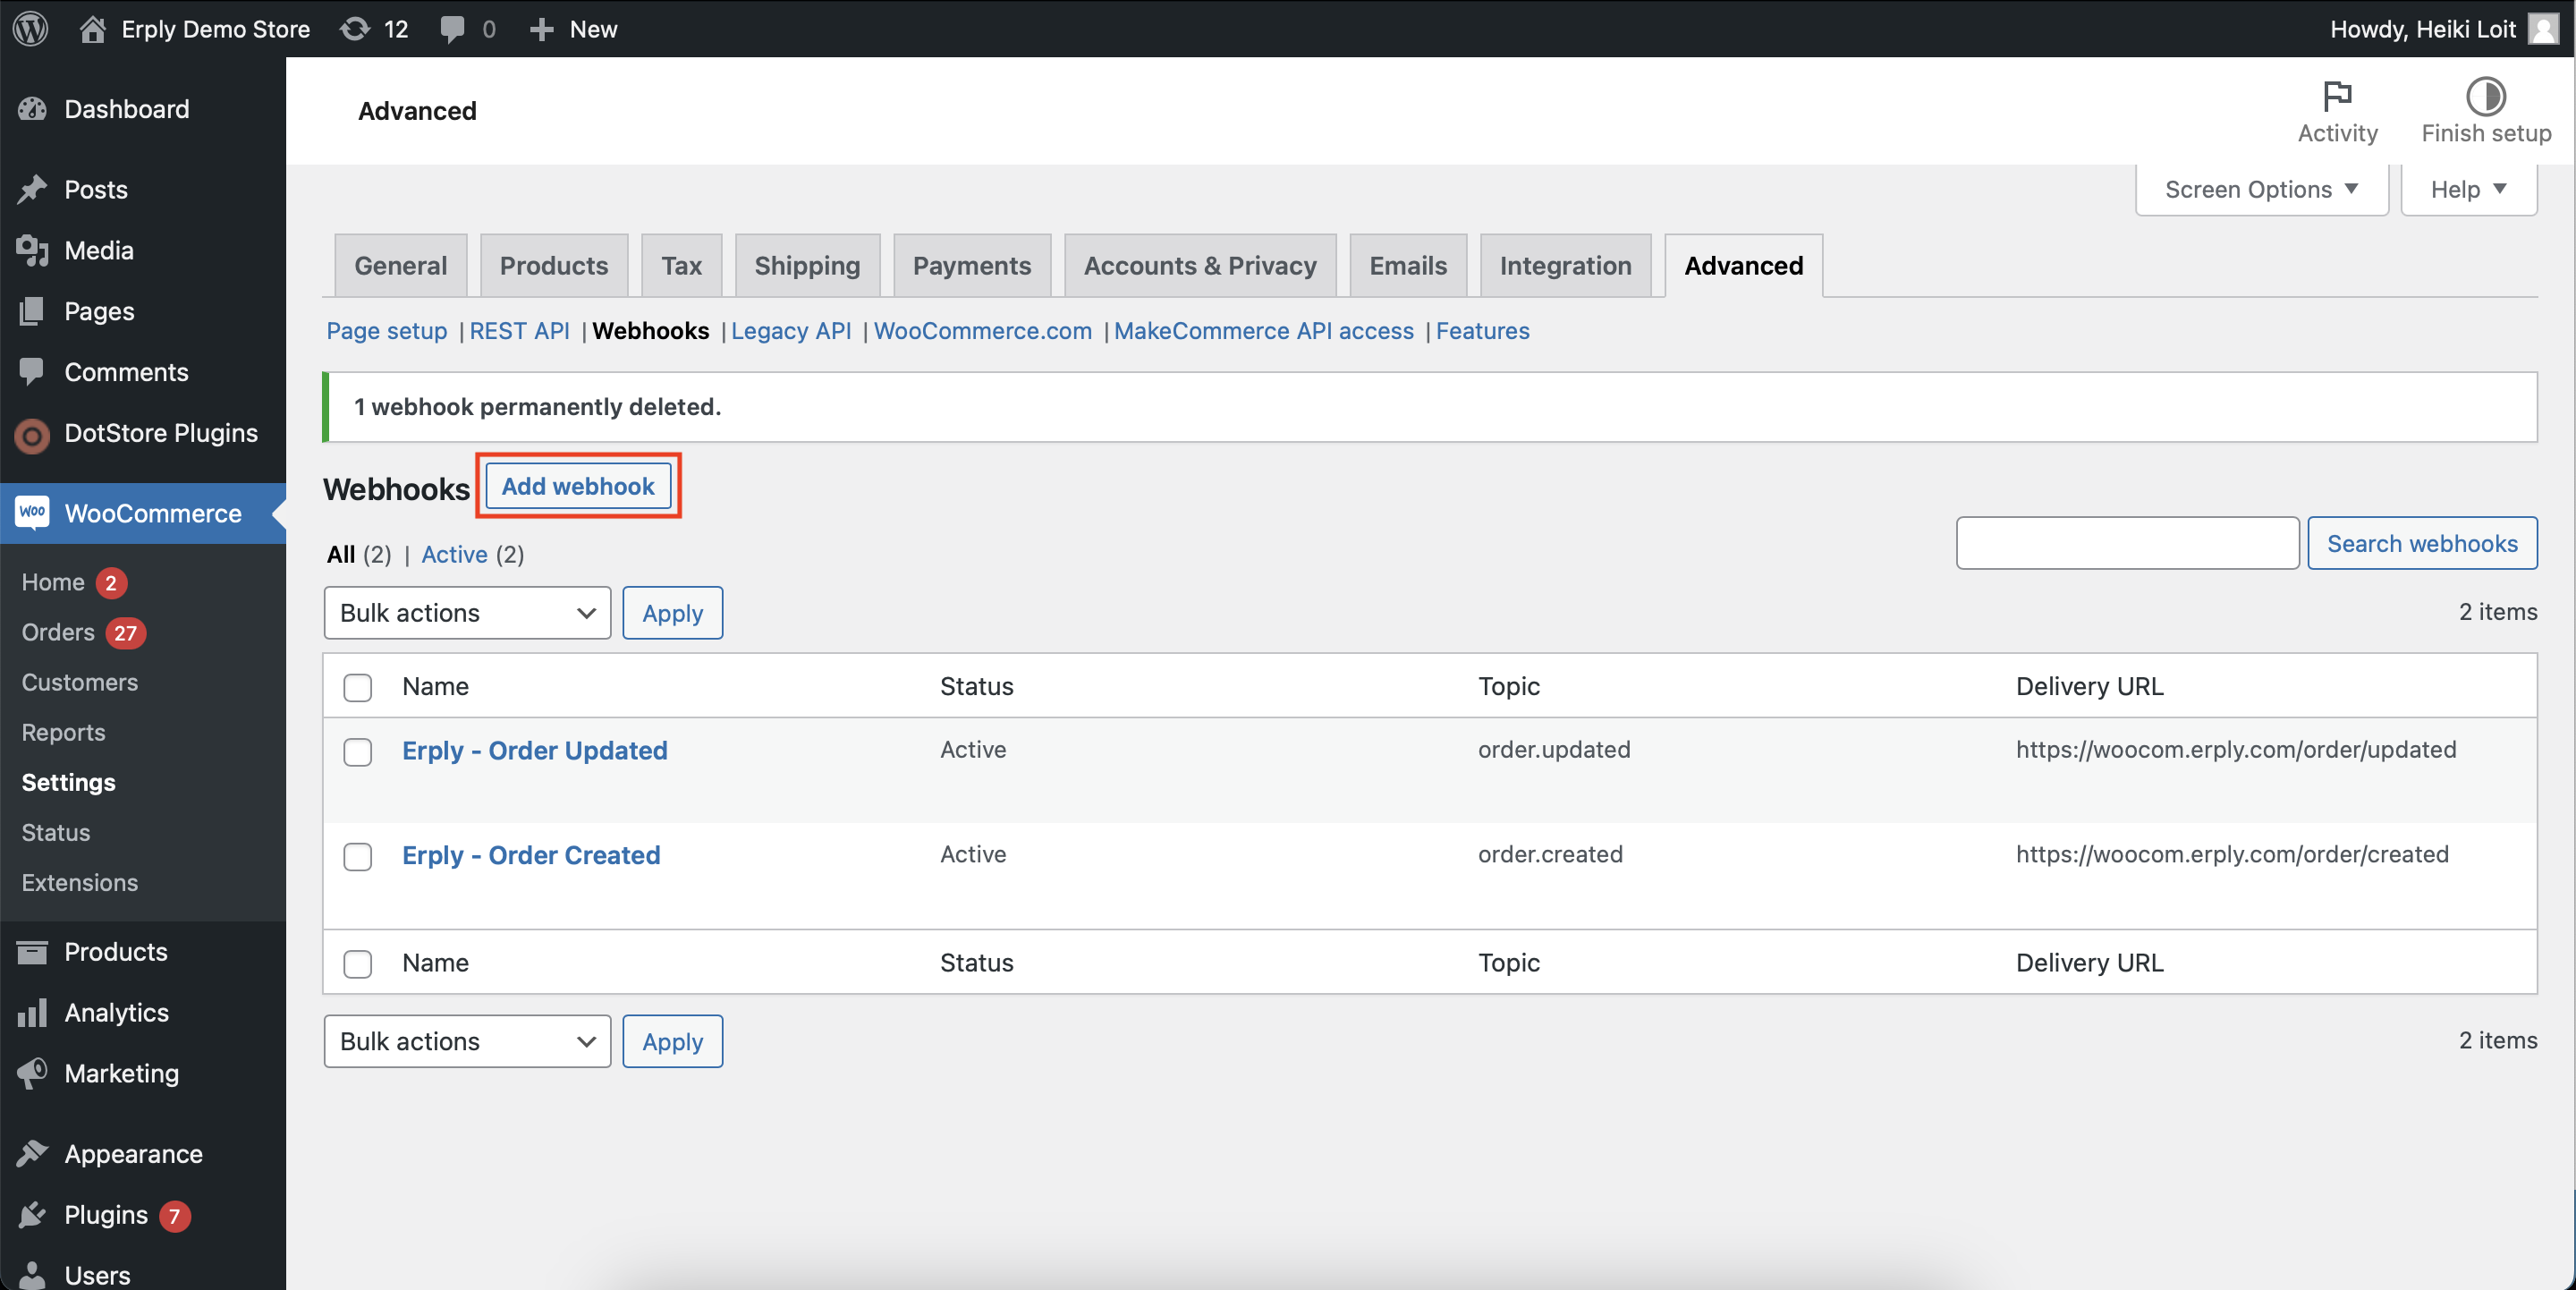
Go to “WooCommerce -> Settings -> Advanced -> “Webhook” section and click on “Add webhook”.
Two webhooks must be created, one for new orders and the other for order updates.
! When saving and Delivery URL does not save try typing it in instead of copying.
- New Order
- Name: “New Erply Order”
- Status: “Active”
- Topic: “Order Created”
- Delivery URL: “https://woocom.erply.com/order/created”
- Secret: Leave empty as the secret will be generated upon save
- API Version: “WP REST API Integration v3”
- Updated Order
- Name: “Updated Erply Order”
- Status: “Active”
- Topic: “Order Updated”
- Delivery URL: “https://woocom.erply.com/order/updated”
- Secret: Leave empty as the secret will be generated upon save
- API Version: “WP REST API Integration v3”

Supported versions of WP and WooCommerce
WooCommerce: 3.7+
WordPress: 4.4+
Configure your basic integration settings
The following settings must be configured when setting up your WooCommerce shop. To access the configuration panel, you must go to. “Settings -> WooCommerce Panel” or E-Commerce -> Integrations Manager.
Please note that you can have several WooCommerce shops in your Erply account and you can sell different products on them by using our Assortments module.
- Company name: Your company name
- Account number: This is prepopulated with your Erply account number.
- Warehouse: Warehouse associated to the integration. This is the warehouse that will be associated to all sales documents and where the inventory will be subtracted
- Combined Inventory: It is possible to combine inventory from multiple warehouses. All incoming orders will still be associated with the primary warehouse and manual inventory transfers in Erply might be necessary in order to fulfill the orders.
- Document type: how purchase documents will import into your Erply account
- Invoice-waybills (depletes inventory quantities)
- Stock is moved and the transaction is completed as soon as the document comes into Erply.
- Orders (reserves goods by putting them in layby)
- A few confirmation steps required to complete the order.
- Used for buy online, pickup in-store orders.
- automatically take the item out of stock.
- You can set different document types for paid or unpaid woocommerce documents
- Invoice-waybills (depletes inventory quantities)
- Regular Prices (Use price lists or not): There are two ways of showing prices in your woocommerce store
- Prices will be pulled from your product card in Erply
- Prices will be pulled from a price list you associate with the integration
- Sales Prices: It is possible to use a price list for showing discount prices in woocommerce. It is also possible to define the start and end date for the price list
- Sync type: There are two options here: You can read more about these below
- Full account: All products in Erply marked “show in webshop” are displayed in your webshop.
- Assortments: Product assortments are assigned to your Woo warehouse and displayed in your webshop. Use these when you want different webshops to display different products.
- Integration status: Choose if the WooCommerce integration is active or not.
- Daily checkup time: Allows you to choose when daily data checkup takes place. During this checkup we will verify that all sales documents are imported from Woo to Erply and all product related data is in sync on both environments.
- Site URL: The URL of your Woo webshop
- Consumer key, Consumer secret: WooCommerce API Keys found in your WooCommerce shop advanced settings.
- Customer Group: Select the customer group where all new customers from your e-commerce store will be stored
- SKU value: It is possible to choose which code from Erply will be imported to WooCommerce as the product SKU.
- Shipping fee product ID: Add your shipping fee productID from Erply to this field to associate incoming shipping fees
- Language: Language of the product fields where the data will be taken that will be imported to WooCommerce
- Sync Rule: There are two options here: You can read more about these below
- Clean Setup: existing products and product groups on your woocommerce site will be removed and replaced with data coming from Erply
- Existing Setup: existing products and groups will be left to WooCommerce and data will be added on top of that from Erply. (This will also require manual product mapping for the sync to work correctly – to do so please contact support@erply.com for further instructions)
- Allow Backorders: This setting defines whether or not customers can make purchases of products that have 0 or negative stock quantities. This setting mirrors the WooCommerces settings that are also found on the product card in WooCommerce
- Category Permalink Setup: By default the integration sets the Erply group ID as the woocommerce category slug. This setting enables you to change this to the Erply group name which is also better for SEO. If you have an existing integration that already uses ID-s as slug-s, please contact our support for assistance on changing this.
Advanced Settings
Integration also allows you to define which item fields are included in sync as well as add custom fields to the integration and also map together your e-commerce payment types with Erply payment types.
Selective Sync
From the advanced mapping settings you are able to select the fields that will sync over to WooCommerce from Erply. You can toggle those fields on & off from the integration settings. If some field is toggled off that means the field values are not synced to WooCommerce and you are able to manage those values directly in WooCommerce. The integration will not overwrite those values.
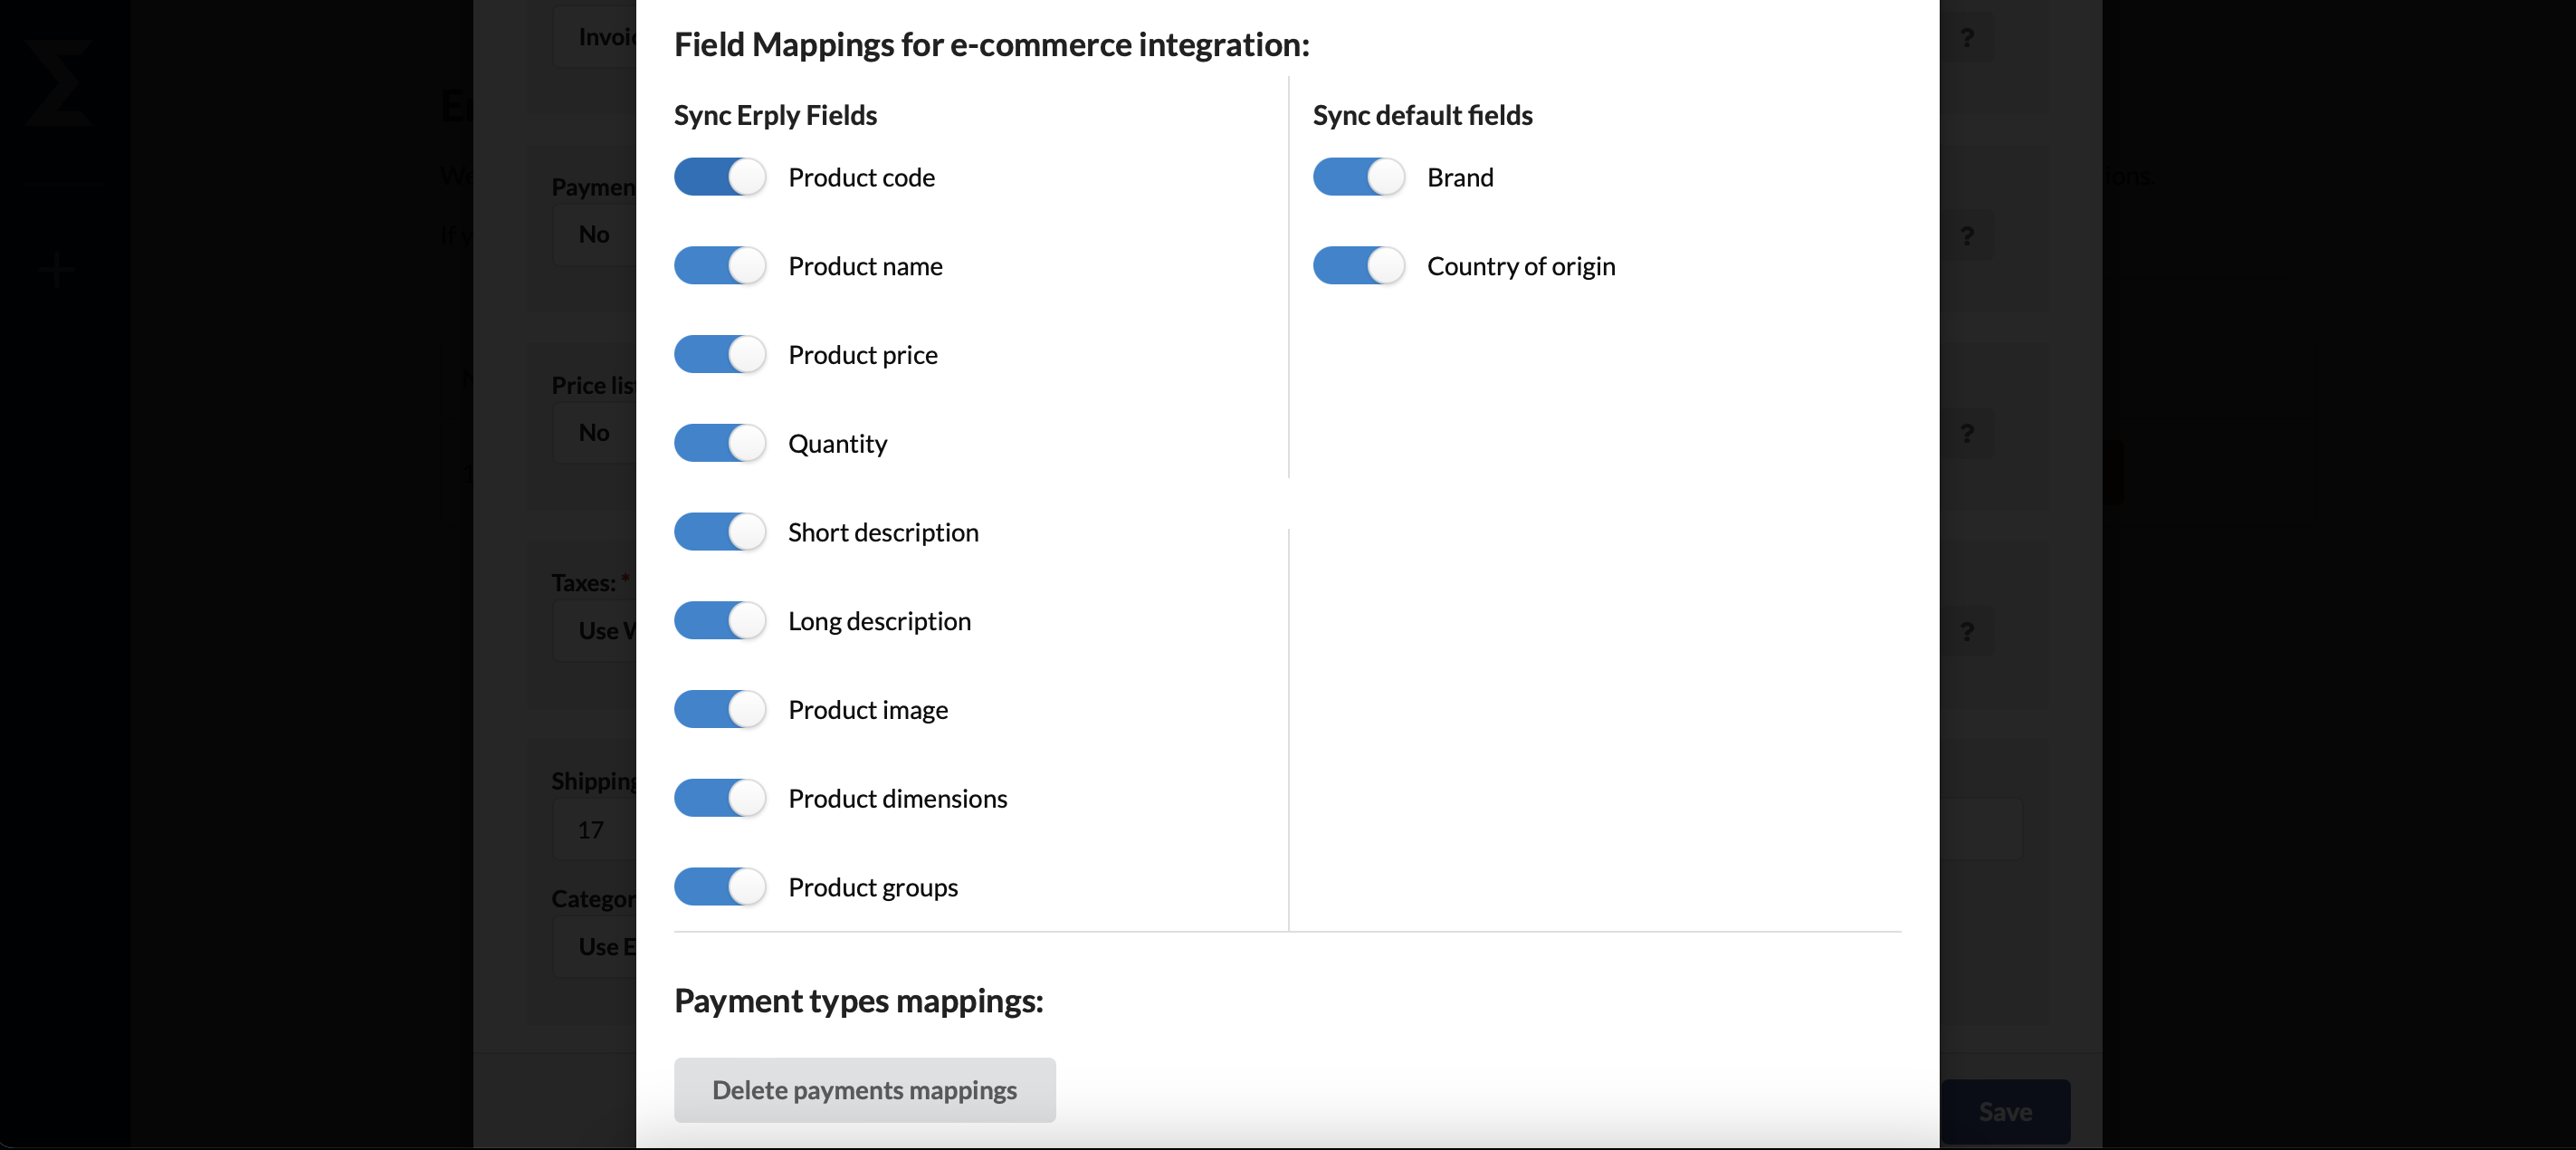
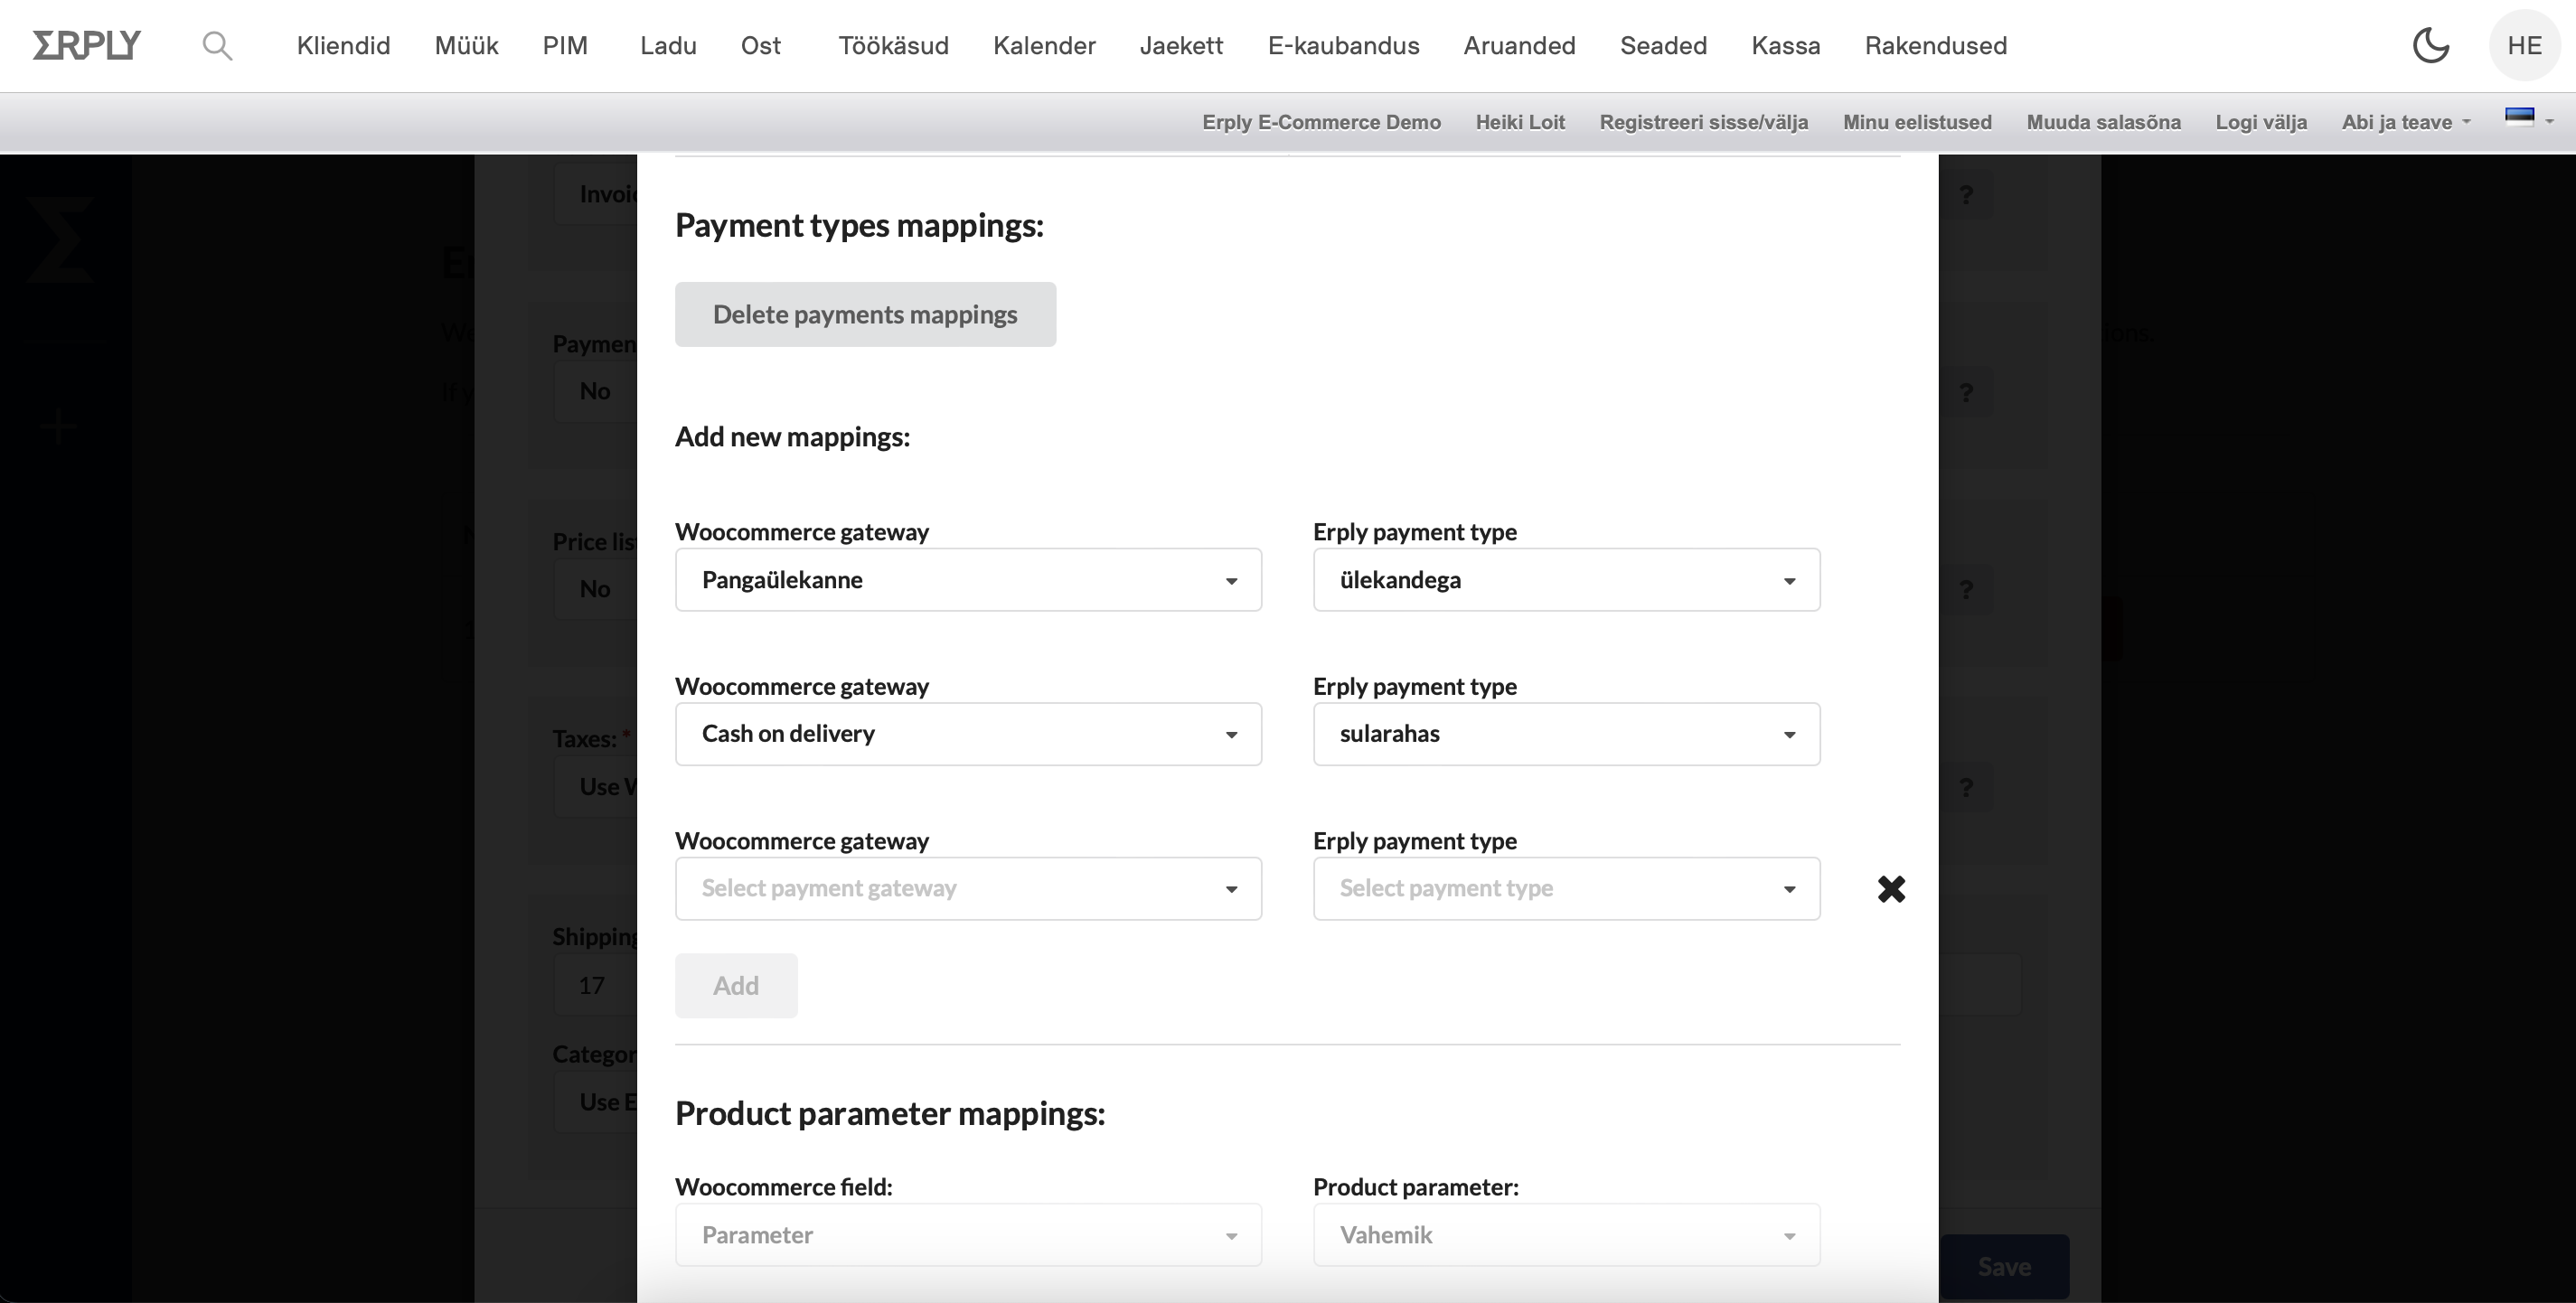
Payment Types Mapping
Payment type/method mapping is required if you wish to have an overview of all different payment methods used for paying online invoices. This mapping is also required if you have an integration between Erply and a bookkeeping service such as Erply Books, QuickBooks Online, XERO etc…
To map payment types together you must select a payment type from the WooCommerce Gateway dropdown and the corresponding type from the Erply Payment Type dropdown and click on “Add”. You can map together as many payment types as you have in WooCommerce or Erply.
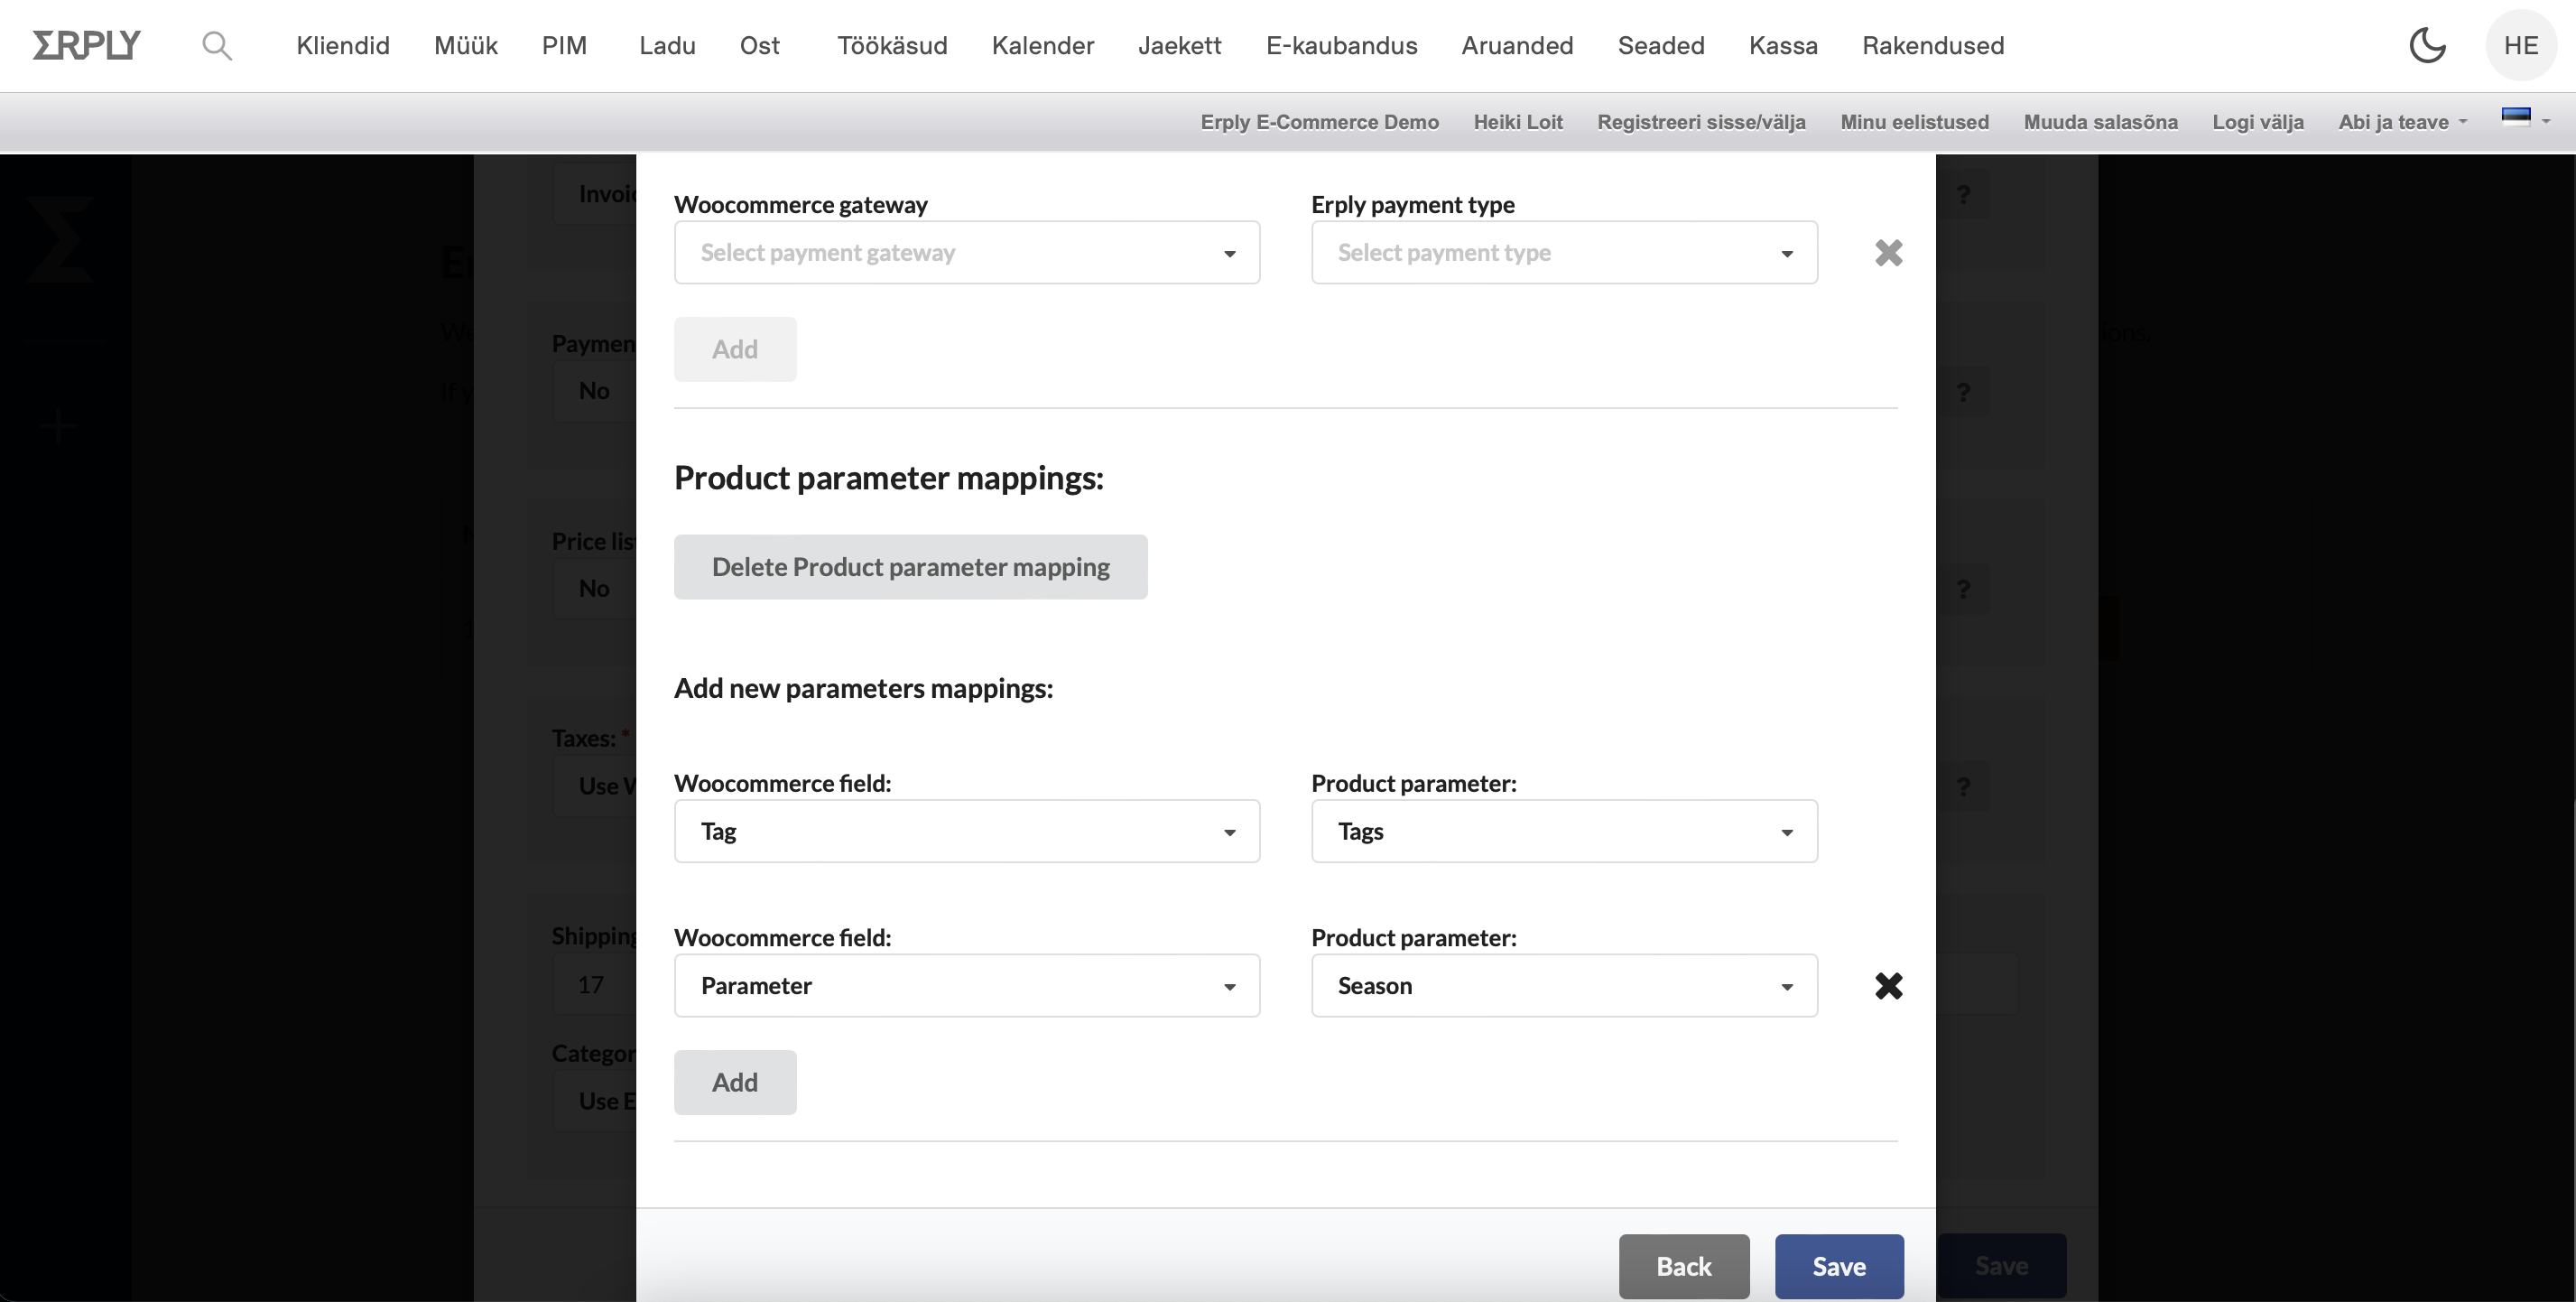
Product Parameter Sets & Mapping
Our integration allows you to create custom product fields or parameters from Erply to your e-commerce store either as WooCommerce attributes or TAG-s. To use this functionality you must first create a Parameter Set in Erply and assign different parameters to that set. Once this is done, you can map the parameters together with their intended field in WooCommerce using the mapping settings.
To find out how to create and manage Parameter Sets please follow this guide: https://wiki.erply.com/article/888-parameters
What data is being exchanged between Erply and WooCommerce
Products
The following product fields will sync from Erply to your WooCommerce webshop:
- Product name
- Product code
- Product short description
- Product long description
- Product dimensions
- Height
- Width
- Length
- Weight
- Product Price
- Price list prices
- You are able to set a price list for regular prices and sale prices
- Product image(s)
- Quantities
- Product groups (including additional product groups)
- Country of Origin
- Brand
Customers
Customer orders made from the WooCommerce webshop are synced into Erply’s back office.
With every purchase we check if the customer already exists in your Erply account by 2 variables: Name & E-Mail, If those 2 variables match up with a customer in your Erply account the sales document will be associated with an existing customer.
If any of the variables do not match up, a new customer will be created to your Erply account and the sales document will be associated with him.
Sales Documents
Sales documents are automatically imported into Erply. Depending on the payment options we also import unpaid sales documents to Erply (in case of “pay on pickup” or “pay by wire transfer”) in those cases the payment status will be “unpaid”.
We also use woocommerce webhooks for updated orders – in some cases the payment provider does not provide real-time responses if the payment has been verified and can take up to a day to do so. Once the order is updated in Woocommerce, the updated will be reflected to Erply as well.
Payments
All customer payments that are made in WooCommerce are imported to Erply and associated with the sales document. Each payment will also be associated with the correct payment type based on the payment type mapping.
Tax Rates / VAT
All product prices are sent to WooCommerce exclusive of tax. This is mainly due to different tax regulations and rules in different countries where automatic tax calculation is required during the checkout. Erply does create tax rates that are associated with the products in Erply to WooCommerce but the tax settings must be manually changed in WooCommerce accordingly. The following guide will help you navigate through the tax settings in WooCommerce: https://woocommerce.com/document/setting-up-taxes-in-woocommerce/
Integration Workflow
Our integration exchanges data between Erply and WooCommerce automatically and there is no need for any manual actions.
Sales documents are imported to Erply in real-time
Products and product updates from Erply are being exported to WooCommerce after every 15 minutes
Product quantities from Erply are being exported to WooCommerce after every 5 minutes