This guide explains how to set up and apply taxes with Erply. Erply supports multiple tax rates and tax scenarios.
To find out what tax rates apply to you, please consult your city or state tax code, or an accountant who knows tax laws in your areas of business.
Creating a Tax Rate
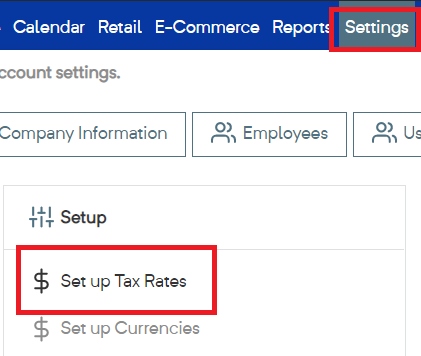
In the back office, navigate to the Settings module and select Set up Tax Rates.
Note: Existing tax rates cannot be edited or deleted from the system.
Click New and enter the name of the tax rate and the % to be applied.
We recommend including the tax rate % in the name of your tax for full transparency throughout the system. For example, “NYC - 8.72%”
Note: The tax rate should be your total applicable tax rate. If your state charges 5% and your city charges 2%, you need to combine them to get your effective rate (7%)
Click the Save button. Once saved, the percent cannot be changed. Instead, new rates may be added and old rates may be renamed or assigned new numbers in your accounting software.
Tax Code
The tax code field enables you to set account codes for your accounting software. This field works in conjunction with Erply Accounting and the Erply QuickBooks export.
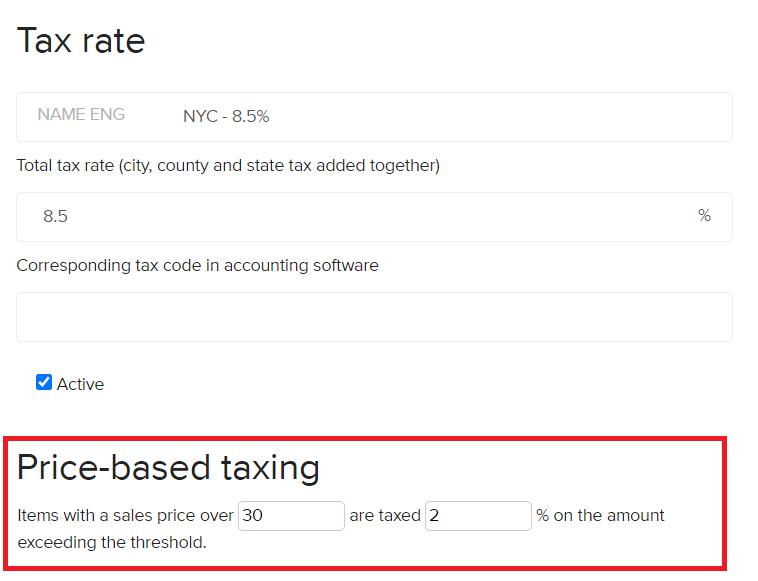
Price-Based Taxing
In some locations, some items are taxed differently for the portion of the item’s price that is over a set threshold. This taxing method is used in Massachusetts, for example, for certain product categories.
This type of tax rate is added as a regular rate, then applied like a normal rate.
If an item’s sales price is over a certain threshold, then the value below the threshold is taxed with one rate (which can also be 0%) and the value above the threshold is taxed at a different rate.
Priced-based tax rates can be associated with a register or product group so they can apply automatically when needed.
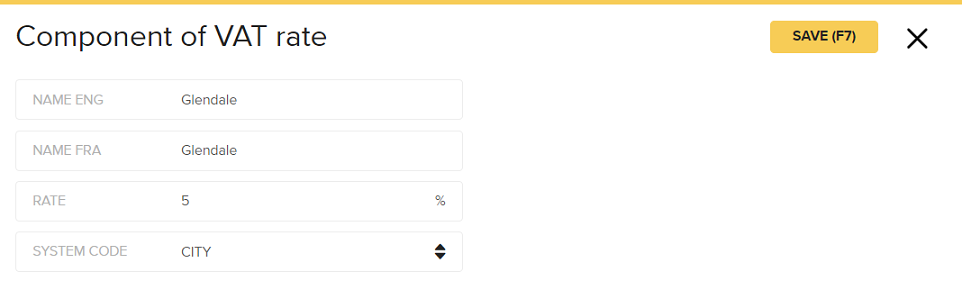
City/State/County taxes
The ability to break down taxes by city, state, and country is a paid feature that must be enabled by Erply support.
Once enabled, you can find the Component of Sales Tax section under the Tax Rates settings.
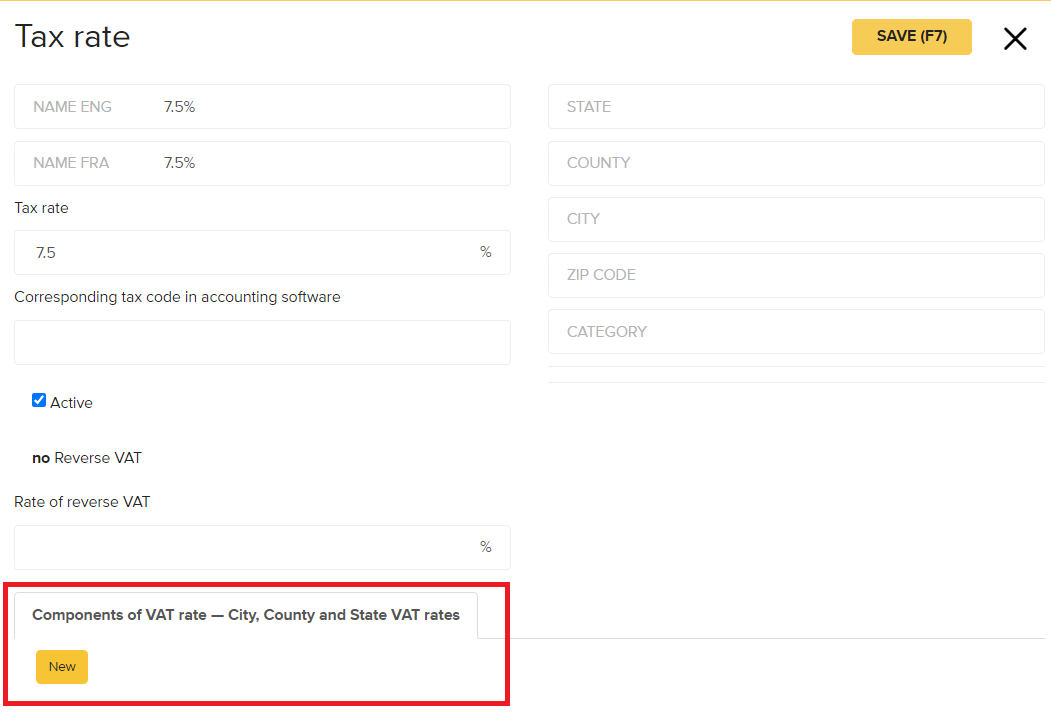
Numeric values should be entered in the fields.
Applying Taxes
Tax rates must be applied before they take effect. There are several ways you can apply tax rates depending on your usage.
Register-based tax rates
Tax rate applied to a register override tax rates set on items or product groups. This is the most common and usually best set up.
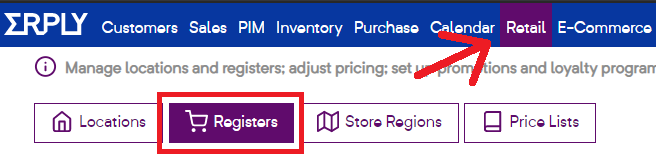
In the back office, navigate to the Retail Chain module and select Register. Select the register where you’d like to apply the new tax rates.
Click on the default tax rate dropdown menu and select your newly created tax rate.
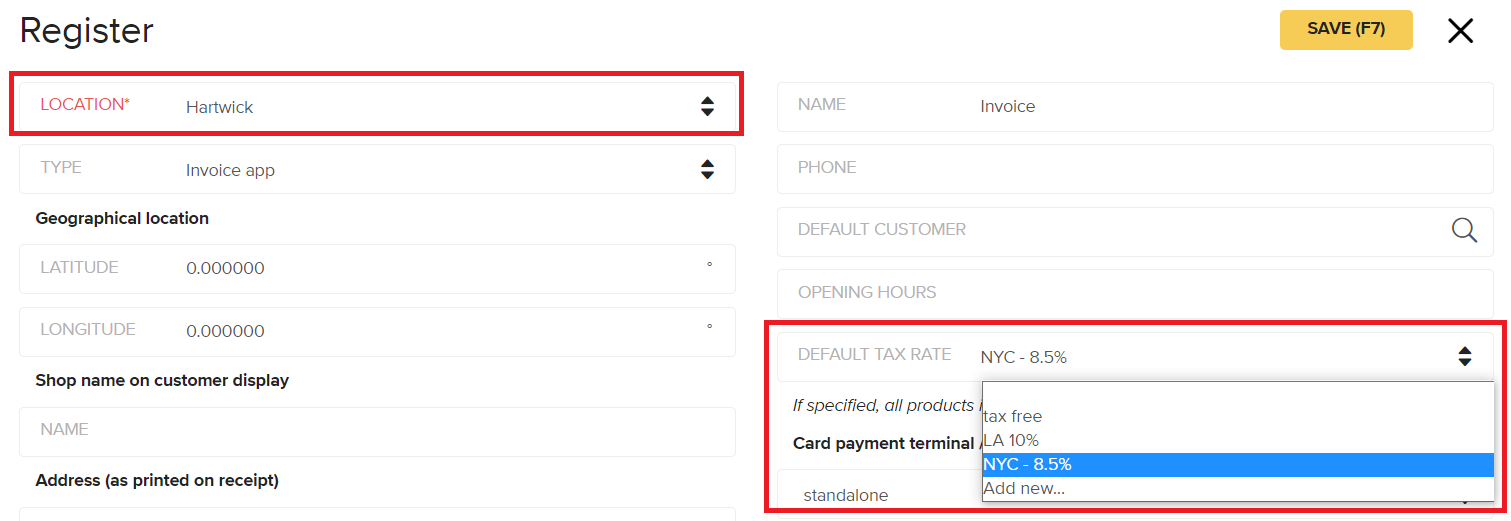
Click Save to save your changes.
Note: If you are logged into this Register currently, you may have to log out then back in again to apply the tax rate
Product group-based tax rates
Tax rates can be assigned by product group and location. A register must already have a tax rate set on it for these to work. Product group-based tax rates are often used for non-stock items (services) or items that may have different tax rates under your state’s tax laws.
Product group-based tax rates only affect products within the product group at the location specified.
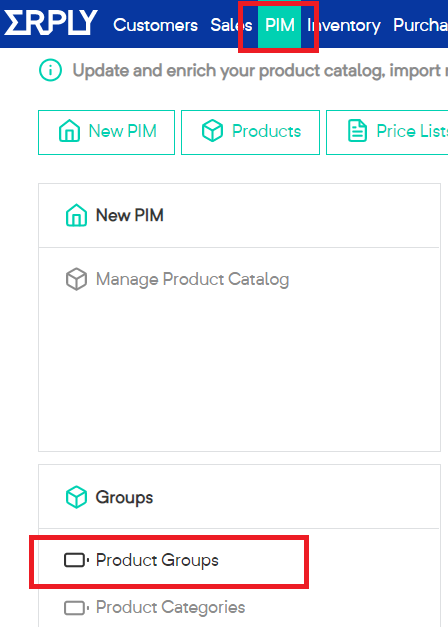
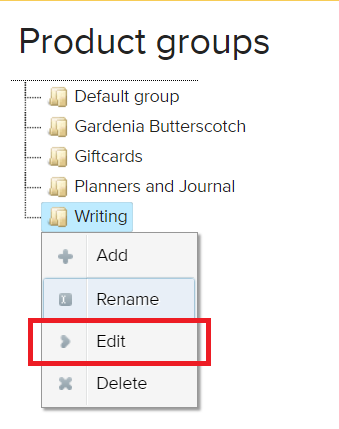
In the back office, open the PIM module and select Product groups
Right-click a product group and select Edit.
Select a tax rate.
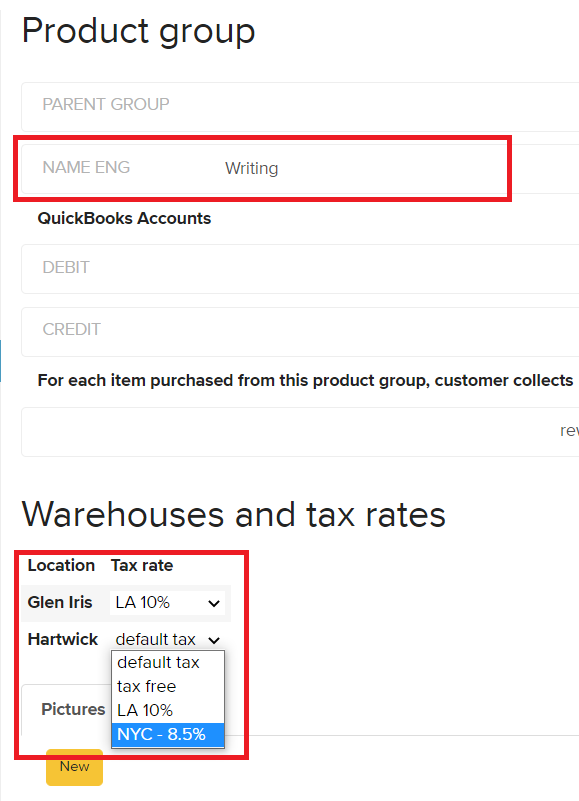
Click Save to save your changes.
Note: If choosing to set all taxes by product group please note you will need to assign a tax rate to each one. If left to “default tax” it will take the tax rate from the register or product card.
Note: Tax rates are not "inherited" by lower product groups. If you want a tax rate on a child, or tree-d product group, you must set it in each group.
Tiered tax rates
Tiered tax rates are set up at shop level (Location), and are a lower priority than product group rates. Tiered taxes are used in the state of New York, for example; an item's tax rate depends on its retail price:
Clothing and footwear under $110 are exempt from New York City and NY State Sales Tax. Purchases above $110 are subject to a 4.5% NYC Sales Tax and a 4% NY State Sales Tax.
If a shop sells both clothing and other kinds of items (non-clothing), you need to set up tiered tax as the default and configure exceptions for all other product groups.
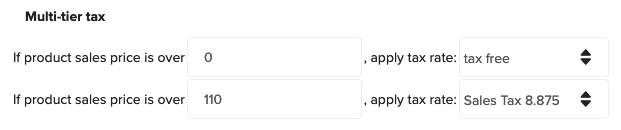
In the back office, navigate to Retail Chain and select Locations. Click on a location and scroll down to the Multi-tier tax section.
For all other product groups that do not need this type of rate, tiered tax rates need to be overridden using product group taxes.
Erply lets you set up two tiers. Enter the lower tier first, higher tier after that, and specify tax rates for both tiers:
Product level tax rates
Product level tax rates are attached to each product. They will not properly apply if a product group or register tax is applied.
Product level tax rates are generally only used if you have a lot of applicable taxes.
Tip: When items need to be taxed individually, the most time-effective way to assign tax rates is to import this information. To do this, taxes should be set-up first, then the percent should be noted on the import sheet in the ‘tax rate’ column. There should be no % sign in the document.
In the back office, navigate to the PIM module and select Product catalog. Click the name of the item that you want to add a tax rate to.
Scroll down to the tax rate section and select the applicable tax rate from the dropdown menu.
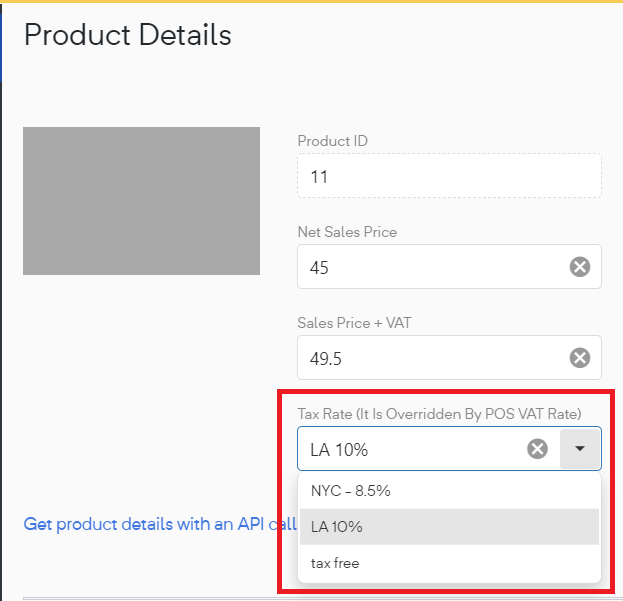
Click Save to save your changes.
Note: If this product is sold through a register with a tax rate applied, the register will override the tax rate.
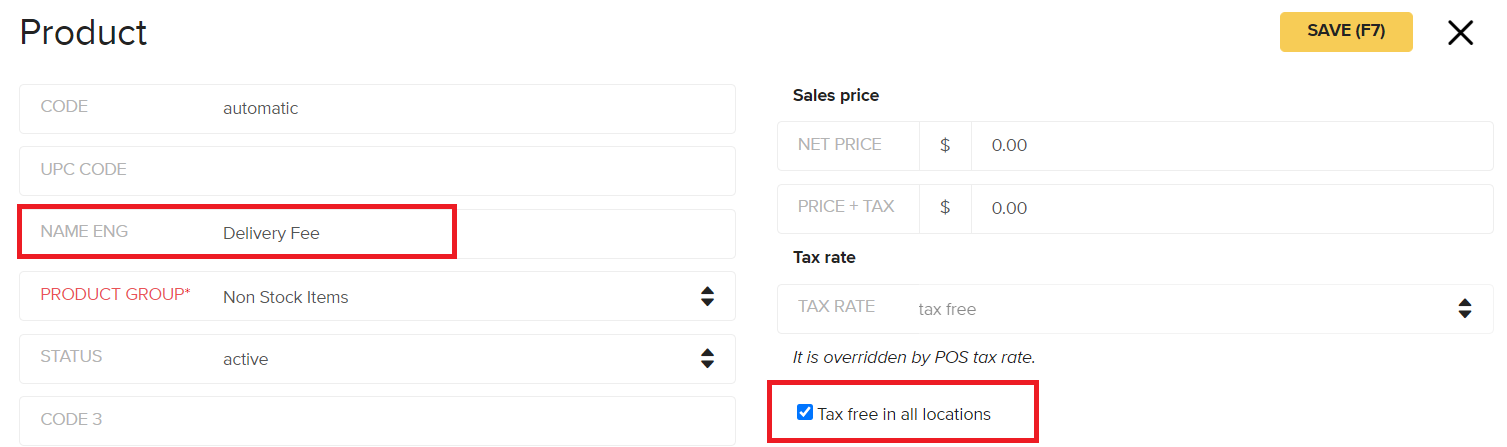
Tax free in all locations
When this checkbox is enabled on a product, it overrides VAT rates set on the item otherwise (by group, item, or register). This is for items that are never taxed, such as stamps, or some non-stock items.