Supported payment terminals
Ingenico Lane 5000

Required OS system
Only Windows.
Step 1. Install the Installer app
If you do not have the Installer app installed yet, please refer to the article.
Step 2. Connect the E-service terminal with your computer
Once the terminal is connected to the internet and powered ON, we can proceed with the next step.
Important: make sure that the terminal is in the same network as your computer!
Step 3. Setup the E-service microservice in Wizard
Navigate to the Wizard.
Login with ERPLY credentials (client code, username, password).
From the ADD NEW MICRO-SERVICE dropdown list select the ‘eservice-pl’.
Press ‘Continue’.
In the ‘eservice-pl’ configuration page check the config file(“new configuration” section on the right side).
On the terminal check the the terminal IP address (Press F button on the terminal -> Control Panel -> Terminal Settings -> Communication means -> Ethernet)
Enter the IP address to the microservice config file:
{
"Port": 5658,
"SSLEnable": true,
"production": true,
"websocket": true,
"ip": "xxx.xxx.x.xxx",
"port": 3000,
"printoutLayout": "DICT",
"printoutLineSizeInChars": 38
}
Once done press the blue button "save config” on the left side.
Now press the green button “Start”.
Step 4. Create a configuration parameter in Configuration Admin module
Log into https://login.erply.com/ and select “Back Office”.
Click on the Settings -> Configuration Admin.
From the list select the ‘self_checkout_pos’.
Press “+Add new configuration”.
Note: If you don't see ‘self_checkout_pos’ in the list, Please manually add it.
From the ‘Level’ select the “Company”.
No need to edit ‘Level ID’ ad ‘Type’!!!
Into the ‘Name’ field enter “EFT”.
From the ‘Value’ dropdown select “string”.
Into the new ‘Value’ field that appeared after “string selection, enter the value “eservicePL”.
Press “save changes”.
Step 5. Make sure the Cayan Microservice is installed in your Erply Wizard ( https://posow.erply.com )
In your Erply wizard, Click "Hardware" on the upper left > "Integrations" > Choose " POS " in the Tab > Select your " POS ID" > Payment Terminal and Continue.
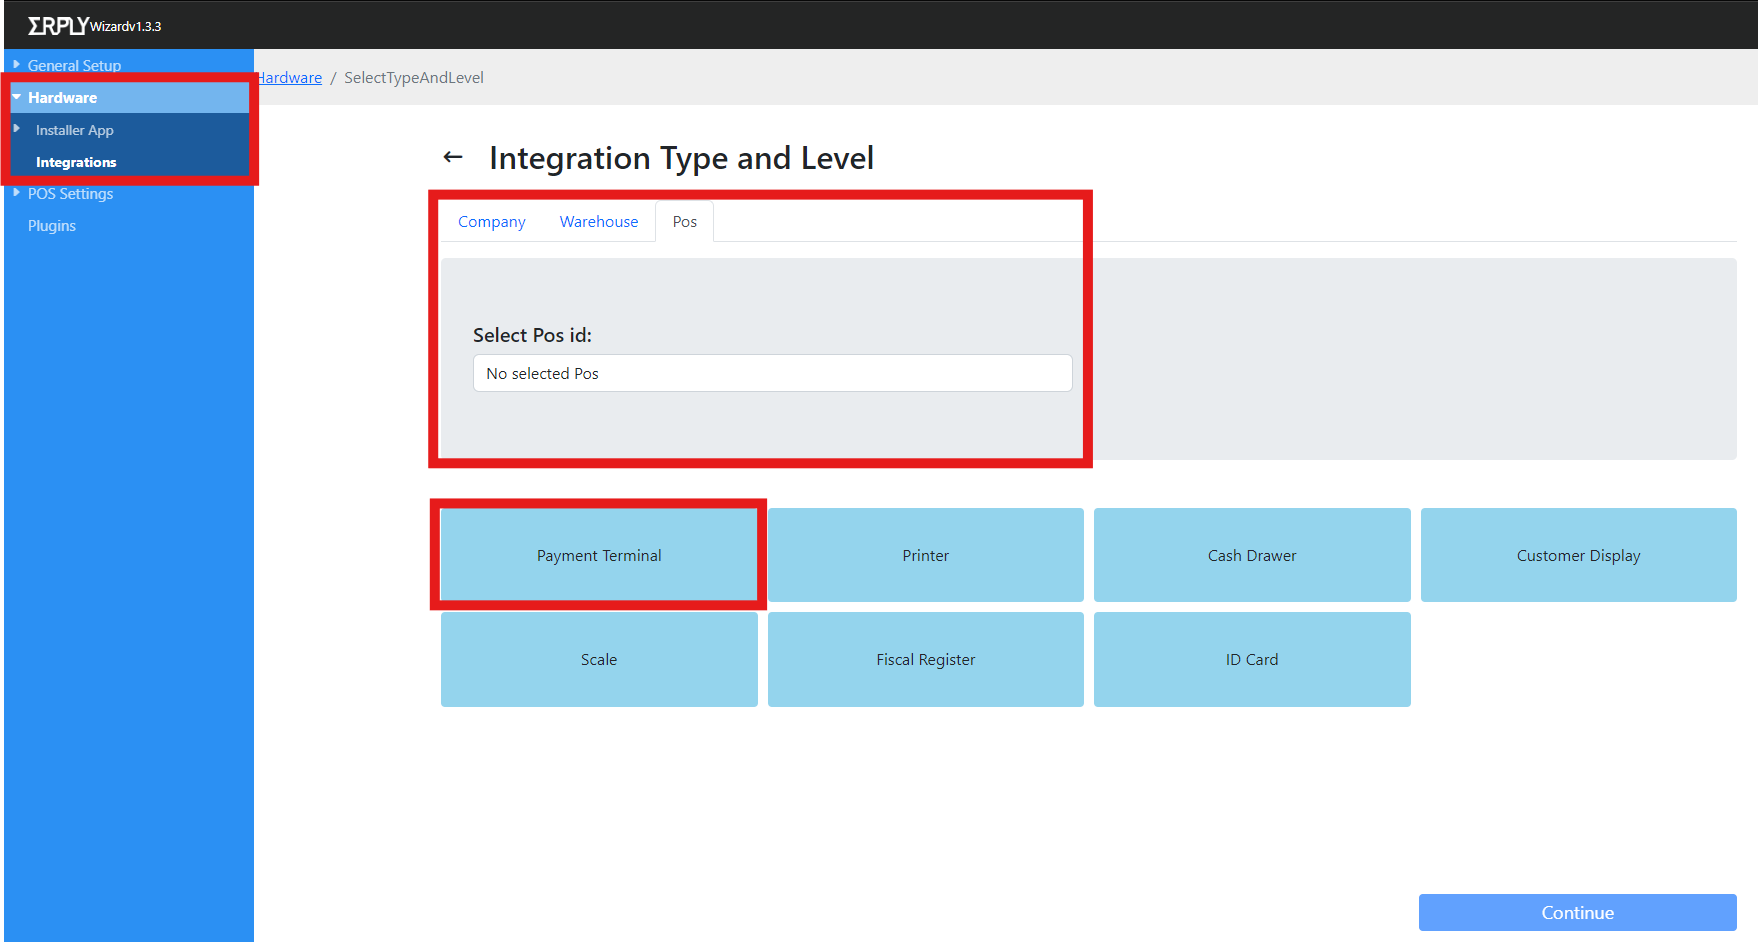
On the "Available Integrations for Pos level" > Choose your current Payment Integration
Click "Install Latest" and wait for it to be installed properly
Note: Ensure the Account Credentials and Device IP are correct for your Payment Integration setup and Save.
Once Done, Relaunch your SCO (Self Check-out) App.
Terminal is configured and you can proceed with testing with your Self-service checkout POS!