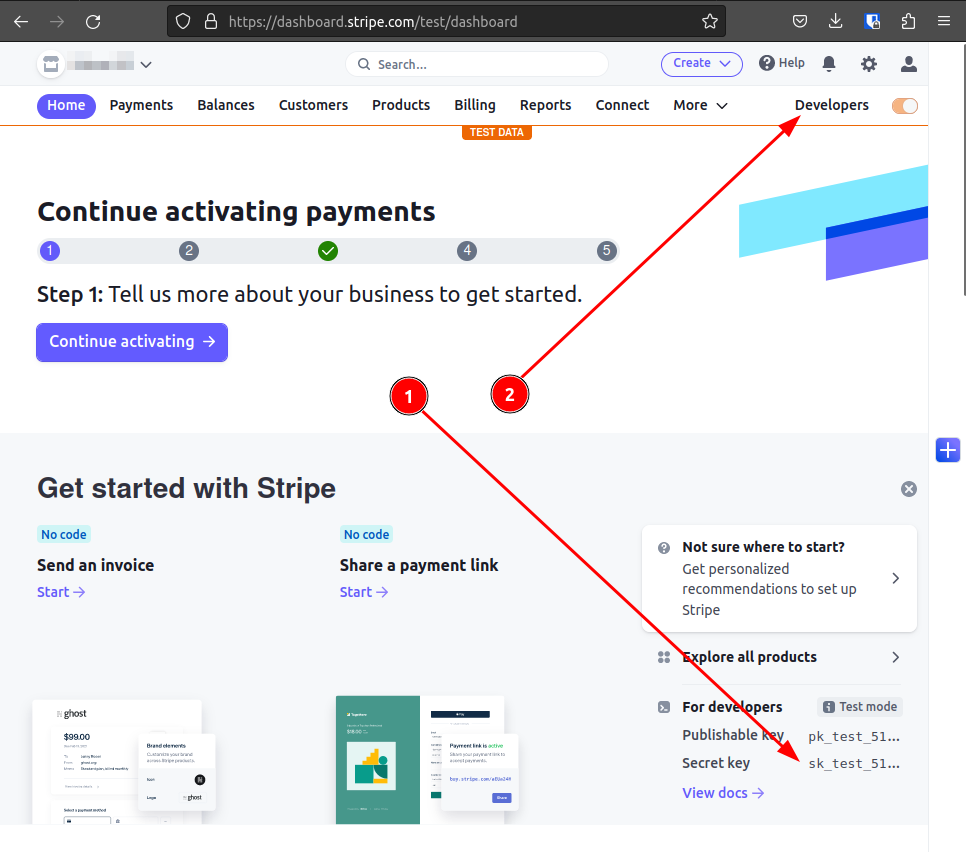
Getting the API Key
1. Click the Developers > API Keys > then reveal the Secret Key and copy it
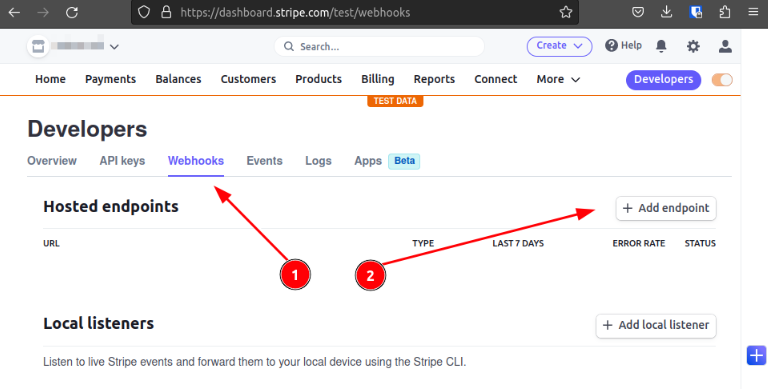
Creating Webhook
1. Go to webhooks tab
2. Add endpoint
1. Endpoint URL is https://str-int.erply.com/wh
2. Select events that will be sent to Erply
1. Search for "checkout"
2. Select event "checkout.session.completed"
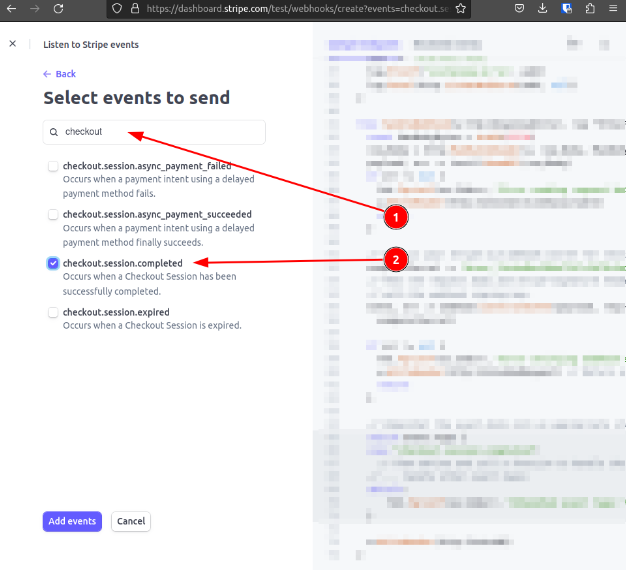
3. Click Add events.
Now we are ready for the Erply setup
Erply setup

From the screenshot above
1. Insert the API key which is the Secret key we saved from step 1 of the Stripe setup
2. Insert the Webhook key taken from the Stripe webhook page.
Notice that the webhook key starts with "we" instead of "whsec", you have to change that to make it whsec_*******

3. Add https://str-sb.erply.com
Note: You can customize fail and thank you pages. If empty, the default pages are used. If you want to have page with your company logos, make a folder /files with 2 files in it: fail.html and success.html. Insert URL of the files folder here. For example, if your customized success page has URL https://example.com/somefolder/files/success.html you need to write here https://example.com/somefolder
4. Select Automatic sending.
5. You can customize email. The email has always 3 parts. The beginning which you can edit here, the middle part which is a generated link, and the lower part which you can also customize.
6. Lastly, Make sure to hit Save.