The rest of the settings are available under the gear icon.

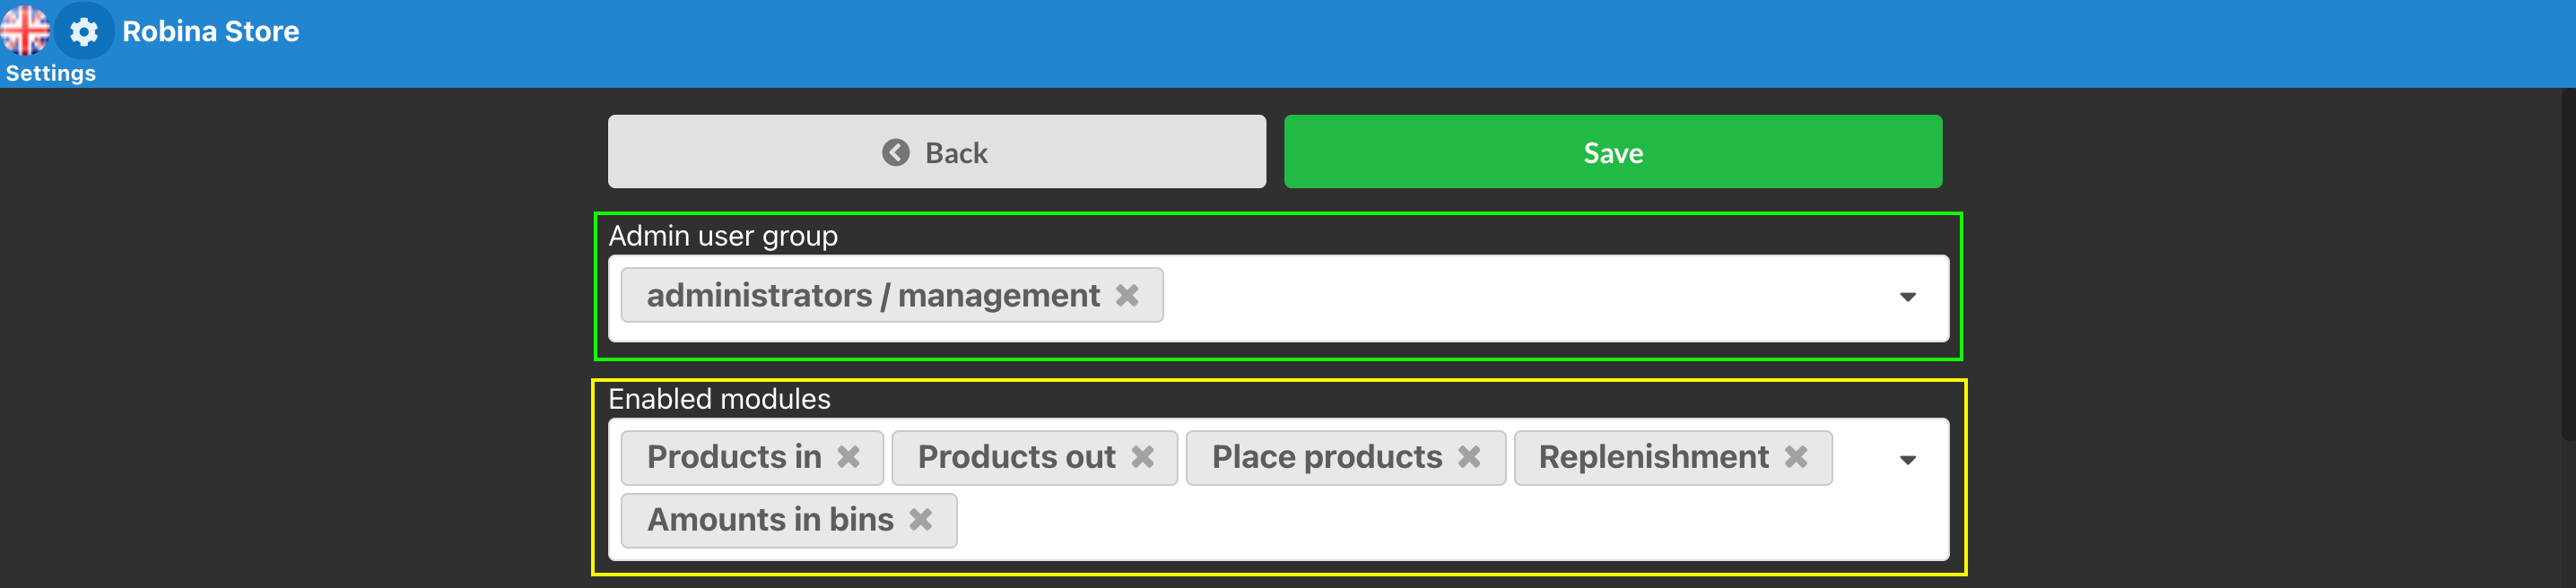
At the top, it is possible to assign Admin user group for WMS environment. It is linked to your Erply account and by default, only administrators/management user group is added.
Under the admin user group, it is possible to see the enabled modules for your Erply account. These modules are added by Erply support team, so if you are missing anything, please reach out at support@erply.com.
NB! Before starting using WMS, please make sure you have quantities in bins enabled. Otherwise, you will received error code 1006.
Once you enable rapid scan, the default quantity for each scan is 1.

Activate locations in warehouse if you company uses locations system in your warehouse.
It is possible to activate "Scan to suggested bin" in order to use default locations, so there is no need to scan the location in warehouse each time.
Toggle the "Create an inventory registration on bin amount change" setting for creating registration documents in case of changing the bin amounts. By default, no documents are created.

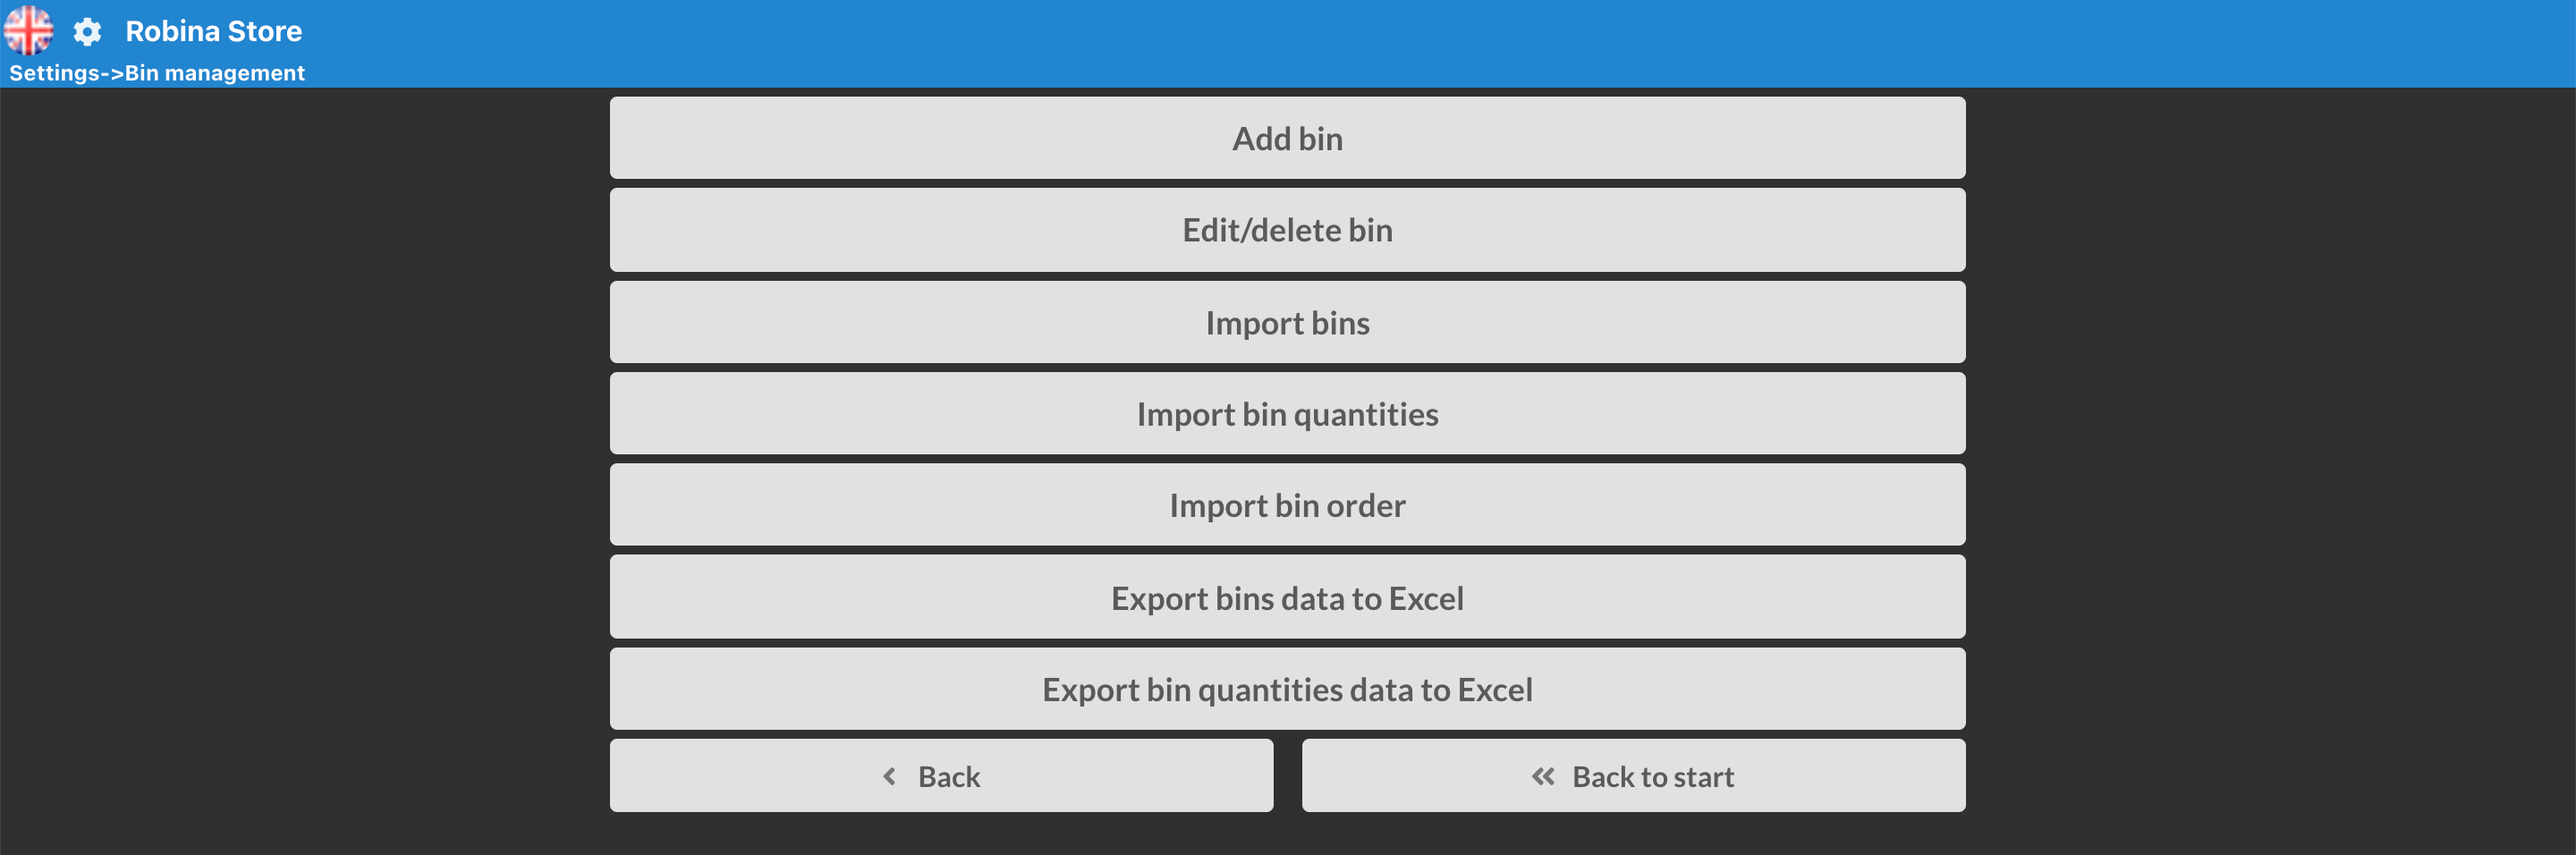
Select "Bin management" in order to add/edit/delete bins and perform other bin related tasks.
It is possible to define products that are automatically added to the destination document without scanning. It means that all the products that are marked on the below field, are automatically added to purchase/sales invoices when scanning purchase/sales orders. There is no need to scan these products again.
Please note that these EAN codes must be added comma separated.

Choose a document type after handling purchase orders. It is possible to create purchase invoice-waybills or just purchase waybills.
When enabling creating a sales document after handling sales orders, it is possible to choose a document type from the dropdown menu: either waybill, invoice-waybill or from client card. The last means that there is a setting enabled on the client card which states that this client is a waybill client.
*In order to have a waybill client setting enabled, please reach to our customer support team and ask them to enable the following parameter: enable_waybill_customers = 1

There is a list of settings for enabling creating different documents: waybills, inventory transfer orders, write-offs, etc. In order to create write-off documents, the "Reason codes for inventory registrations" module must be activated on your Erply account.
Also, it is possible to define whether the created documents are confirmed or drafts. (The status can be seen in the Erply back office.)

It is possible to choose whether the "amount" is already prefilled with the amount on the document when scanning sales / purchase / inventory transfer order documents.
Also, in order to allow issuing/taking in larger amounts than on documents, please enable the settings below.

"Enable EAN change when receiving goods" allows adding and editing the EAN codes in WMS in the middle of the scanning process.
*Please note that the changes will be reflected also in the back office.

"Enable repeated inventory transfer order scan" allows scanning the same inventory transfer order in multiple parts. By default this setting is not enabled.

In order to use an in-transit warehouse, please assign its ID below.
*You can check the warehouse ID in the back office > Retail Chain > Locations.
If there are differences on the received document compared to the initial order, you can enable emailing differences. You can choose if the email is sent to the order creator, supplier or customer manager or a custom email address.

It is possible to show package calculations when enabling the below setting, but that requires setting up packages in the Erply back office > PIM > Product Card > Packages.

It is possible to enable different interfaces from the below button: Telema, DPD, Venipak.
*Please note that these interfaces are specific to certain markets and might not work in your country. Please reach to Erply Support to get more information.

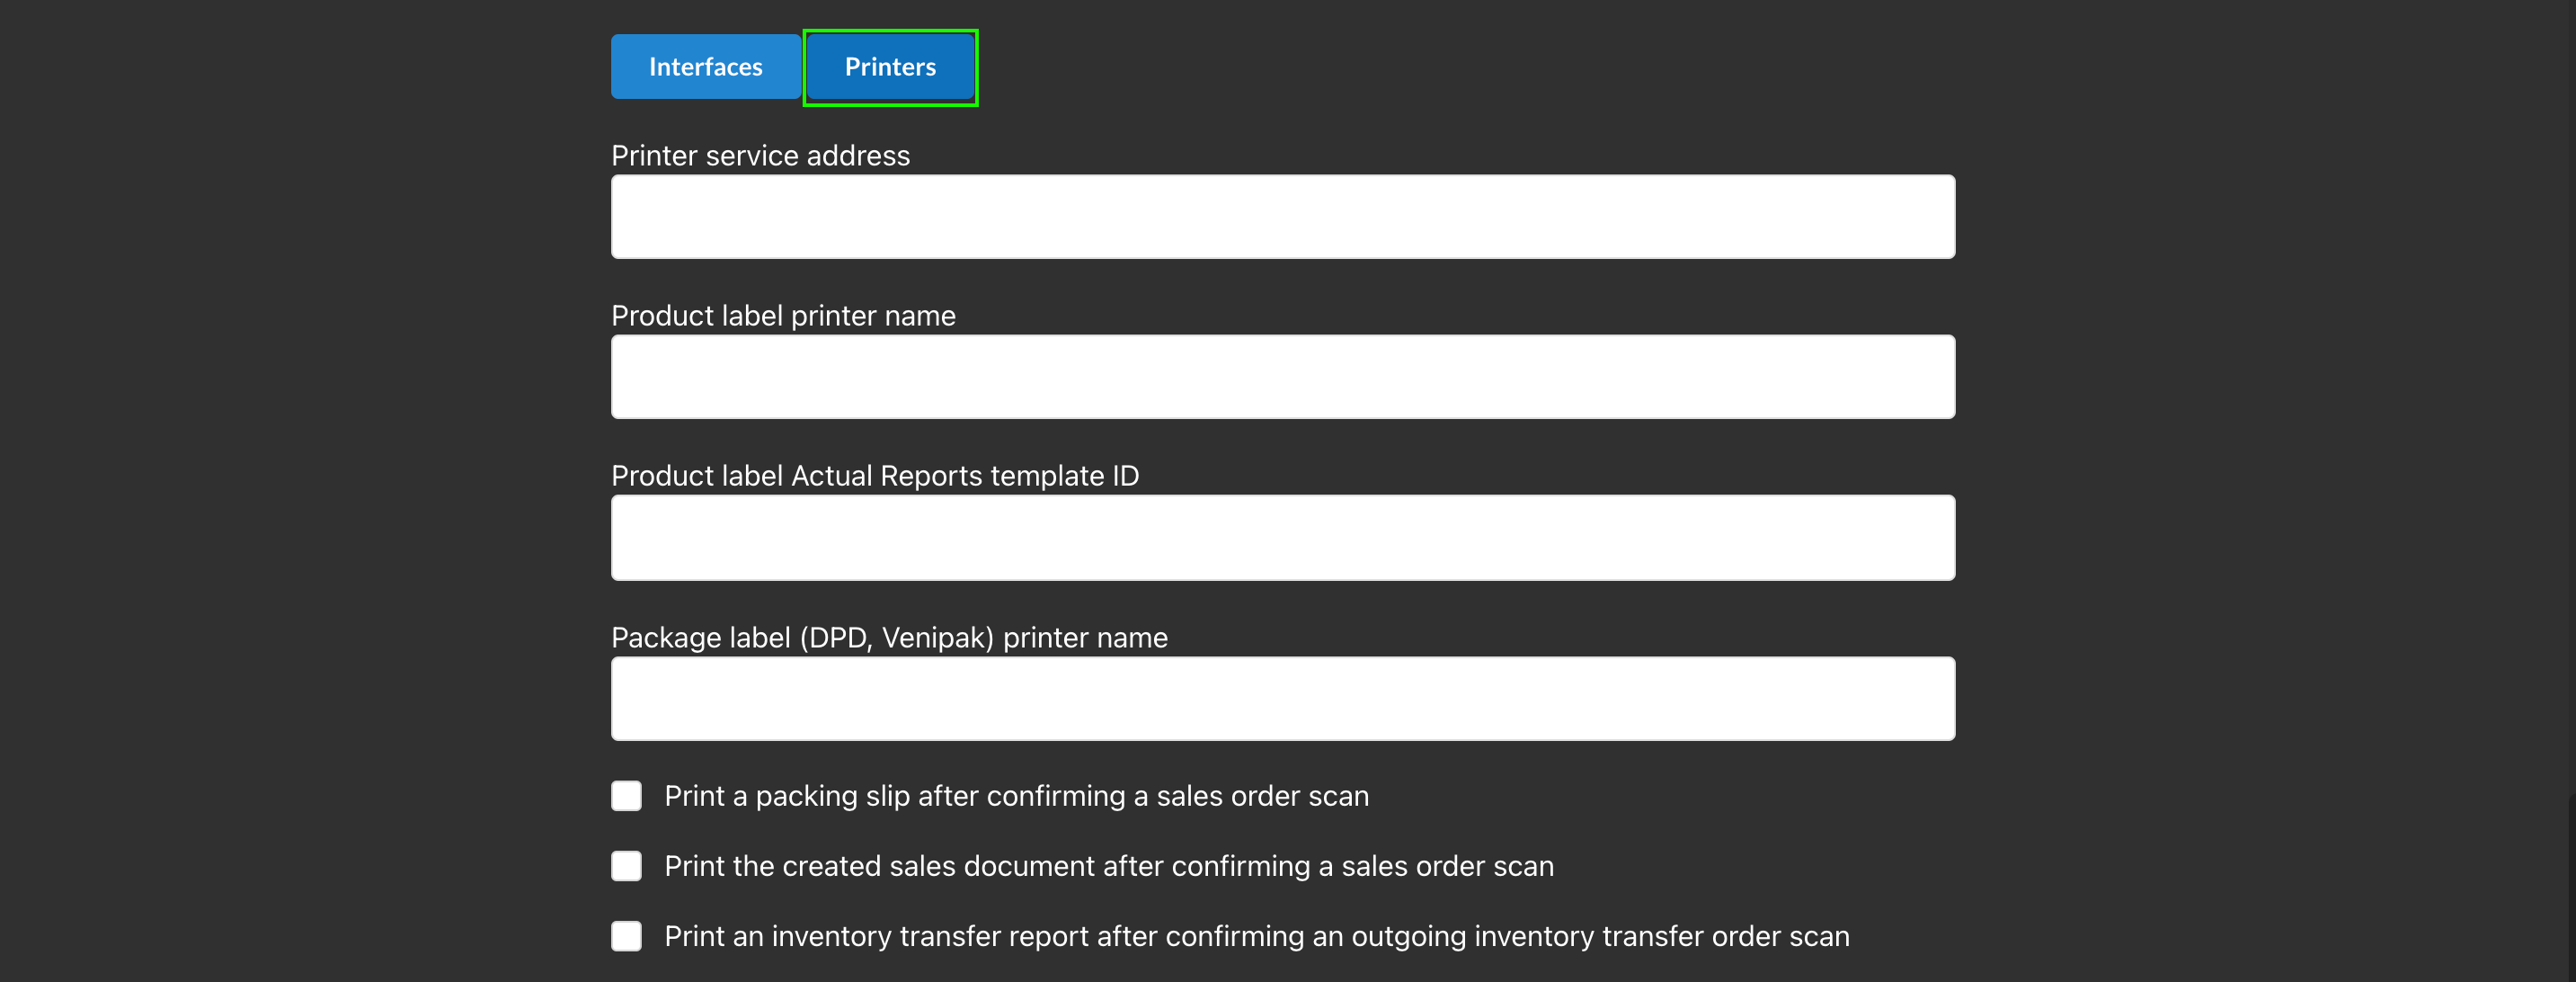
In order to set up printing, please open the settings under the "printers" button.
On the first field please define the printer service IP address followed by the printer name on the next field. You can double check your printer's exact name in your device settings (eg when using a Windows computer, please check Printers & Devices page, when using a Macbook, please check Printers & Scanners page).
From the Erply back office, please check the Actual Reports template ID and configure this under "Product label Actual Reports template ID".
*You can check the template ID when you open the Actual Reports and check the ID on the url bar.
When enabling creating a sales document after handling sales orders, it is possible to choose a document type from the dropdown menu: either waybill, invoice-waybill or from client card. The last means that there is a setting enabled on the client card which states that this client is a waybill client.
*In order to have a waybill client setting enabled, please reach to our customer support team and ask them to enable the following parameter: enable_waybill_customers = 1
There is a list of settings for enabling creating different documents: waybills, inventory transfer orders, write-offs, etc. In order to create write-off documents, the "Reason codes for inventory registrations" module must be activated on your Erply account.
Also, it is possible to define whether the created documents are confirmed or drafts. (The status can be seen in the Erply back office.)
It is possible to choose whether the "amount" is already prefilled with the amount on the document when scanning sales / purchase / inventory transfer order documents.
Also, in order to allow issuing/taking in larger amounts than on documents, please enable the settings below.
"Enable EAN change when receiving goods" allows adding and editing the EAN codes in WMS in the middle of the scanning process.
*Please note that the changes will be reflected also in the back office.
"Enable repeated inventory transfer order scan" allows scanning the same inventory transfer order in multiple parts. By default this setting is not enabled.
In order to use an in-transit warehouse, please assign its ID below.
*You can check the warehouse ID in the back office > Retail Chain > Locations.
If there are differences on the received document compared to the initial order, you can enable emailing differences. You can choose if the email is sent to the order creator, supplier or customer manager or a custom email address.
It is possible to show package calculations when enabling the below setting, but that requires setting up packages in the Erply back office > PIM > Product Card > Packages.
It is possible to enable different interfaces from the below button: Telema, DPD, Venipak.
*Please note that these interfaces are specific to certain markets and might not work in your country. Please reach to Erply Support to get more information.
In order to set up printing, please open the settings under the "printers" button.
On the first field please define the printer service IP address followed by the printer name on the next field. You can double check your printer's exact name in your device settings (eg when using a Windows computer, please check Printers & Devices page, when using a Macbook, please check Printers & Scanners page).
From the Erply back office, please check the Actual Reports template ID and configure this under "Product label Actual Reports template ID".
*You can check the template ID when you open the Actual Reports and check the ID on the url bar.