The Self-Service Checkout is located at https://sco.erply.com or download the Self-service checkout launcher HERE.
Unzip the downloaded file on your computer and create a shortcut for more convenient access to the self-service checkout. To use the self-service checkout, contact customer support at abi@erply.com
Important: We recommend creating a completely separate register in Back Office for the Self-Service Checkout, to better follow sales statistics etc.
Setting up a self-service checkout
For setup, it is necessary to download the Self-Checkout POS settings application from the Erply App Store.
- Navigate to the Back Office -> Apps
- Search for the Self-Checkout POS settings.
- Click “Install”
Click on “Open” button.
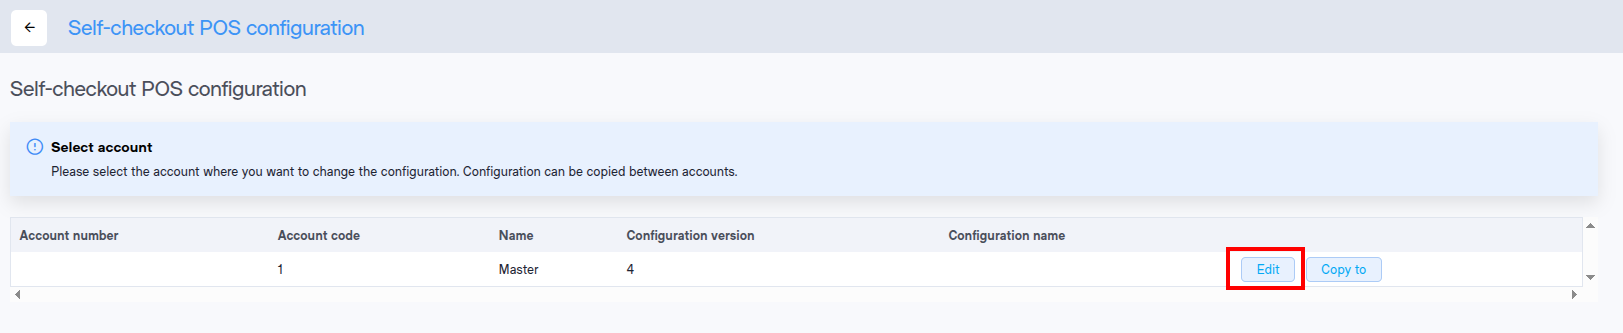
Click on “Edit” button.
General settings
Set versions
The field 'Version' is not editable. Each time when you will save SCO configuration the system will create a new version automatically and number will be changed in this field.
The ‘Version name’ filed can be empty.
'Application version': Always use the latest version of application to use always up-to-date version. If you noticed some important issue on the particular version, in this case you can the version of application to enable more stable version.
Languages
Enter languages that you would like to use in SCO application.
For example: if you are located in Estonia, put en,et (note: do not use 'space' between languages).
Employee discount
Select in which mode to enable the employee discount: Cashier, Full, Lite.
Toggle the “Supervisor” if you like to ask a supervisor approval.
Manual promotions
Enable modes where you like to use manual promotions: Cashier, Full, Lite.
Additional information
Transaction Product Line Limit - by default the maximum number of product lines is 50, if you need more lines, you can set it here.
Manual Voucher Input
Transaction MOP Limit - limit of different payment methods per transaction (split payment).
Gift Card Item Code - gift card item code.
Gift Card Activation Limit - gift card activation limit, does not allow adding more gift cards to the transaction
Transaction Timeout - transaction timeout time in seconds
Scan Customer Card Timeout
Receipt Timeout
EFT - payment integration (for Swedbank put swedbankIngenico; forAdyen - adyenms).
Bag Item Code - the product code of the shopping bag, if you want the quick selection button for the shopping bag at checkout
Unknown Item Code - Product code that is used when the product is not found in the database
Price Decimals - Number of decimal places
Thousands separator
Cash In Limit - Cash deposit limit
Cash Out Limit - Cash payout limit
ODS
ODS - Local product database (offline-product-database micro-service). Need to set the url where (default: http://localhost:7779) This is intended for use with a large number of products (more than 100,000).
Receipt type title
Setup the title for different types of transactions: Sale, Refund, Duplicate(duplicate doucument).
Imported Item Info
Setting the welcome text and transaction completion text

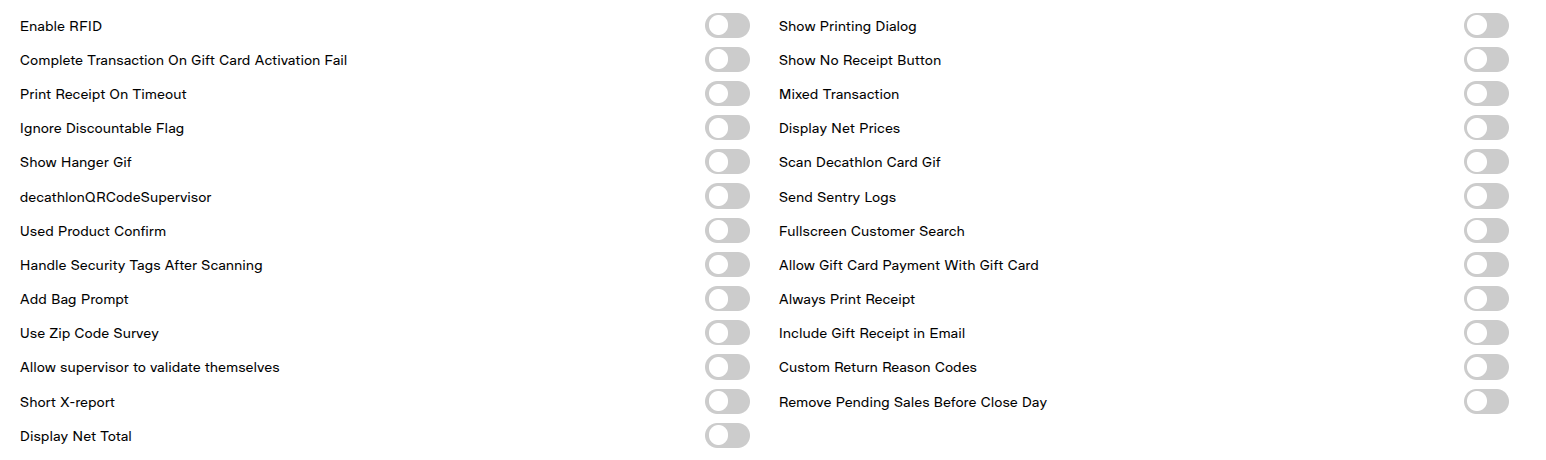
In the end of General settings you can find another options that can be also enabled:
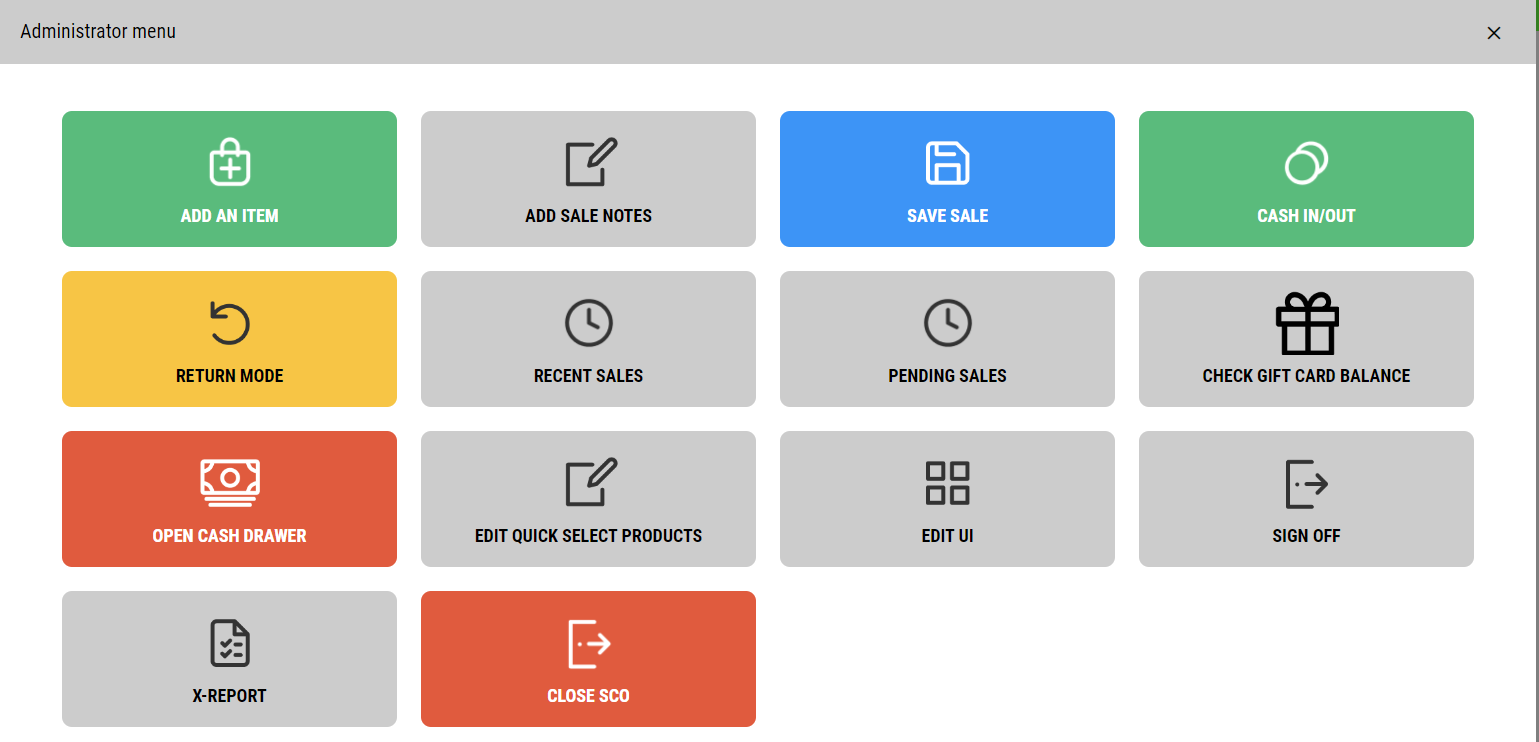
The administrator's menu in the self-service checkout
The employee has the opportunity to change some settings at the checkout. To enter the administrator's menu, it is necessary to first assign a PIN code to the employee on the Erply's user card.
Possible settings/options:
- Add product - you can search for a product only by code or by scanning. Product search by name is available in the customer view.
- Save sale - using this, the sale remains saved but unconfirmed and can be confirmed later in Erply. Sales recorded but not confirmed at the end of the day are automatically cancelled.
- Checkout in/out - used only if cash sales are allowed at the self-service checkout. Requires reason codes set up in accounting software.
- Return - the shopping cart view opens, where you can select the product to be returned. NB the quantities in the shopping cart are automatically minus. It is necessary to select a reason code. A credit note will be created. There is no need to have a base invoice when returning goods through the self-service checkout.
- Recent sales - here you can see the latest deals. From there you can print a purchase receipt, send it to an email or print out a gift voucher.
- Cash drawer - the possibility to open the cash drawer (if it is available for cash transactions)
- Change quick options - you can change their order and position by dragging the buttons. The cross in the corner of the button removes the product from the self-service checkout selection.
- Customize the user interface - see below
- Log out - logs out and closes the current session
- X-report - X-report is displayed on the screen
- Close day - A confirmation window opens to close the day. Pressing the "Confirm" button closes the cash register and displays the x-report on the screen. If cash sales at the checkout are not allowed, then the expected cash amount is not displayed either
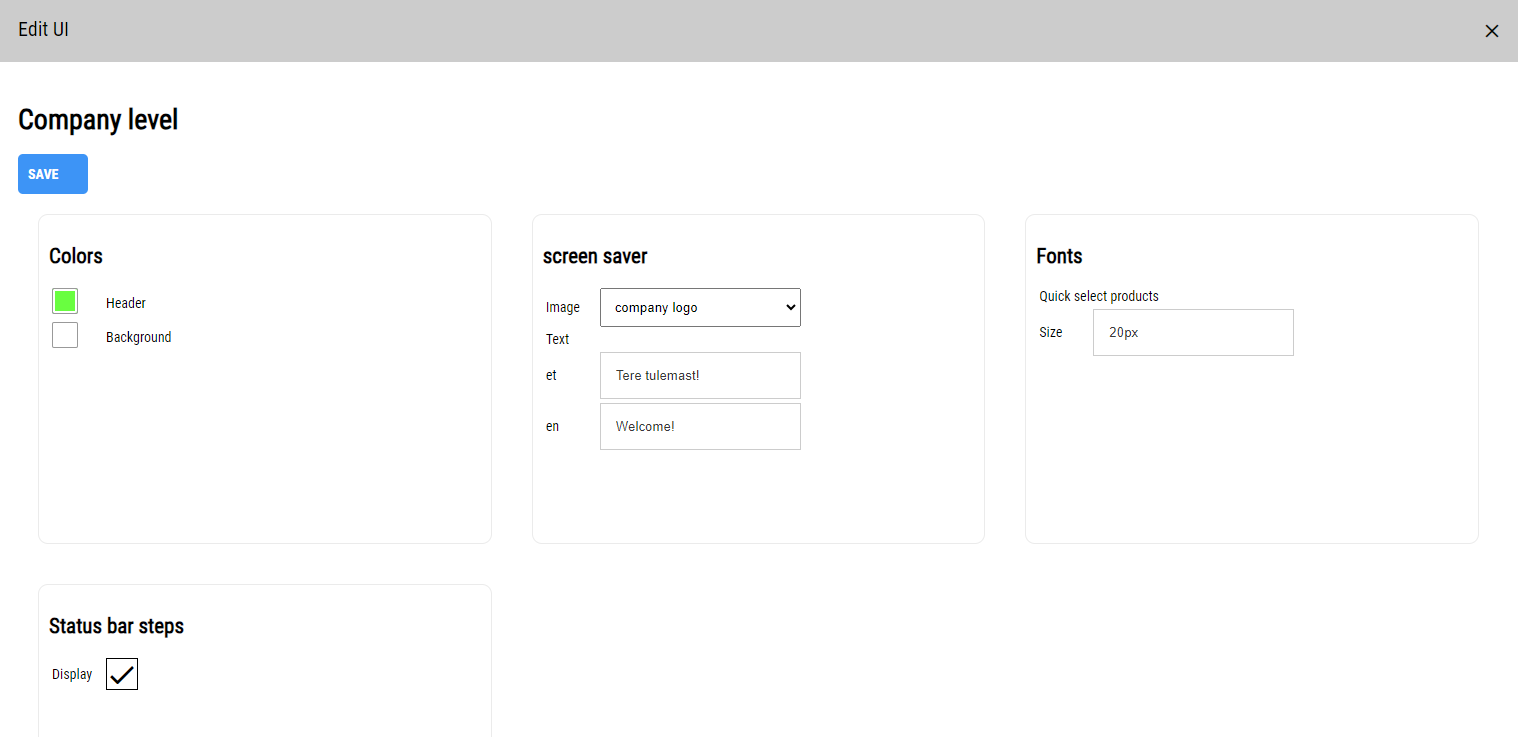
Edit UI has the following subsections:
Company Setup:
- Colors: Can change the color displayed in the header.
- Home screen: you can add a home screen image and welcome text, also in Russian and English, if desired.
- Fonts: This is where you set the size of the text on the hotkeys.
- Status bar steps: can be shown or hidden in the "scan-pay-done" header
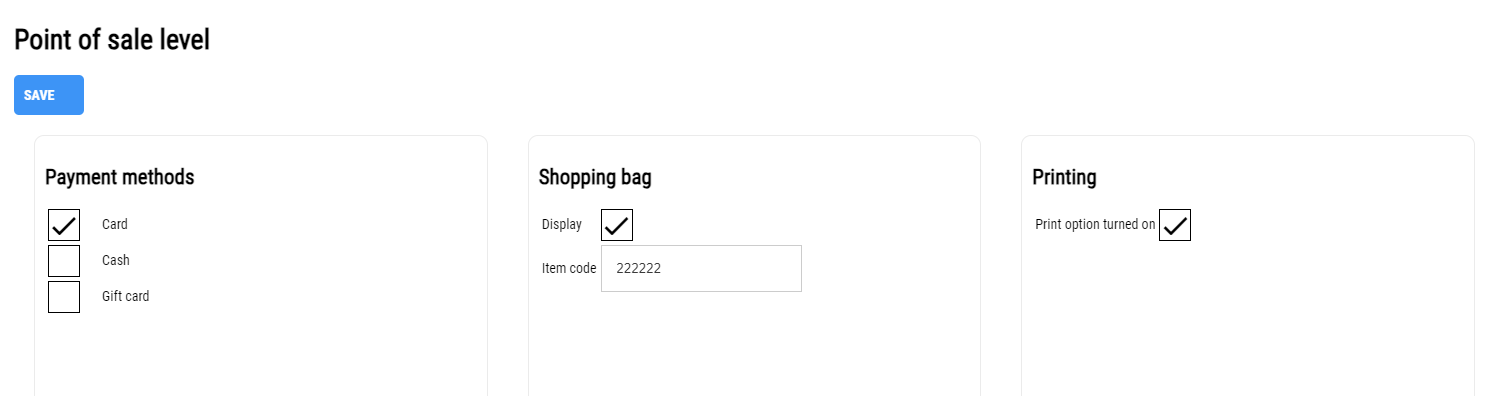
Checkout setting:
- Payment methods: you can choose the payment methods used in the self-service checkout.
- Shopping bag: A product card must be created for the shopping bag in Erply beforehand. To display at the self-service checkout, enter the product code and add a checkmark to display the shopping bag in the customer panel. Save.
- Printing: option to choose whether the receipt printing is enabled by default or not.
FAQ
How can I set up to open the Self-Service Checkout in desired mode?
You can shortcut the following link https://sco.erply.com/?autologinMode=lite.
In the end of the URL put ‘lite’ or 'full' depends on desired SCO mode.