Create a contact person at the Back Office
Before creating a contact person, select the company for which the contact will be created.
In the Back Office navigate Customers, search the company using customer search.
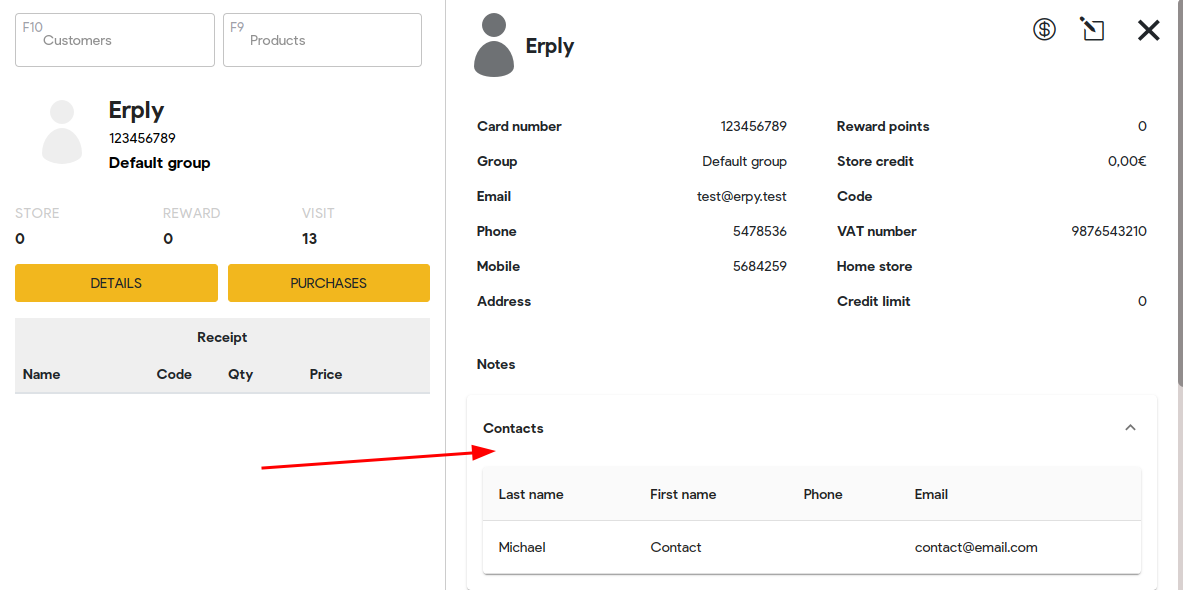
Once the company information page is opened scroll down and find the Contacts section.
Enter contact person data into fields.
Save changes.
Now the contact person for this company is created.
View contacts
In the Back Office:
In order to see the full list of contact persons please navigate to the Customers -> Contact Persons. From the contact person's information card it is possible to see the contact of which company he/she is.
In the Brazil POS:
Search for a company using the customer search.
Select one which has contacts.
There is the Contacts dropdown field to be opened from the company information card.
The list with contact persons is displayed with their contact information.
Create a sale for a contact person at the POS
In order to be able to make sales for the contact person the “Allow to create invoices for contact person” Back Office setting should be enabled in the Back Office -> Settings -> Configuration -> Invoices and Sales.
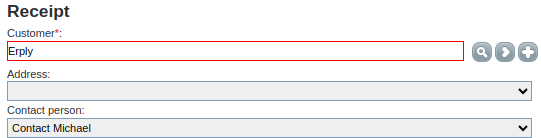
Once the setting is enabled navigate to the POS and make a sale for the contact person.
In case of selling to the contact person the invoice/receipt is created for the company (not for the contact), who will be the real owner of this product. It can be seen on the POS receipt and if checking the sale in the Recent Sales. Also in the Back Office document the customer in this invoice is “company” and contact person is displayed below in the field for the contact person.
Disable creating sales for contact person
In order to disable making sales for contact persons, again, navigate to the Back Office -> Settings -> Configuration -> Invoices and Sales.
Disable the “Allow to create invoices for contact person” setting.
Then in the POS while trying to select the contact person for the sale it will show the following message:

Show contact person name on the receipt printout
Navigate to the POS settings -> Debug.
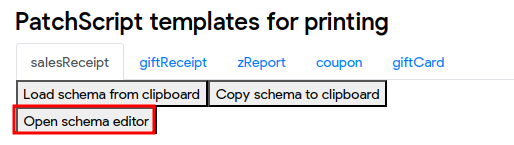
Scroll down and find the 'PatchScript templates for printing' section'.
There please select the ‘salesReceipt’ tab:

Then click on the ‘Open schema editor’:
The Schema Editor is opened in a separate window.
Among receipt fields please find any free TEXT FIELD like on the picture:
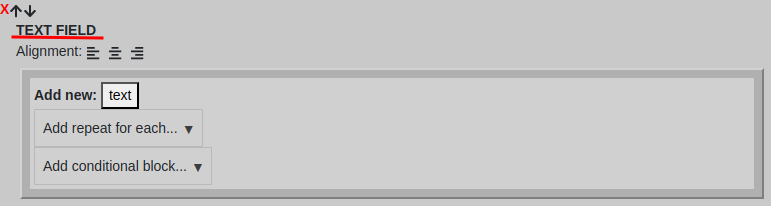
Note: if you can not find it, please scroll til the end of schema editor and create a new one (and move it to any palce you want):
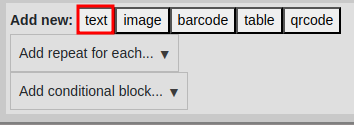
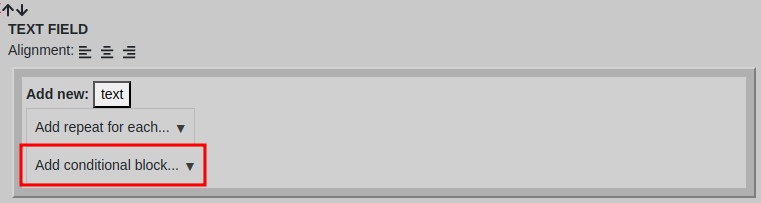
Inside the created text field click on the ‘Add conditional block’:
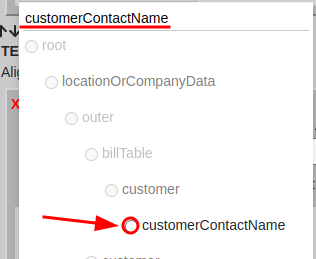
Then type ‘customerContactName’ into the searching field and select the following data from the list:
In the ‘IF TRUE’ box click ‘text’:

In the new text box enter the name of the field (it can be any) using keyboard:
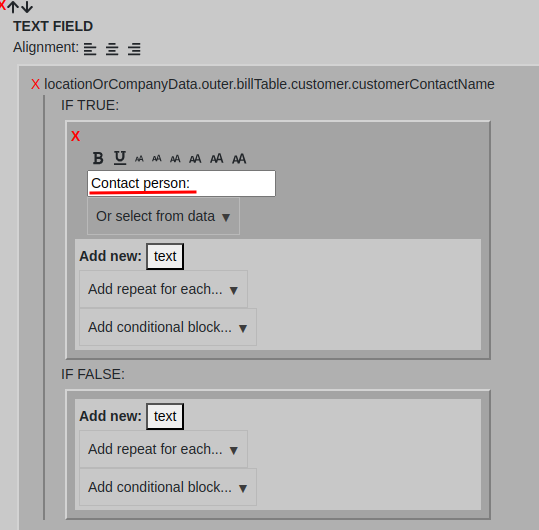
In the ‘IF TRUE’ box click the 'text button again in order to create additional box next to the existing one:
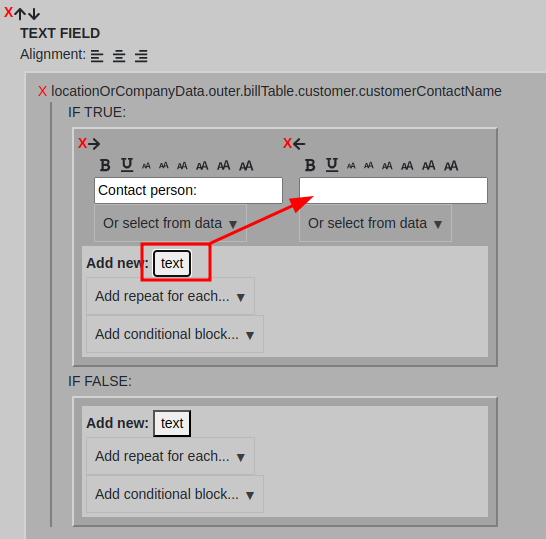
Click on the ‘Or select from data’ and enter the ‘customerContactName’ into the searching field, select the following data from the list:

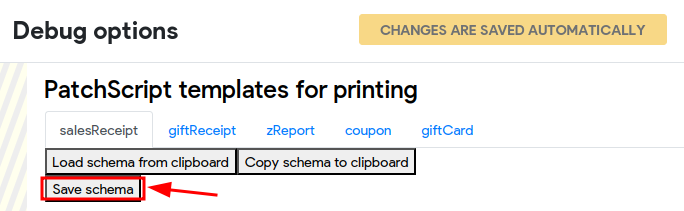
Close the Schema Editor and click Save schema in the Debug configuration:
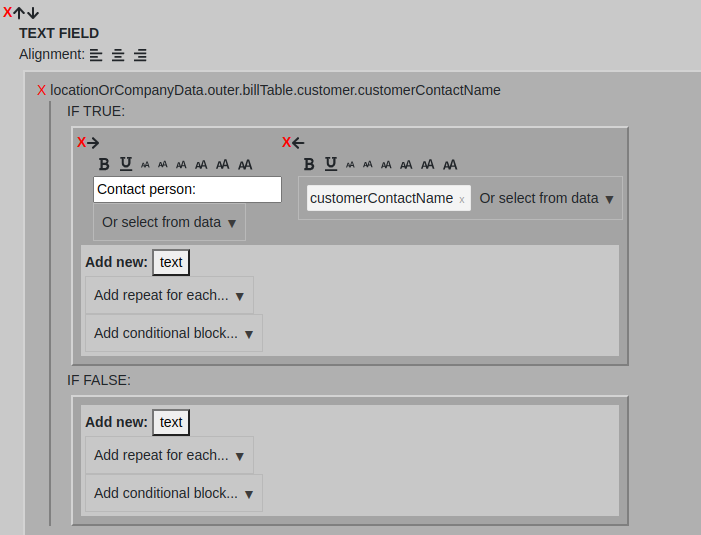
Now the contact field is configured! Here is the picture of configuration in Schema editor for the contact field:
Here is a picture how the filed looks like on the receipt if you have the same configuration as on the picture above:

How the contact person field on the receipt works?
If a sale was made for a contact person - the contact person field is displayed on the receipt. If a sale was made for a regular customer or company - there is not contact person field displayed on the receipt.