Installation Instructions
- Navigate to the Erply backoffice
- Open “App Store”
- Search for: “WooCommerce Integration”
- Click on “Instal”
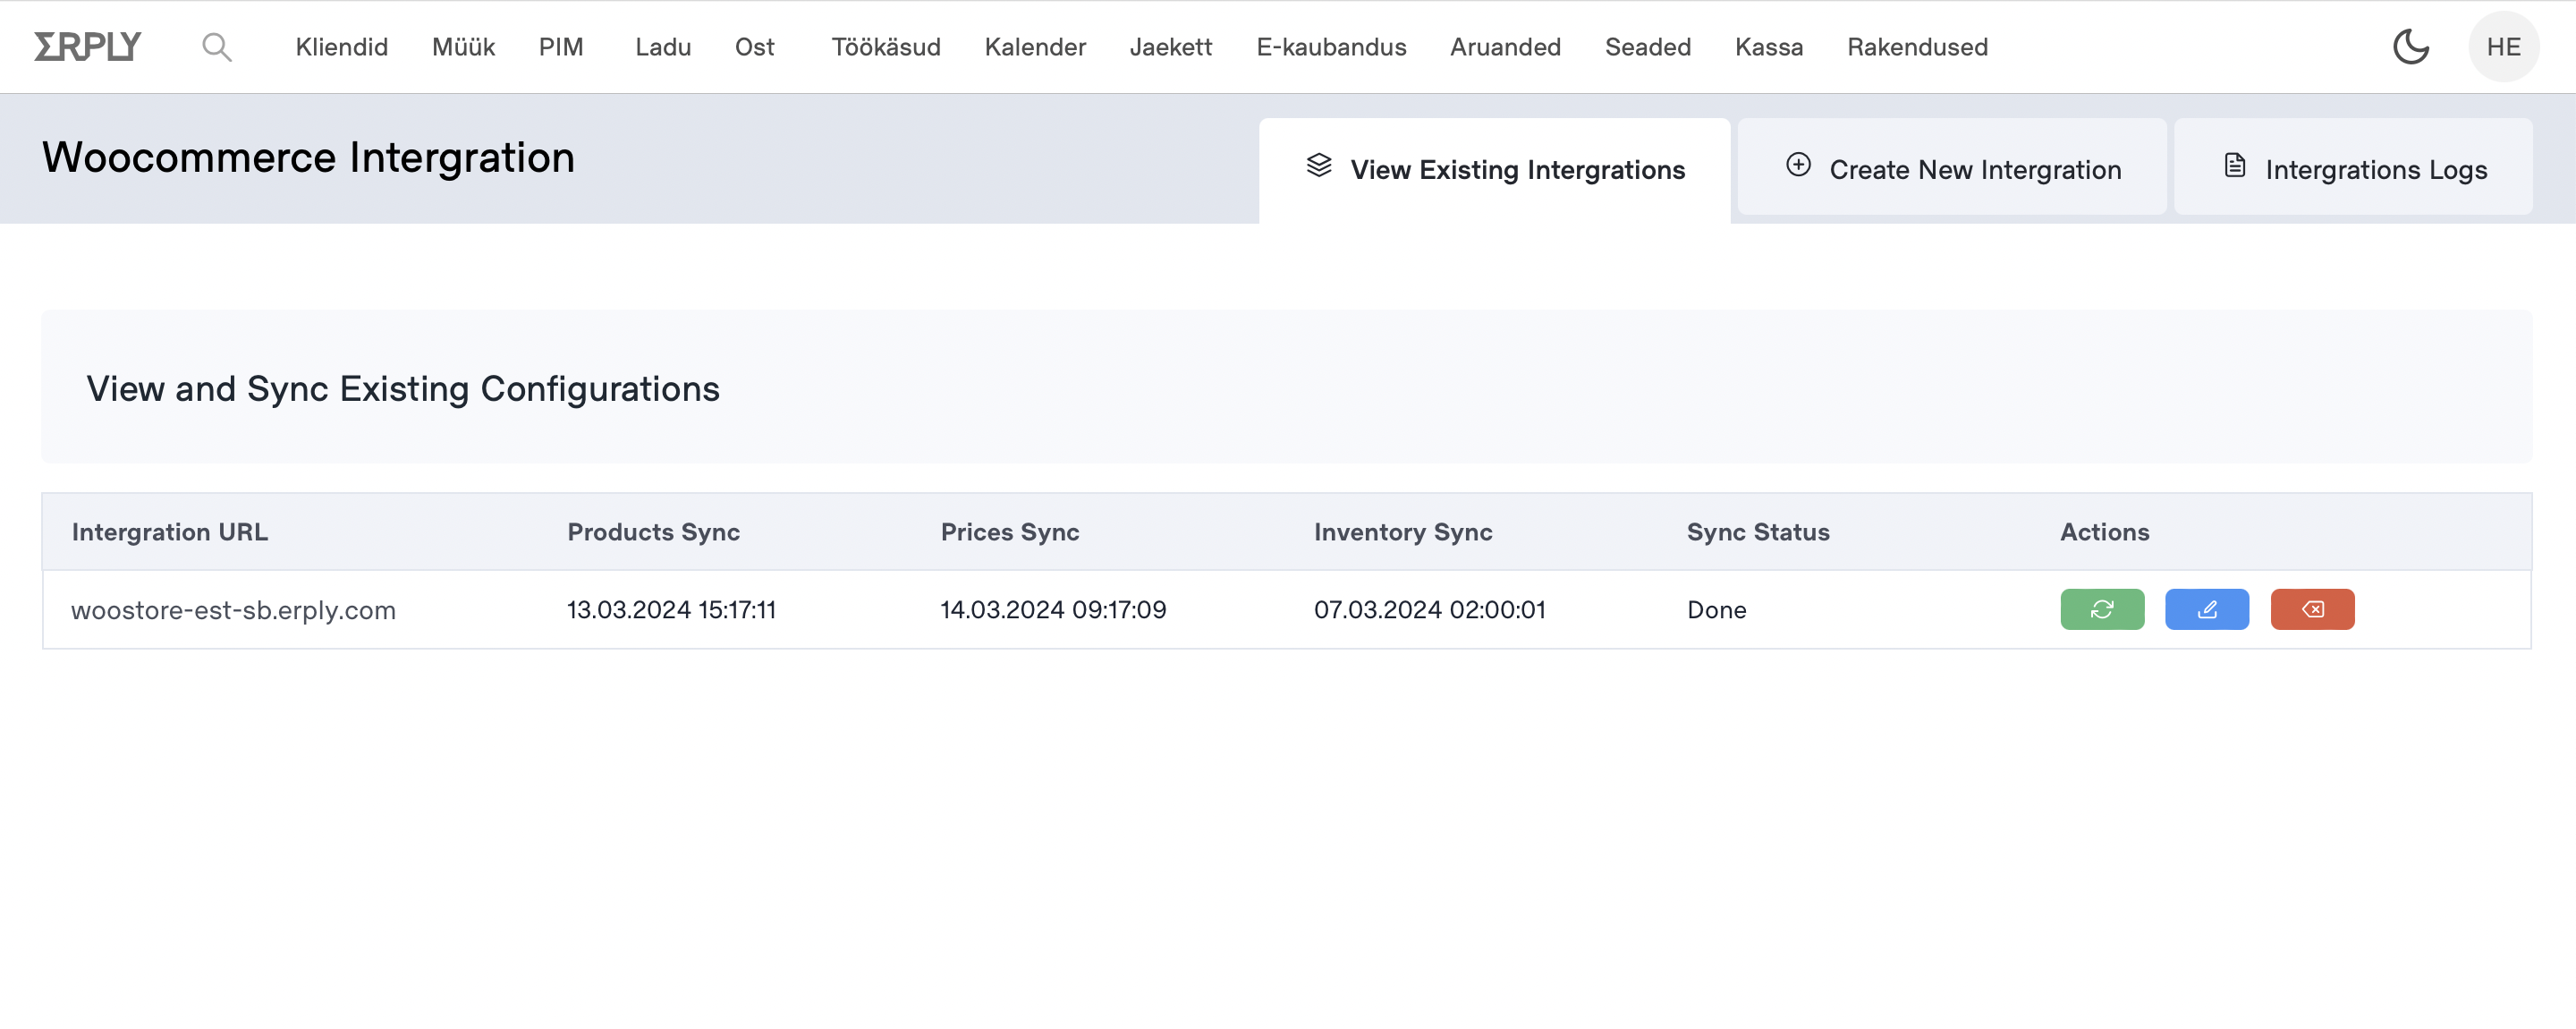
Setup Instructions
Click on the “Create new integration” tab and follow the steps to configure your new integration.
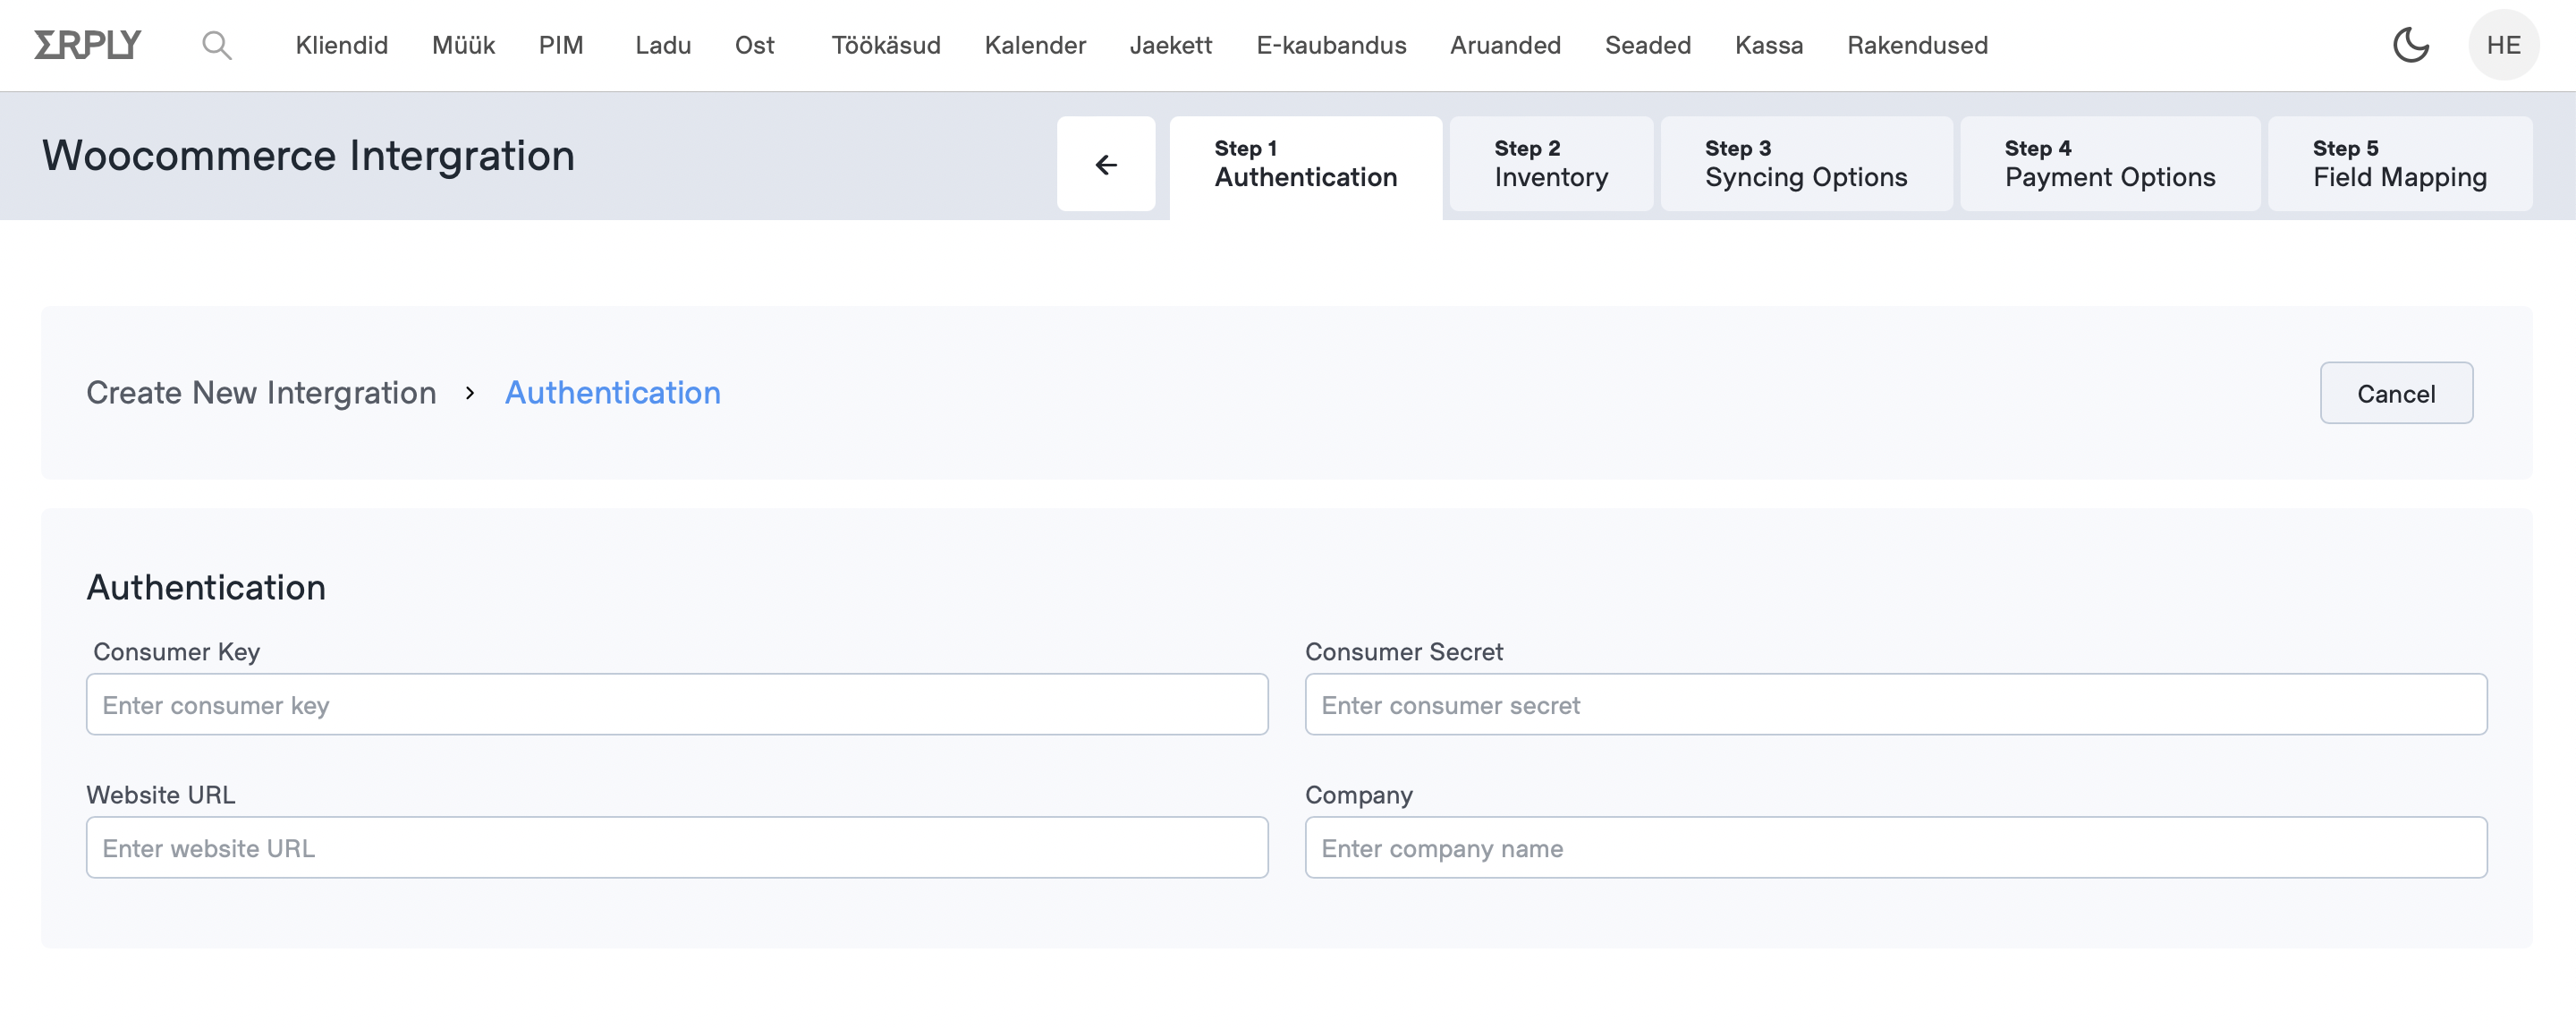
Step 1: Authentication
Log in to your WordPress dashboard and navigate to WooCommerce → Settings. Click on the Advanced tab and then click on the REST API tab. Click the Add Key/Create an API Key button to create a new API key. API key must have read & write permissions.
- Insert your consumer key and consumer secret
- Insert your website URL
- Insert your company name
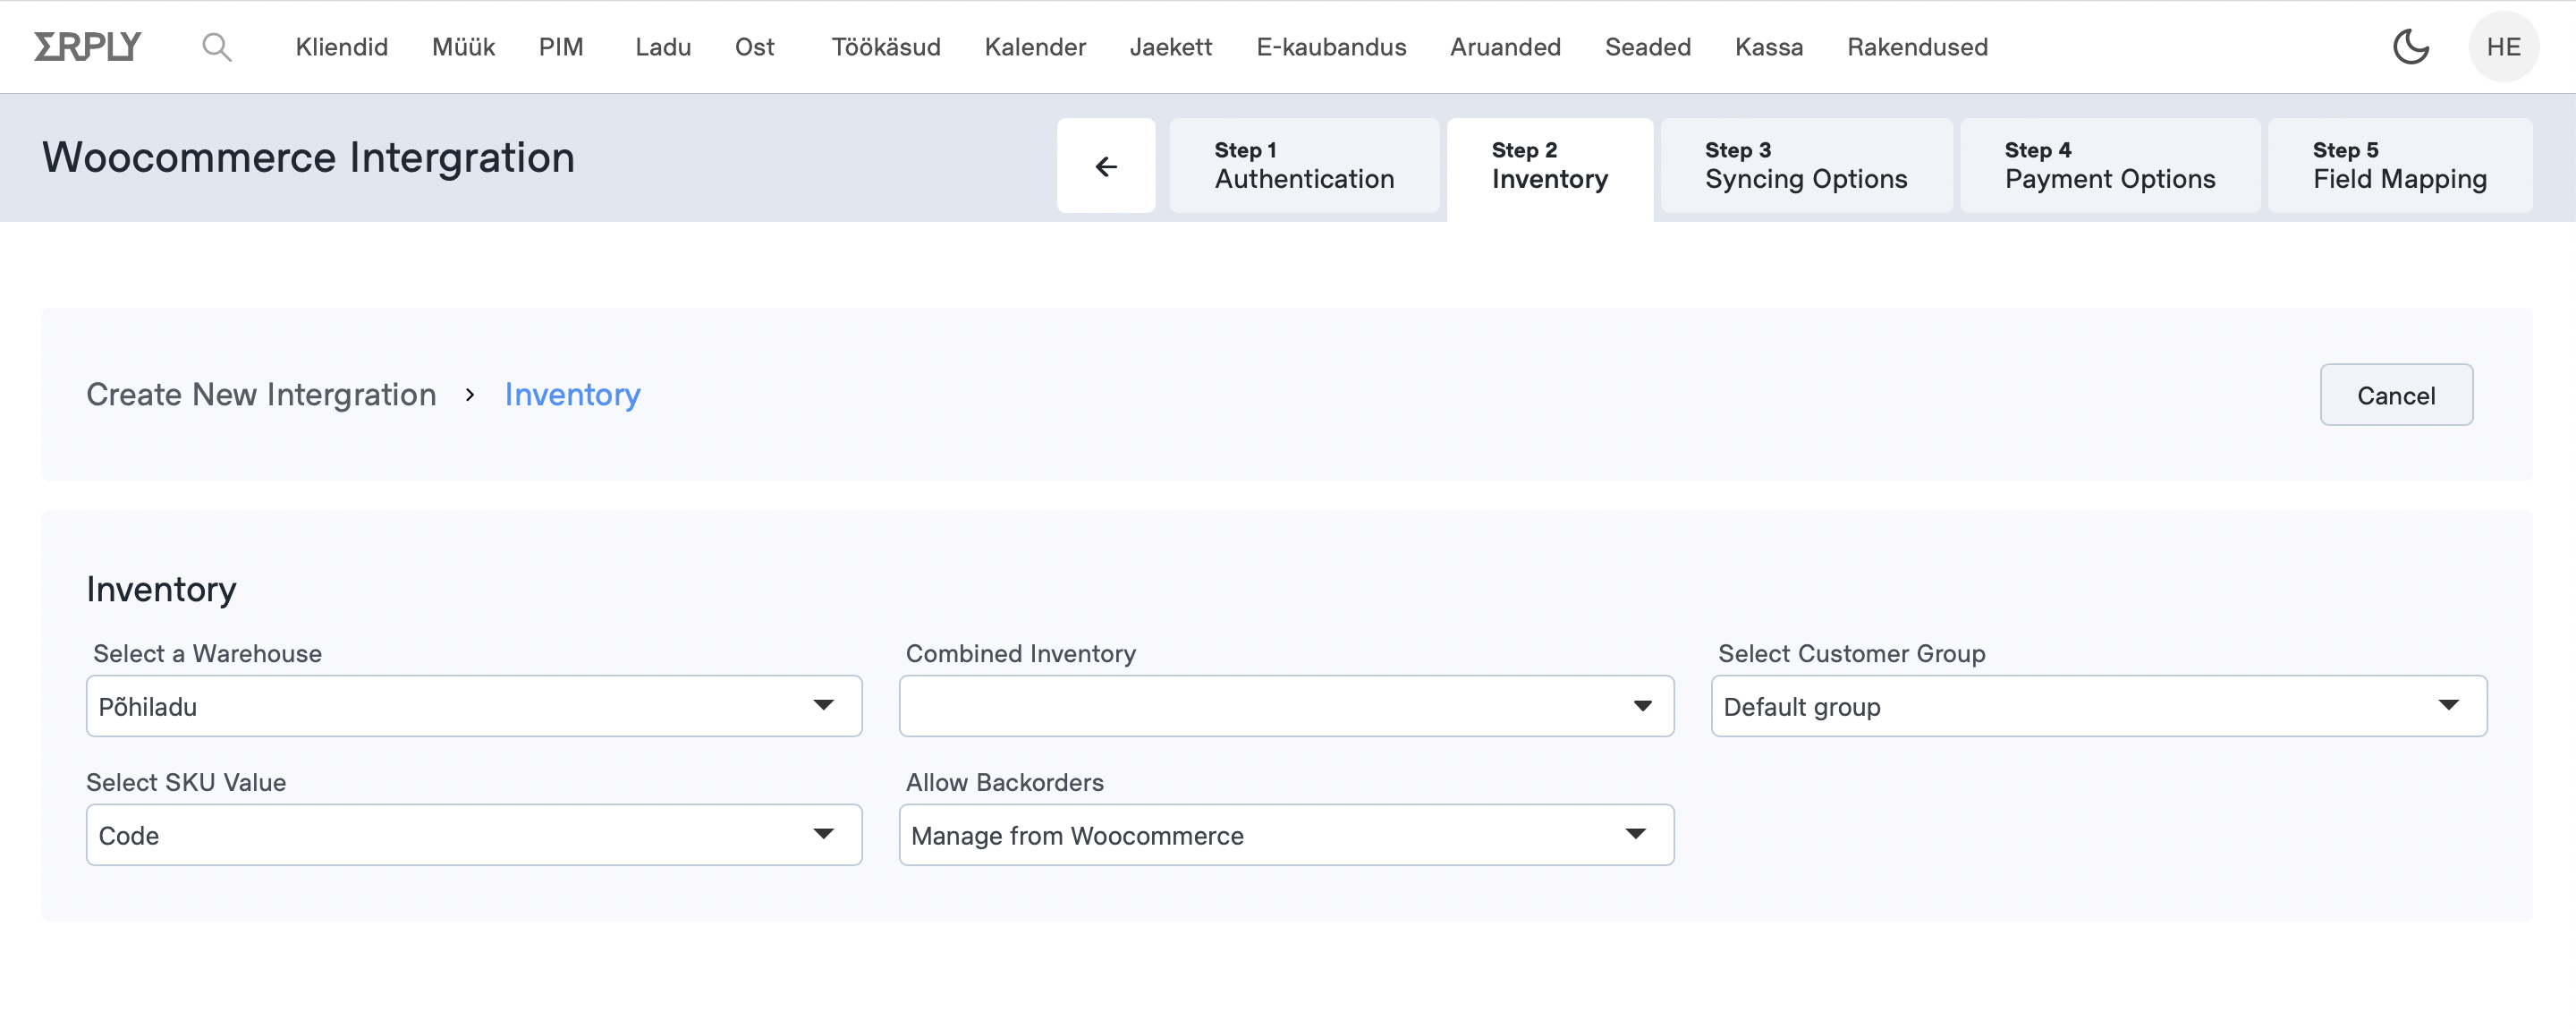
Step 2: Inventory
- Select a warehouse - This warehouse will be associated with all incoming sales documents and product stock will also be taken from that inventory
- Combined inventory - You are able to combine stock quantities between multiple warehouses
- Select customer group - This group will be associated will all customers created by the integration
- Select SKU value - SKU values will be taken from the select code field
- Allow Backorders - Backorders can be either managed from WooCommerce or can be allowed or disabled for the entire product catalogue
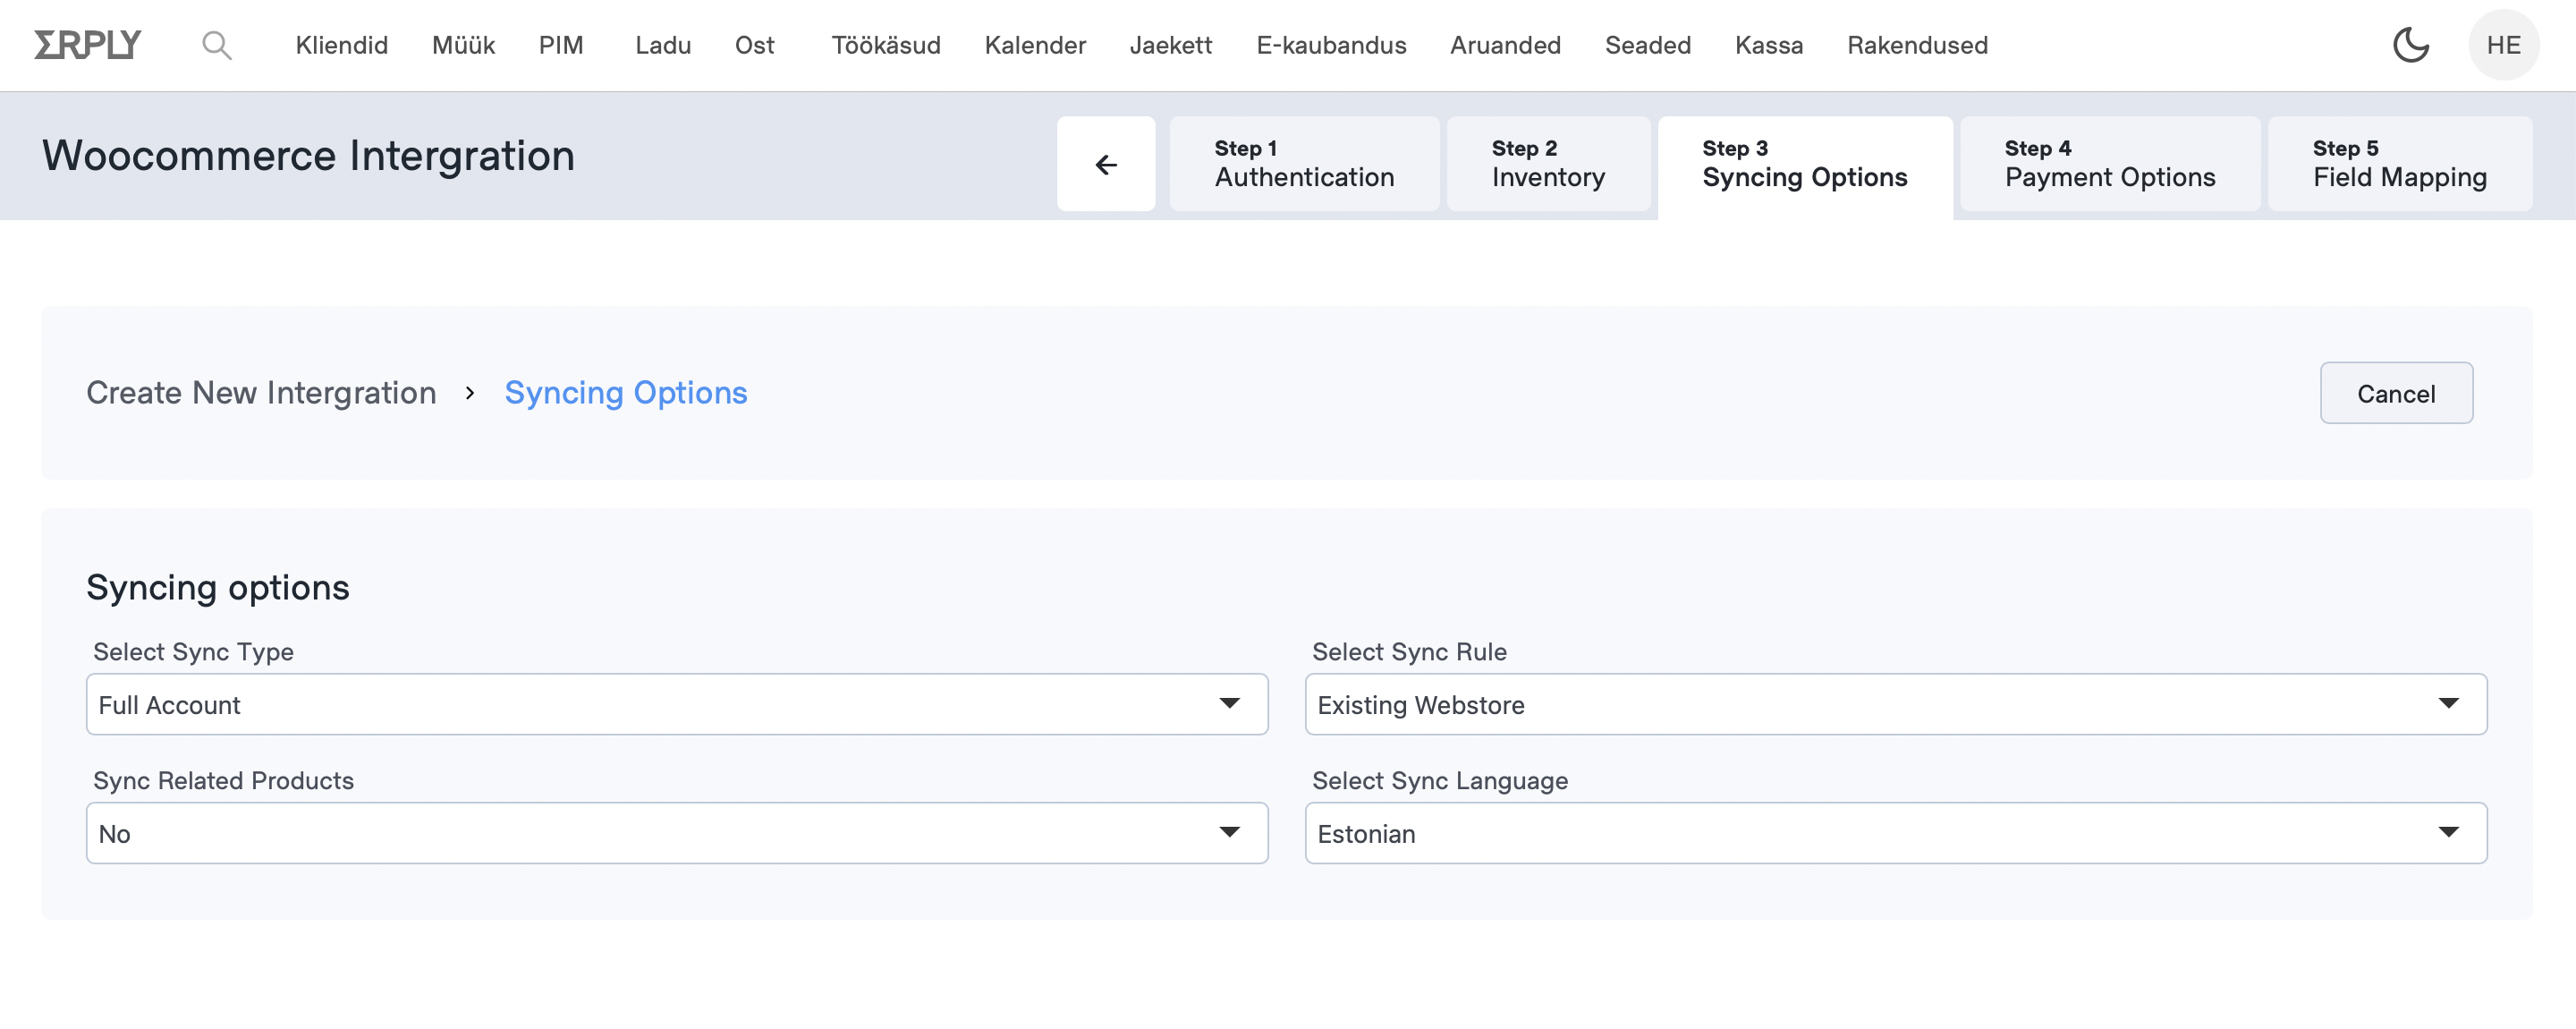
Step 3: Syncing Options
- Select Sync Type - You can sync the entire Erply product catalogue to WooCommerce or an assortment
- Select Sync Rule
- New Website: existing products and product groups on your woocommerce site will be removed and replaced with data coming from Erply
- Existing Website: existing products and groups will be left to WooCommerce and data will be added on top of that from Erply. (This will also require manual product mapping for the sync to work correctly – to do so please contact support@erply.com for further instructions)
- Sync Related Products - Related products can be synced to WooCommerce as either upsell or cross-sell products
- Select Sync Language - Language of the product fields where the data will be taken that will be imported to WooCommerce
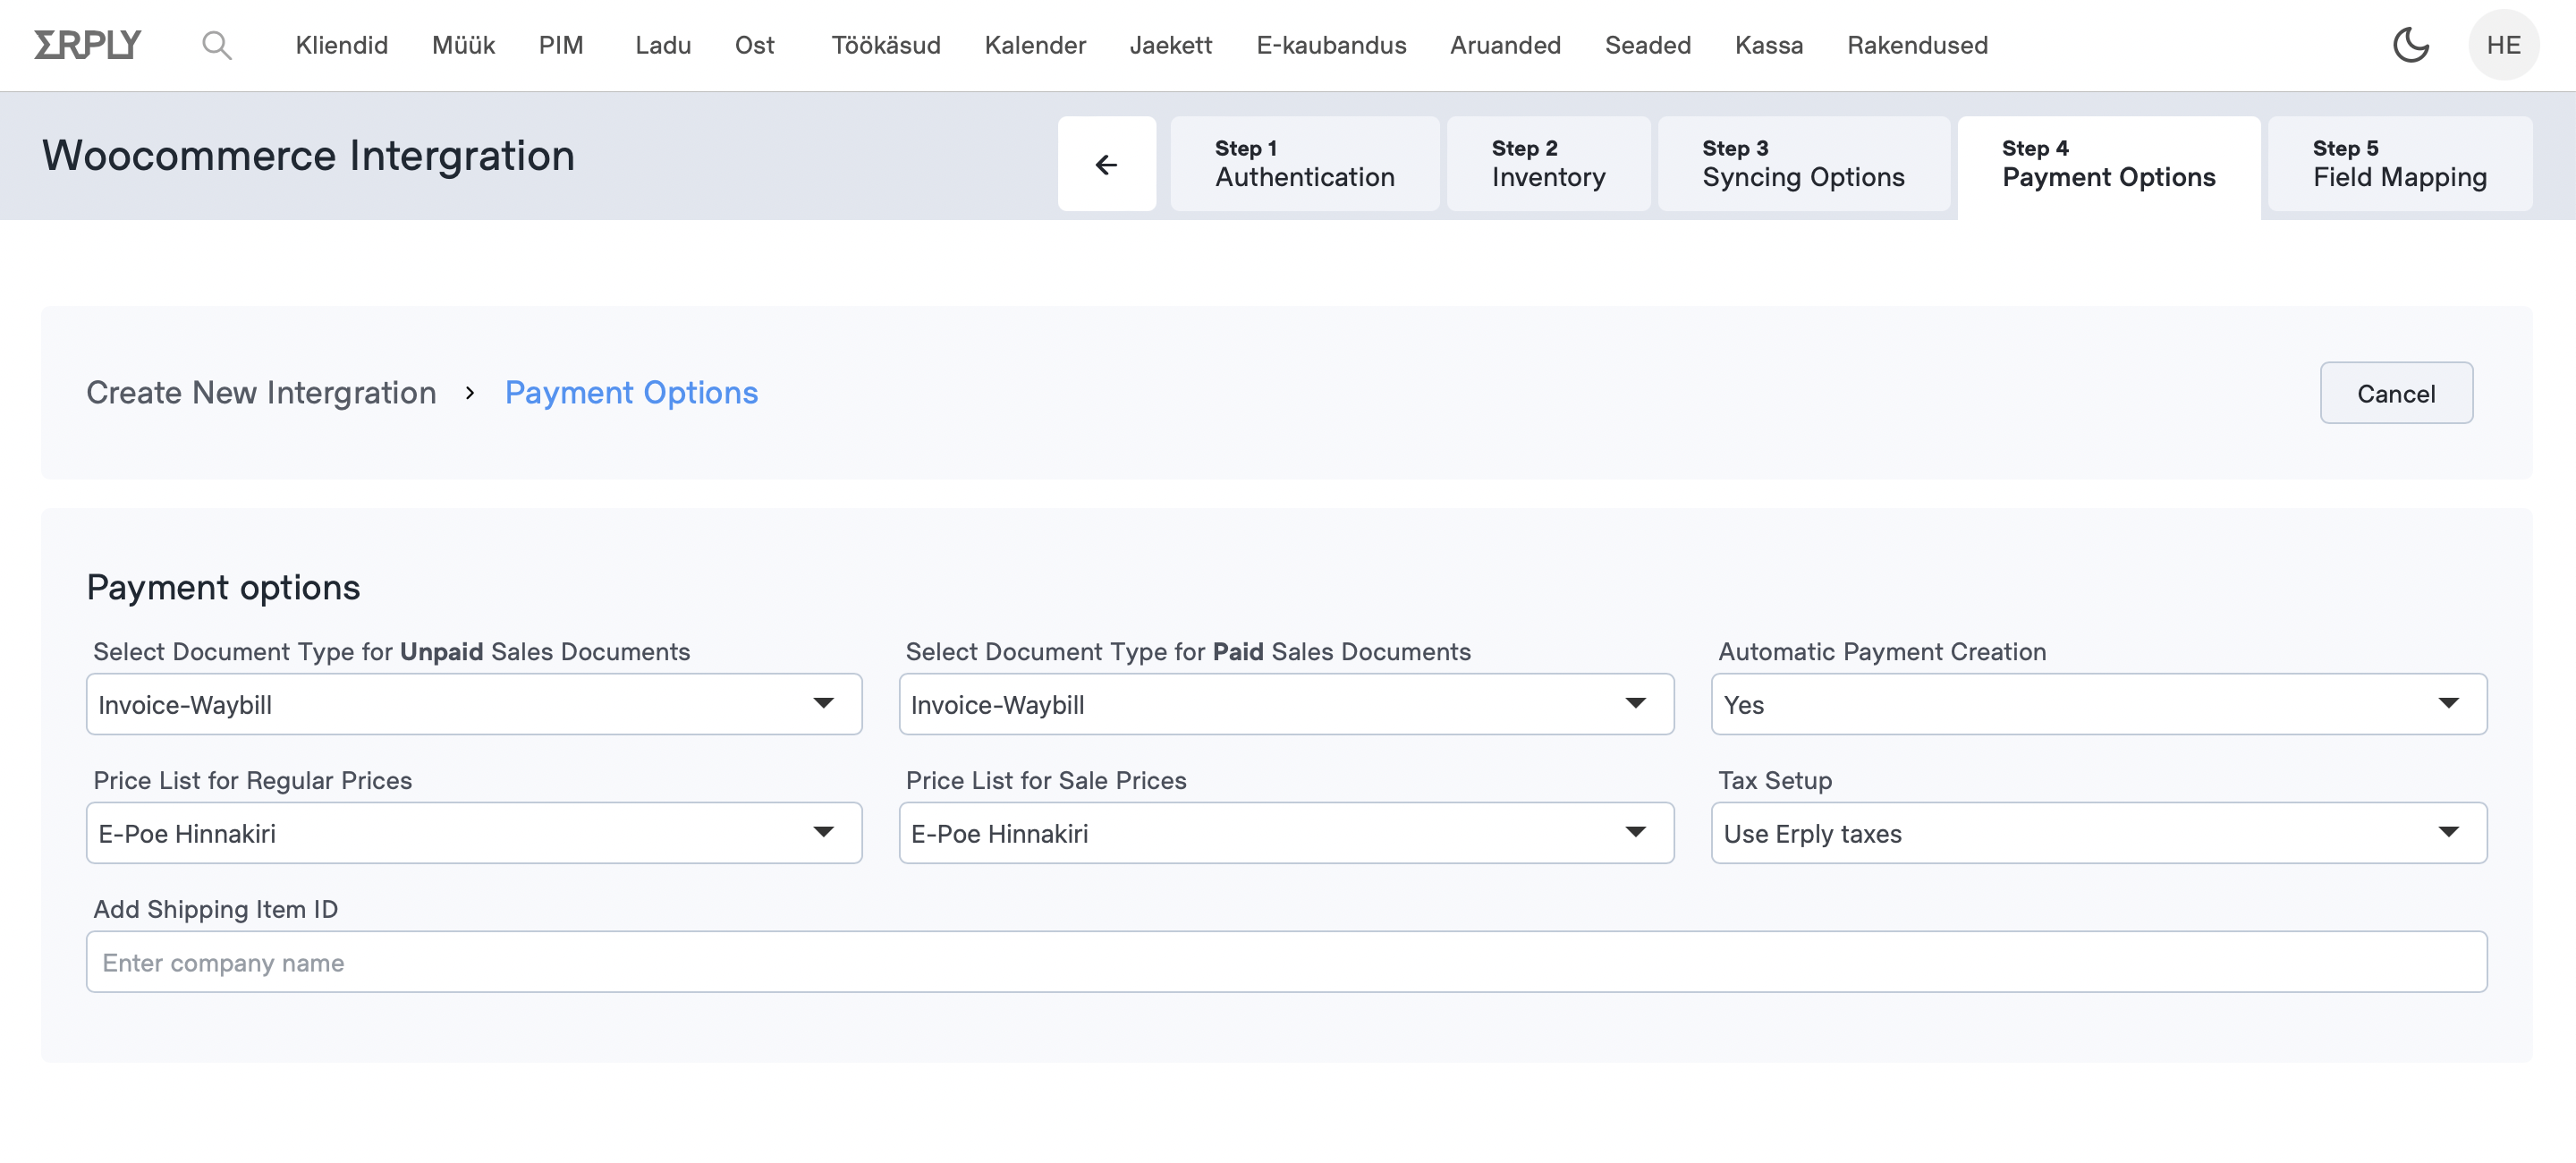
Step 4: Payment & Pricing
- Document Types:
- Invoice-waybills (depletes inventory quantities)
- Stock is moved and the transaction is completed as soon as the document comes into Erply.
- Orders (reserves goods by putting them in layby)
- A few confirmation steps required to complete the order.
- Used for buy online, pickup in-store orders.
- Invoice-waybills (depletes inventory quantities)
- Automatic Payment Creation - You can choose if the integration also creates a payment to Erply or not
- Price List for Regular Prices - By default the product prices are taken from the product card. Alternatively it is possible to create a price list and use the prices from the price list instead
- Price List for Sale Prices - A price list can be created and used for showing discount prices in WooCommerce.
- Tax Setup
- Use Erply Taxes - Taxes will be synced from Erply to WooCommerce
- User WooCommerce Taxes - Taxes will be dynamically applied during checkout and created to Erply
- Shipping Item ID - Add your shipping fee productID from Erply to this field to associate incoming shipping fees
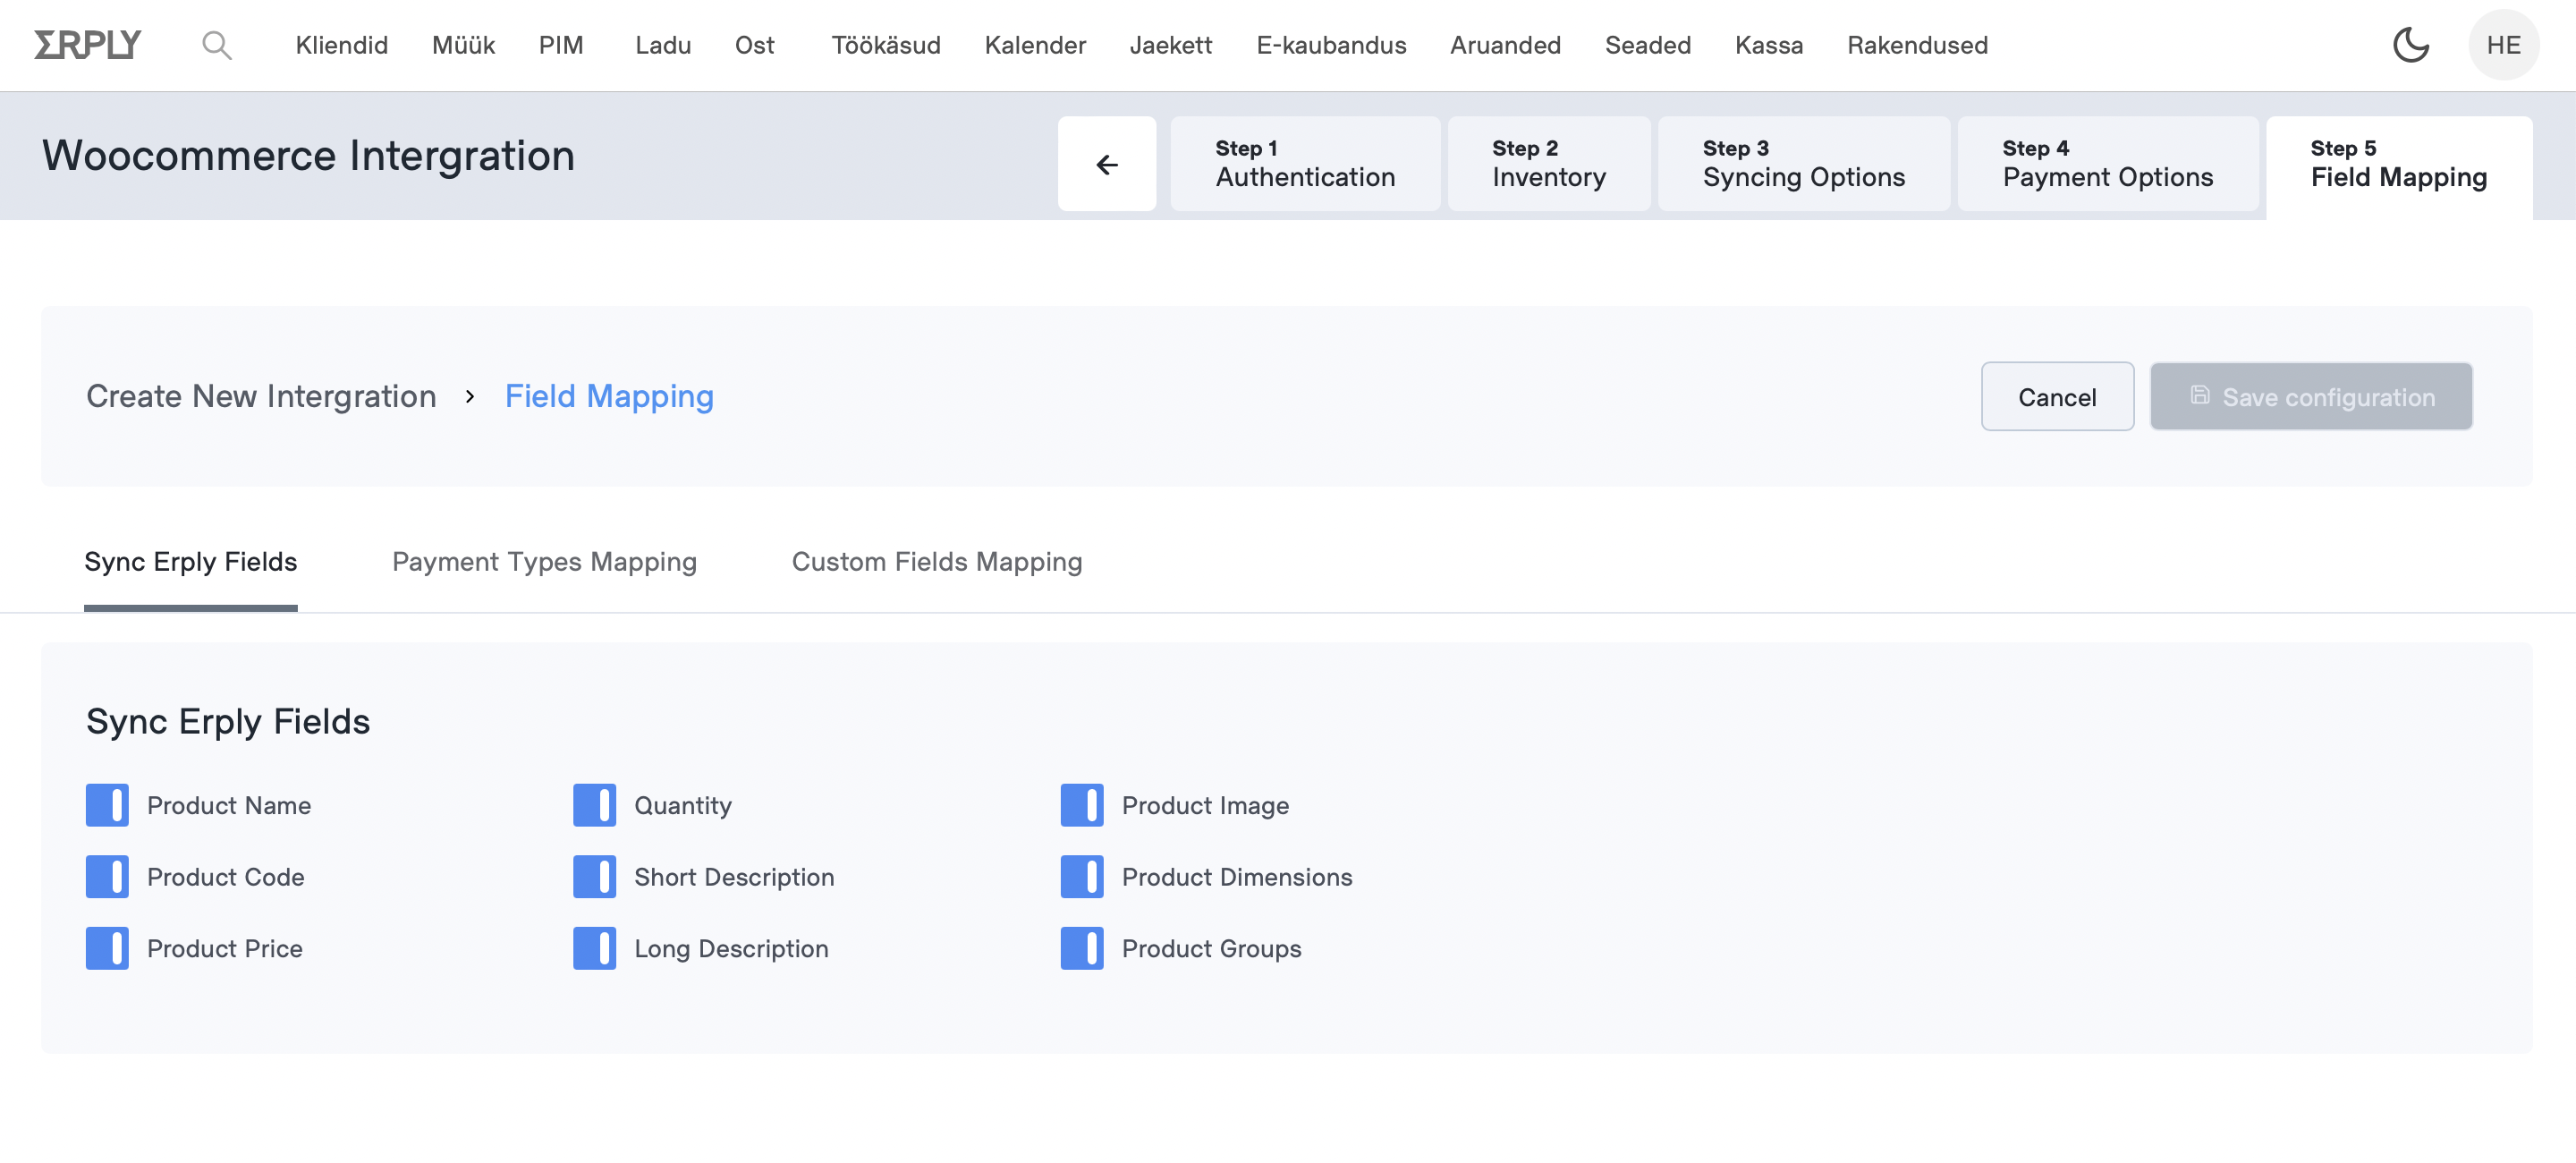
Step 5: Selective Sync & Mapping
- Selective sync - You can choose which fields will be synced from Erply to WooCommerce. If a field is disabled, it will not get synced or overwritten by the integration
- Payment types mapping - You can map together payment types/methods between WooCommerce and Erply. Mapped values will be used when creating payments to Erply
- Custom fields mapping - You can create custom fields in Erply and choose which fields will be synced to WooCommerce and which field type will be used in WooCommerce
Integrations Log
Integrations log will show all errors that the integration has encountered. It will show detailed responses from WooCommerce API, together with timestamps and object ID-s that were affected by the error.
