Supported terminals
- P400(series)
- V400m
- S1F2L
- S1F2
- AMS1
- SFO1
Adyen account in Adyen platform
Before setting up the Adyen microservice in the Wizard make sure that you have created an Adyen account and Adyen device is registered there. If not please follow this article.
Set up Adyen terminal for payments
Make sure that the correct POS Super Wrapper application has been downloaded on your device -> Dowload app
Once app is dowloaded open it on your device.
Login with Erply credentials (client code, username, password)
Click on the cog button (POS Settings) -> Payment Configuration
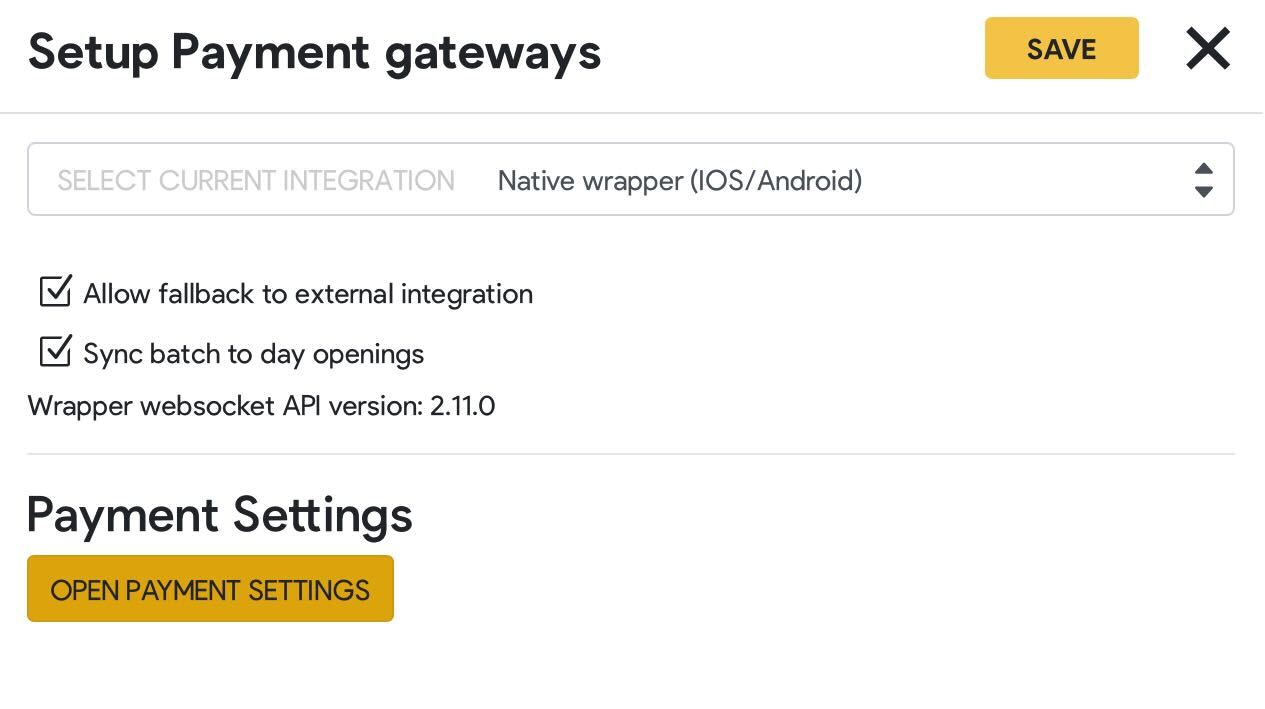
Click on the Setup Payment gateways
From the ‘Select current integration’ select the Native wrapper iOS/Android
Click on the ‘Open payment settings’
Click on the ‘Adyen’. 'Adyen configurations' popup will appear.
Fill the valid API Key and press Save:
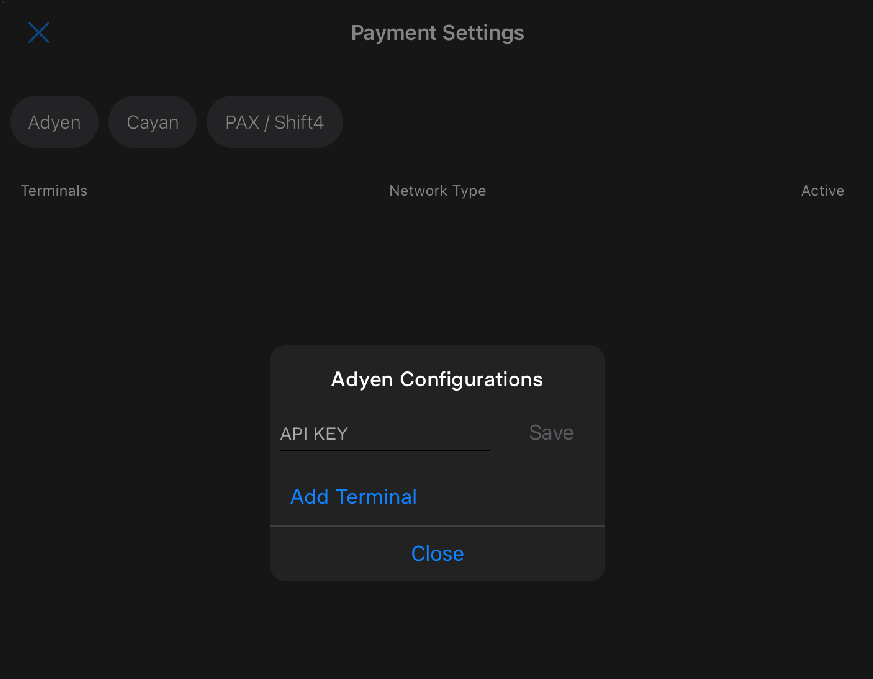
(Note: It will be stored in CAFA on Warehouse level. It means that every location should have a separate Adyen API key. Info how to create an Adyen API key you can find in Adyen docs (https://docs.adyen.com/development-resources/api-credentials/))
Click on the ‘Add terminal’.
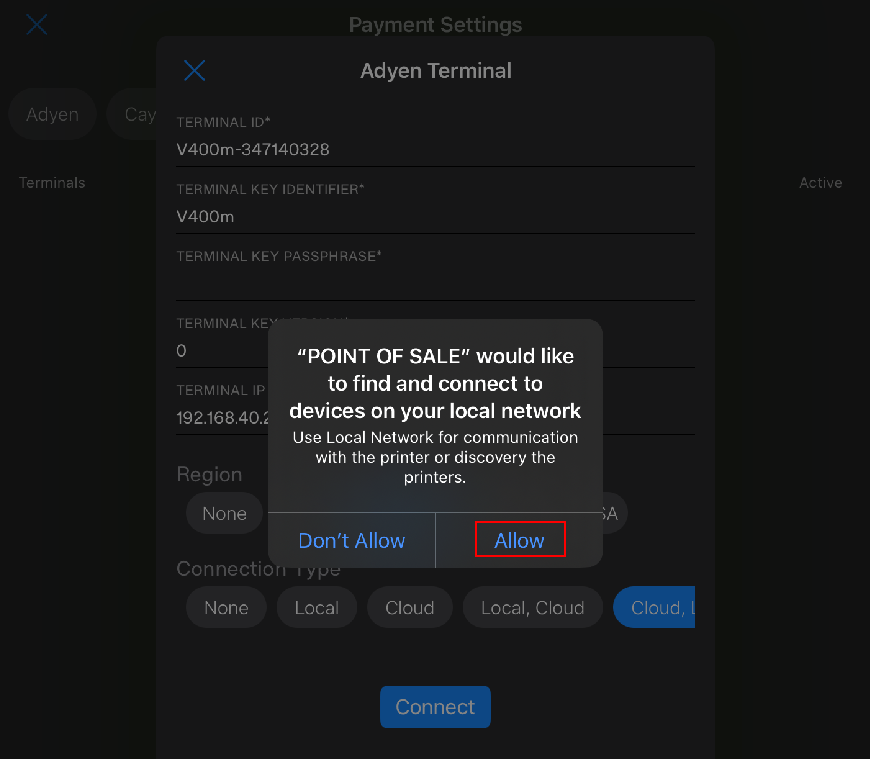
Fill in all the necessary fields:
- Terminal ID (case-sensitive)
- Terminal Key Identifier
- Terminal Key Passphrase
- Terminal Key Version
- Terminal IP Address)
- Select the Region (Europe, USA, Australia)
- Select Connect type:
- Local - This is used to connect to a terminal that shares the same WiFi connection as the iOS device.
- Cloud - This is used to connect to a terminal that has been added in the Adyen Portal, fetching the terminal's IP from the cloud and establishing a connection to it.
- Local, Cloud - This serves as a backup connection. If a local connection is unavailable, it will attempt to connect to the terminal through the cloud.
- Cloud, Local - This also serves as a backup connection. If a cloud connection is unavailable, it will attempt to connect to the terminal through a local connection.
Click Connect.
If you see the popup that will ask you to allow to find and connect to devices on your local network, please click ‘Allow’:
Device will show you a message “Connection succeeded”.
After the successful terminal setup you are able to perform actions such as Save, Set as Active or Remove terminal by tapping on the corresponding button. If you make a long-press on the Save button then you are able to see the option to ‘disconnect’ theterminal.
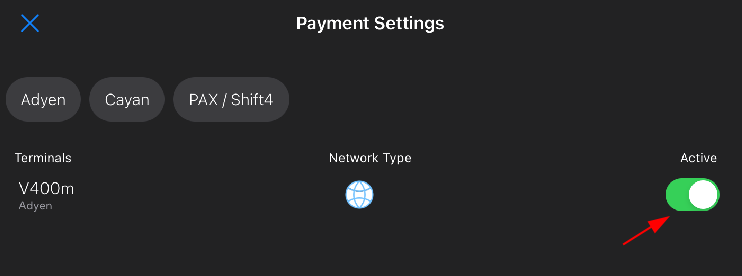
When the user has already saved the terminal, it will appear on the Payment Settings screen, where all terminals are listed:
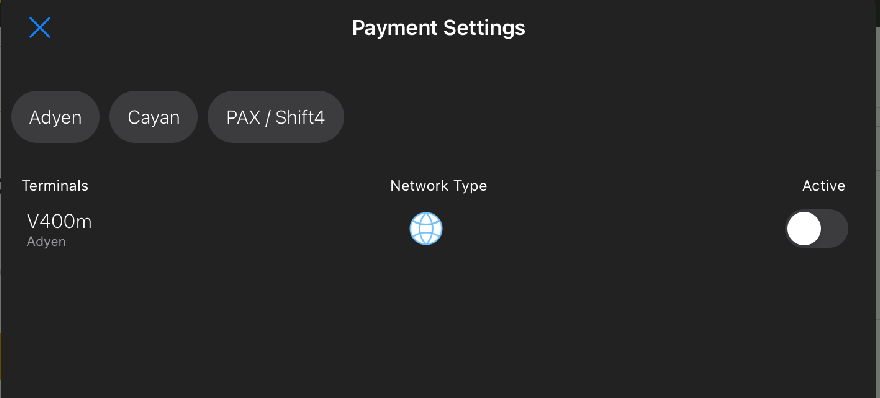
From there, you can tap on the terminal to access multiple actions such as Test Connection, Set as Active, and Remove the terminal.
By swiping from right to left on the list, users will reveal a 'Remove' button, allowing them to remove the terminal from the system. For terminals with printer support, users will additionally see a 'Configure' button:

The ‘Configure’ button allows users:
- Enter IP address
- Change terminal receipt printing options
- Enable POS receipt printing from terminal
Make sure that the connection status is ‘Active’, if not please set is as Active (should become green):
Set up Adyen terminal as printing device
In the SuperWrapper application navigate to the Settings -> Printing configuration.
Enable “try printing by wrapper” option.
Save configuration.
In the SuperWrapper application navigate to the Settings -> Payment configuration.
From the “Select current integration” select the Native wrapper(iOS/Android).
From the Payment Settings section click on the yellow “Open payment settings” button.
Click on the Adyen.
Make sure that the payment terminal is configured and active. If not please follow instructions here to set up the payment terminal.
Swipe from right to left and click Configure.
Enable the “Print receipt from terminal”.
Press ‘Close’ to close the configuration window.
Close the payment settings window.
Once the terminal is ready to use you can perform a test.
To test the receipt printing, please navigate to the POS Recent Sales, select the sale and click on the ‘print receipt’ button(printer and paper icon).
How to check additional information on the adyen terminal?
For v400m and p400Plus
- To see the terminal’s information with the IP address, press 5 and then OK [5->OK].
- To see Payment menu, press 8 and then OK [8->OK]. Enter PIN code.
- To access the terminal’s Administrative menu, press 9 and then OK [9->OK]. Enter PIN code and press OK to continue [code->OK].
- To access network, press 9 and then OK [9->OK]. Select Network and enter PIN code.
For S1F2 and S1F2L
- To see the terminal’s information with the IP address, go to the Settings -> Device info.
- To see Payment menu, go to the Transactions.
- To access the terminal’s Administrative menu, go to the Settings -> Configuration. Enter PIN code and press OK to continue [code->OK].
- To access network, go to the Settings -> Network. Select Network and enter PIN code.
Note: PIN codes to access transactions and configuration views can be found in Adyen portal -> In-person payments -> Terminals -> select terminal -> Passcodes.