Moneris account in Moneris platform
Before setting up the Moneris microservice in the Wizard make sure that you have created a Moneris account and Moneris payment device. If not, please create one in Moneris portal.
Download the iOS SuperWrapper
Note: Before you start configuring the iOS SuperWrapper make sure that the terminal is turned on and is in the same network as your iPad.
Make sure that the correct POS Super Wrapper application has been downloaded on your device -> Dowload app.
Once app is dowloaded open it on your device.
Login with Erply credentials (client code, username, password).
Setup Moneris integration for iOS SuperWrapper
In the iOS SuperWrapper click on the cog button (POS Settings) -> Payment Configuration.
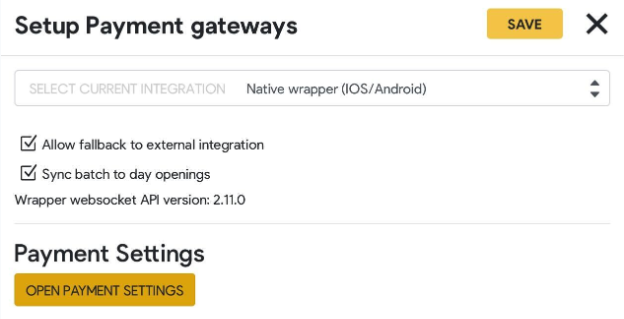
Click on the Setup Payment gateways.
From the ‘Select current integration’ select the Native wrapper iOS/Android.
Click on the ‘Open payment settings’
Click on the Moneris.
Enter the following data:
- IP address (may vary; to check the terminal IP address press the yellow “<“ button and “4” on the terminal)
- Port (terminal port)(ask from terminal provider)
- Terminal ID (ask from terminal provider)
- Merchant ID (ask from terminal provider)
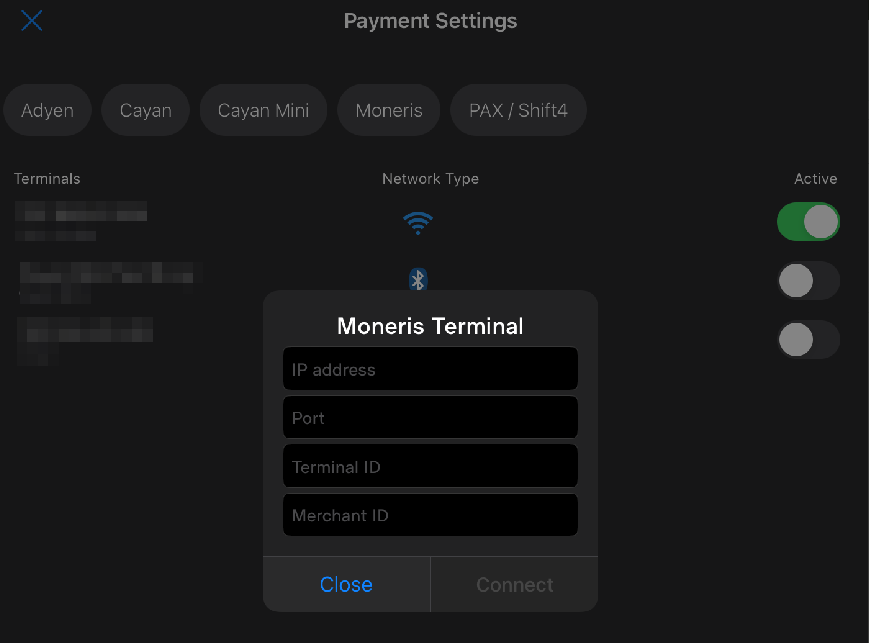
Once data is inserted click ‘Connect’.
Then press ‘Save’.
Then press ‘set as active’ to activate this terminal for sales.
Close the Moneris terminal configuration window by pressing the ‘Close’ button.
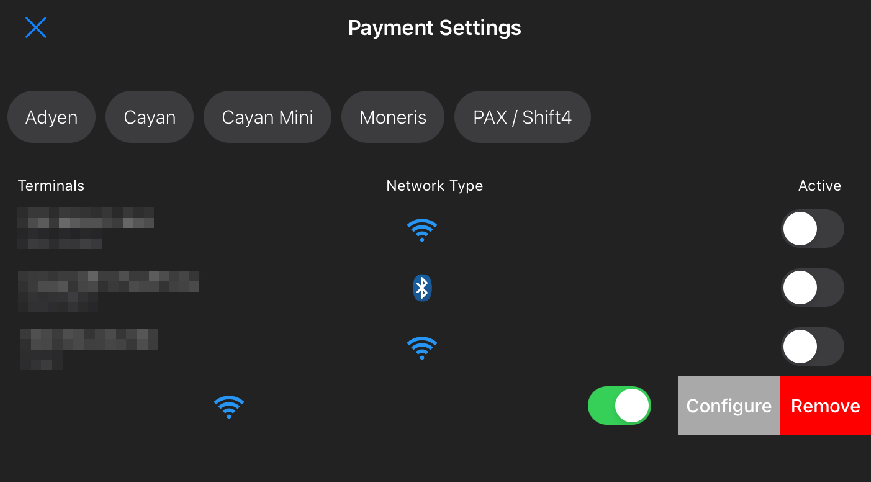
Now you can see that the terminal is active and ready to use.
By swiping from right to left on the list, users will reveal a 'Remove' button, allowing them to remove the terminal from the system. For terminals with printer support, users will additionally see a 'Configure' button:
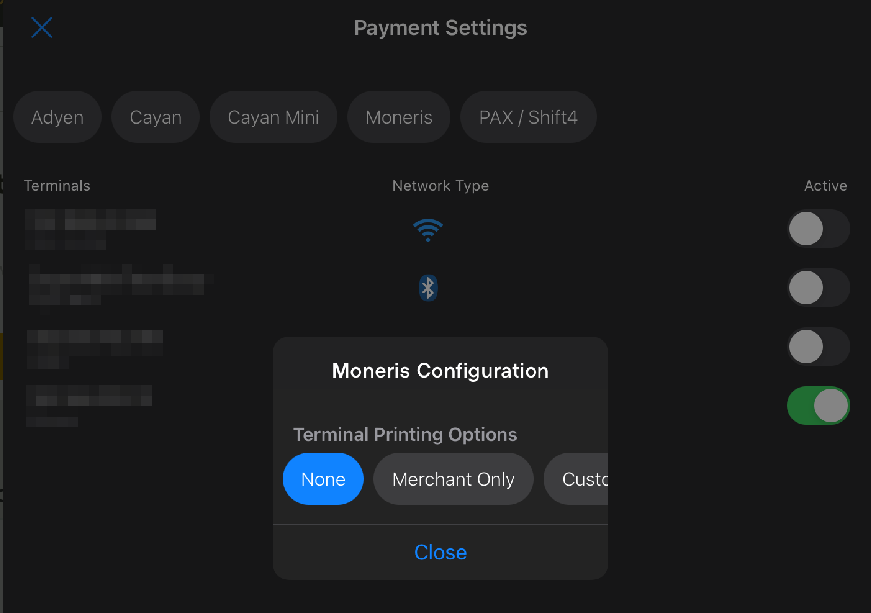
The ‘Configure’ button allows users to specify the type of receipts they want to print on the terminal after the payment, with options including None, Merchant Only, Customer Only, and Both.
Pay with Moneris
Add products into the shopping cart.
Hit Pay.
Select card payment - the payment row is added with Moneris integration:
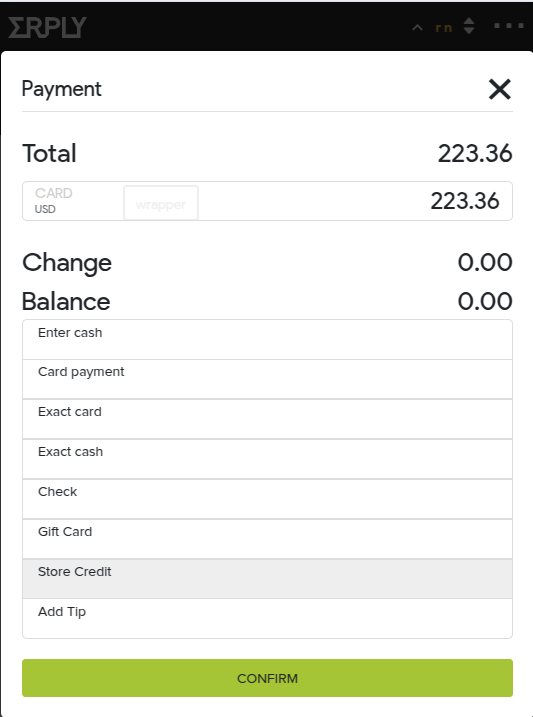
Cancel the payment
Removing the payment card during the payment processing
In this case the POS will show the following message in payment window:
“The EMV card was removed from the insertion reader prior to the completion of the transaction”
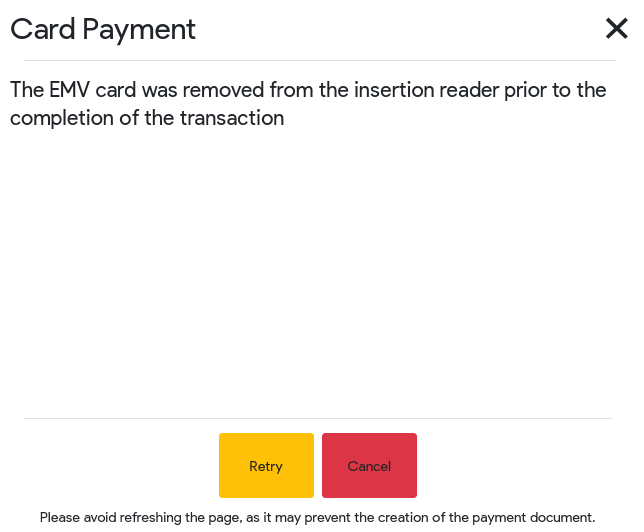
Here you can decide:
- “Retry” - send another payment attempt to the terminal
- “Cancel” - return to the payment screen
Cancelling the payment
The payment can be cancelled only on the terminal side by pressing the red button.
Voiding payments
In case there were multiple card payments applied, one of them was successful, the second one has failed for some reason or the client would like to cancel the payment at all, there is a possibility to void those payments that have already been approved.
In order to void payments please click on the red cross button or close the payment window.
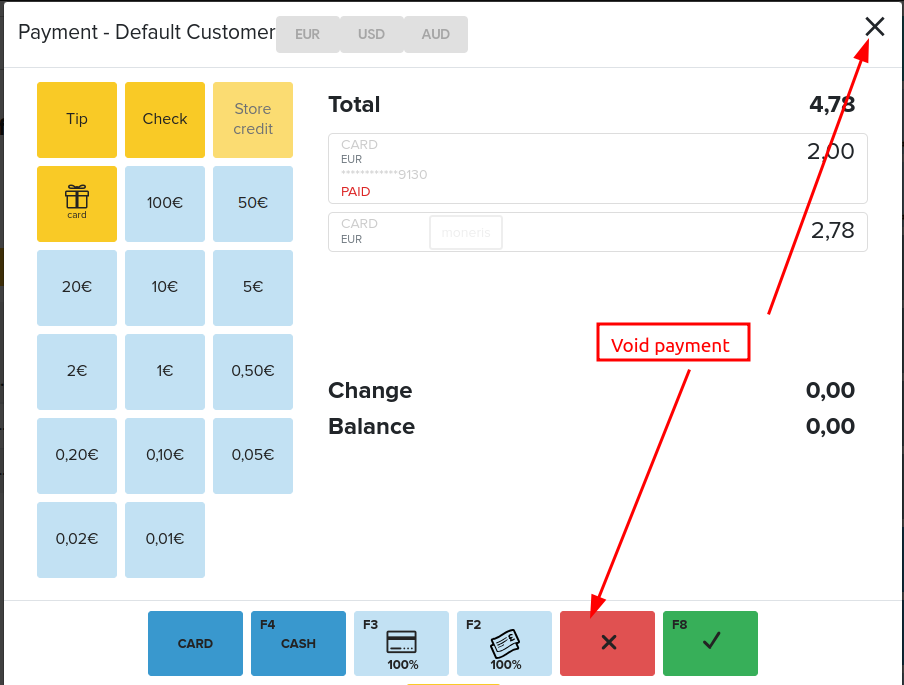
Afterwards the POS will give you a “Closing payment window” popup with message “Payment plan contains handled payments which will be automatically voided”. There you can choose:
- “Cancel” - return to the payment screen
- “OK” - cancel the payment and return funds back to the client card.
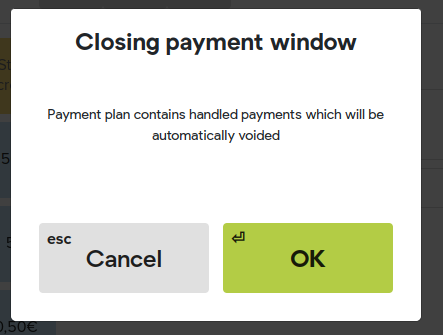
In case you will press “OK” button the POS will start voiding approved payments and you will see the following screen:
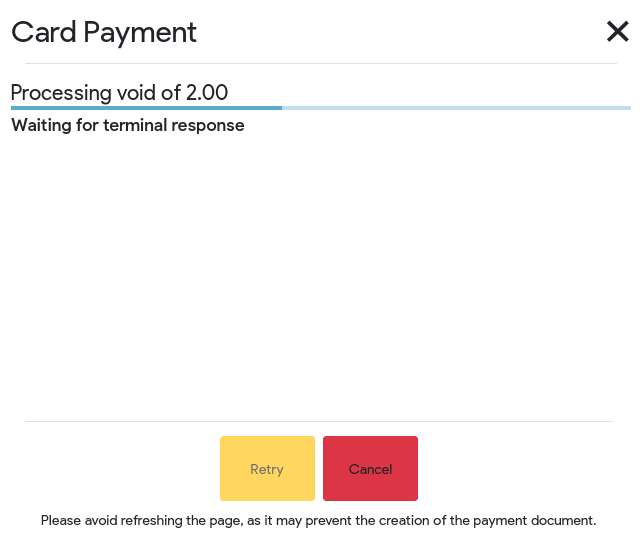
Return with Moneris
Referenced return (return based on receipt)
In order to start the return for sale that was paid by card with Moneris integration, you need to find the sale in the POS using the receipt number. It can be found under the red “Return” button or in Recent Sales.
Once receipt has found select products, apply reason codes if it is required and click Save.
Hit Pay.
In the payment window you will see the initial card payment on the right side and automatically applied return payment on the left side:
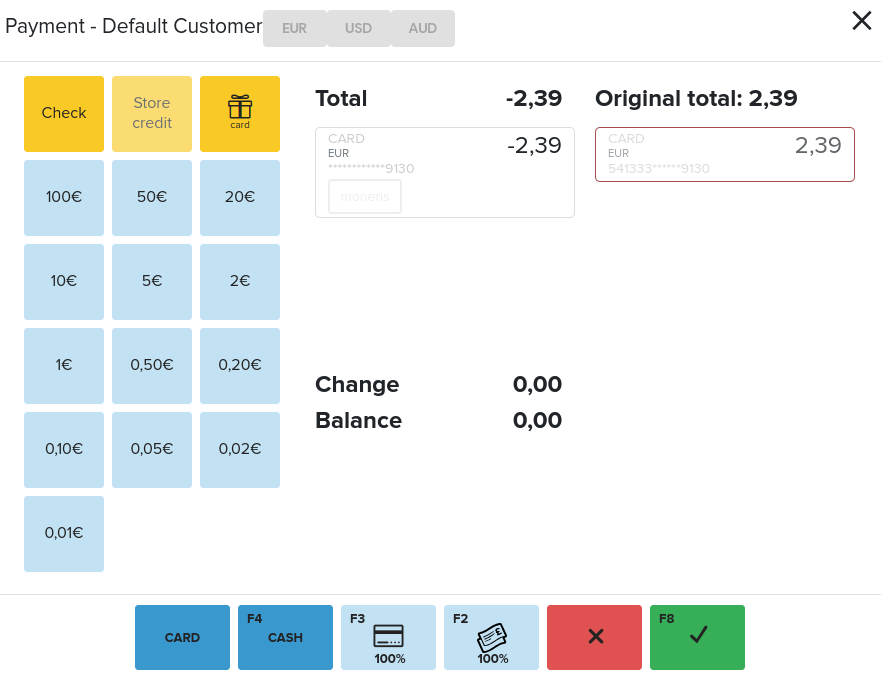
In case you would like to refund money to the same card, please click on the ‘green checkmark’.
In case you would like to change the return payment method please click on the automatically applied return payment method

and then green OK button on the left side numpad:
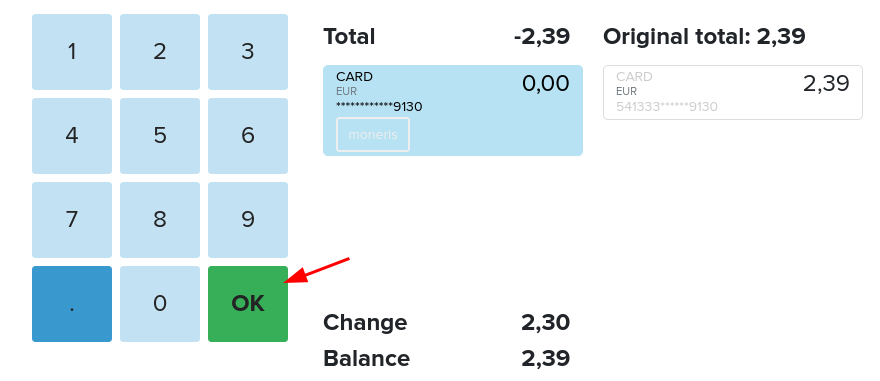
Afterwards apply another return payment method and finalize the return.
Note: If the payment method is not automatically selected and you would like to make a refund to the client card, that document was paid with, click on the original payment method on the right side.
Unreferenced return (return without the receipt)
Add needed products to the POS shopping cart.
Set a negative quantity for products.
Select the return reason if it is required.
Hit Pay.
Select the card payment method.
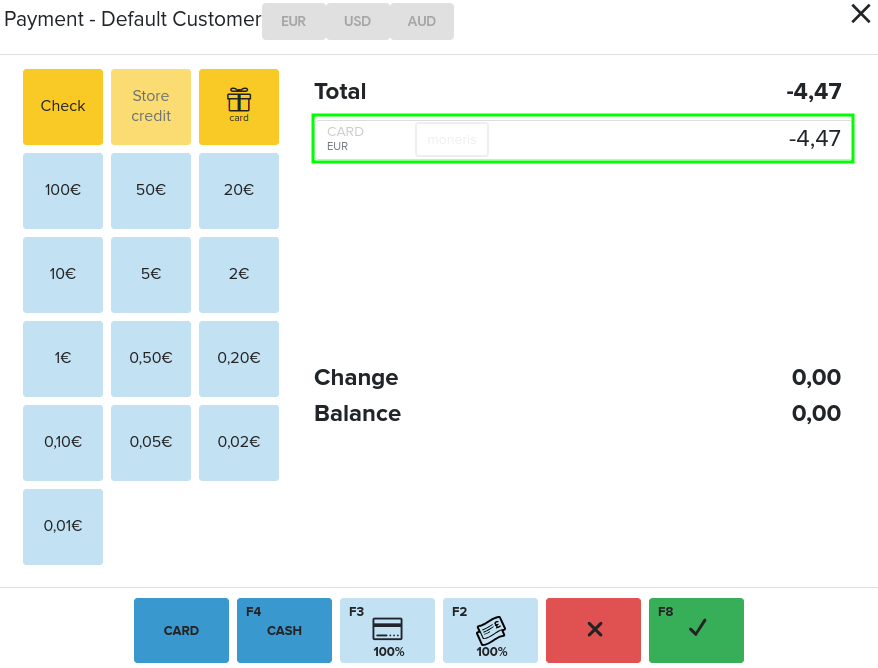
Finalize the payment by clicking on the ‘green checkmark’.
You will see the “refunding purchase” process in the POS payment window.
Once the amount appears on the terminal screen the client should insert his/her payment card into the terminal.
Close day with Moneris
The “Sync batch to day openings” in the Payment configuration -> Setup payment gateways -> Adyen:
- if enabled - while closing the day in the POS, day is also closed on the terminal and all the payments are sent to the bank automatically;
- if the setting is disabled, you need to close the day in the POS and terminal separately.