Managing Sales Tax Settings on a Sales Receipt
Tax configurations are handled at the product level, and companies can have specific tax rules applied.
Applying Tax Exemption Certificates
This guide will help cashiers apply a tax exemption on a sales receipt using the Tax Exempt module. The goal is to make a complete sale tax-free at once by using a Certification ID.
Step-by-Step Instructions
1. Start a New Sale
- Begin by creating a new sale and adding the desired products to the shopping cart.
2. Access the Tax Exempt Module
- Click the Options button, then select Tax Exempt.

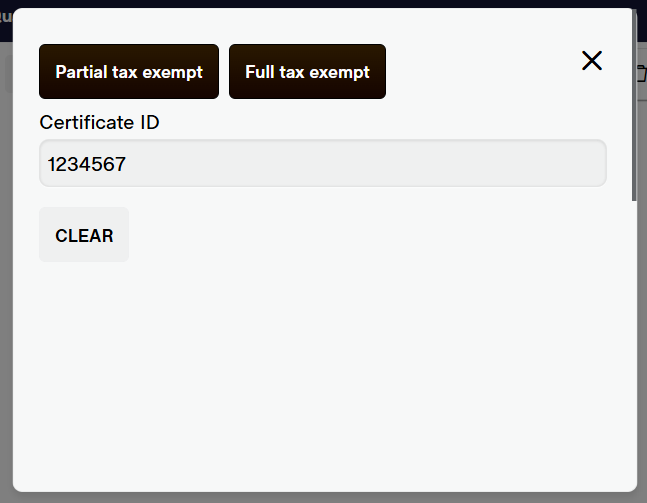
- The Tax Exempt module will open, displaying the following options:
- Certification ID field: Where you will enter the tax exemption ID.
- ‘Full Tax Exempt’ button: Applies tax exemption to the entire receipt.
- ‘Partial Tax Exempt’ button: Allows partial exemption if applicable.
- ‘Clear Tax Exemption’ button: Resets the tax exemption field.
- ‘Close’ icon: To close the module without applying any exemption.
3. Applying Tax Exemption
- Enter the Certification ID in the provided field.
- Click the ‘Full Tax Exempt’ or “Partial Tax Exempt” button to apply the exemption.
- Once applied, the Tax tab in the shopping cart will display the applied tax exemption status, either Partial or Tax Free.

4. Handling Additional Items
- If additional items are added to the cart after applying the full tax exemption, the tax exemption will automatically apply to the new items.
5. Clearing the Tax Exemption
- To remove the tax exemption, click the ‘Clear’ button. The cart will revert to displaying the original tax calculations.
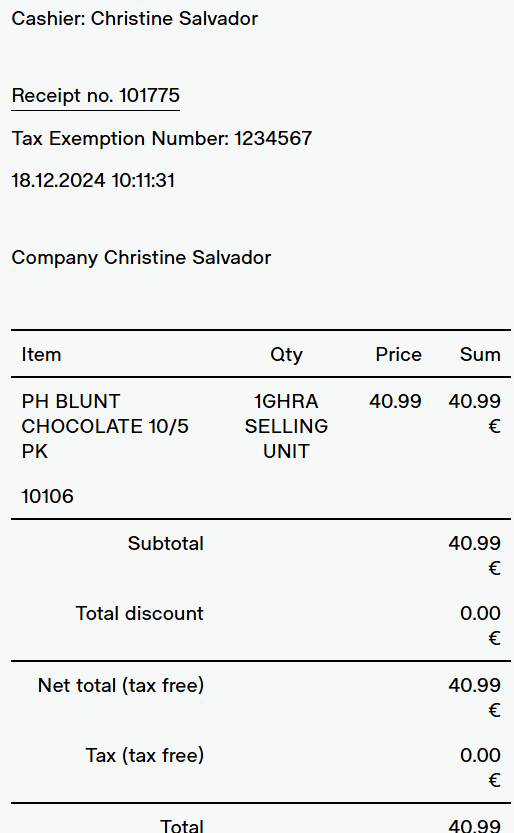
6. Completing the Transaction
- Proceed to complete the payment for the sale.
- Print the receipt. The ‘Tax Exemption Number’ will be displayed on the receipt, confirming that the sale was processed tax-free.
Important Note
If you need to add or remove tax for each product, consider using Adding or Removing Tax at the Product Level in POS.