Activate Back Office plugin
Each custom payment type needs a unique system code. In order to create this system code you need a special plugin enabled. In this case, please contact support@erply.com and ask to enable the “Erply BO/POS Custom Payment Type” plugin.
Once it's done you can proceed with configuration.
Configure payment types in the Back Office
Custom payment types must first be configured in the Back Office. In the Back Office, navigate to the Settings -> All settings. Once in the settings page, navigate to Payment Types on the left hand gray menu bar.
If you would like to craete a new payment type, click on the “new” button.

In the Type of Payment menu, you’ll need to configure a few settings:
Name: Name of your new payment type. Check off the Create as custom payment type box!!!! (if you do not see such a field, it means that the BO plugin “Erply BO/POS Custom Payment Type” is not enabled yet).
System code: A unique code to give the system. System codes are used to determine which payment type fills which purpose. Important: there should be only one payment type for each purpose: CASH, CARD, etc.
You do not need to create separate card payment types for Visa, Mastercard, AMEX etc. — if you are using an integrated payment terminal, the system will distinguish them automatically in the reports.
Note: System codes must be 10 characters or less, and must be from the system codes which are built into Erply (CANCELFEE, CARD, CASH, CHECK, CREDIT, GIFTCARD, TIP, and TRANSFER).
Save these options when you are finished.
Setting up custom payments at the Berlin POS
Erply has two plugins that allow you to add your own tender type at the POS and the back office.
In this guide, we’ll cover how to configure, and use the Erply BO Custom Payment Type and Erply POS Custom Payment Type (Berlin POS) plugins.
Contact support@erply.com, if you would like to add those plugins on your account.
Setting up custom payments at the Brazil POS
Open the POS to apply your new custom payment. Click the Settings button and select Payment Configuration.
Your new custom payment method will be listed on this screen. Check off the custom payments that you wish to use in the POS.

This menu can be used to enable and disable custom payment methods at any time as long as you have proper user rights.
Making sales in the Brazil POS with your custom payment
In the POS payments window, your new custom payment method will appear as a payment option.

Select your new payment method to get started. You’ll be able to finalize the sale as usual.
Custom payments in back office sales
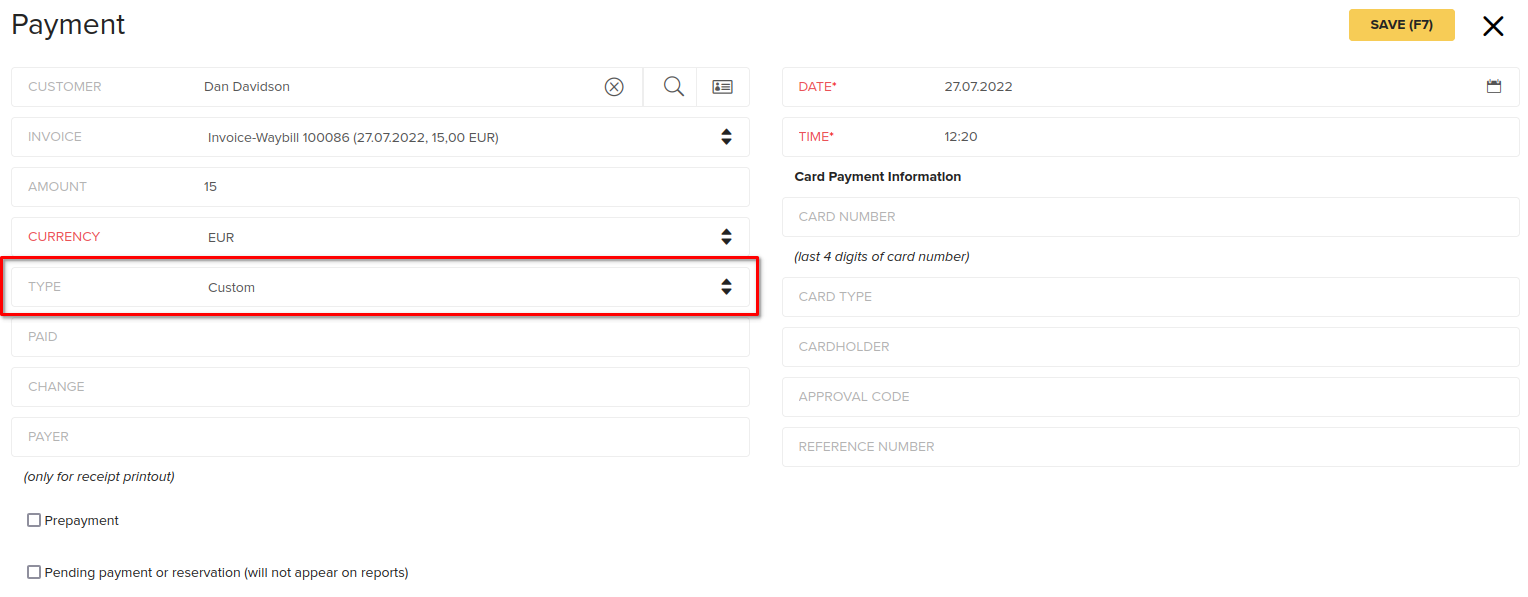
When making payments in the back office, your custom payment option will appear as a payment type.

Reports
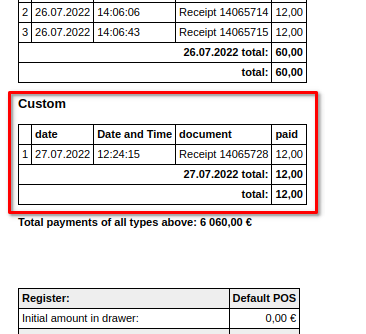
Custom payments will appear on X reports and Z-reports.
