Benefits of Actual Reports
Faster service with automated documents
Smart templates save you manual work by automatically populating documents with data on sales, customer information, order status, and more.
Stronger branding
Whether you’re implementing a new barcode system or simply want to change the price of an item, all templates are easily editable. Add custom fields, insert data from the back office, and more.
Common uses for Actual Reports:
- New invoice or purchase order templates
- Redesigned receipts for in-store and online purchases
- Custom labels for items without barcodes
- Product labels with additional information
How to use Actual Reports
Actual Reports is a powerful tool that allows for endless customization options. This guide will cover the basics so you can get redesign an existing document template, or create an entirely new design.
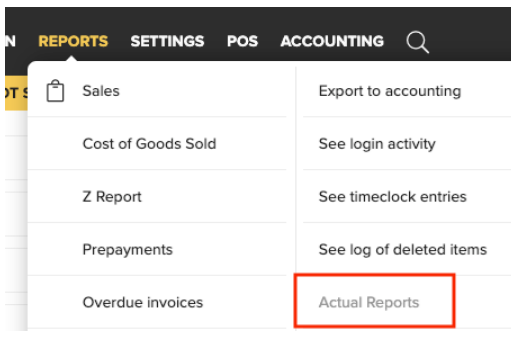
Actual Reports can be accessed in the back office by navigating to the Reports module and selecting Actual Reports (may be unavailable if you are using Berlin Back Office).
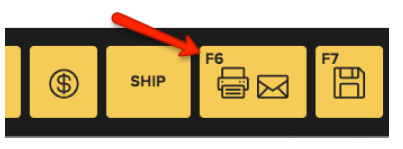
Alternatively, you can open Actual Reports by opening any documents (invoice, receipt, etc) and present the Print/Email button on the bottom menu.
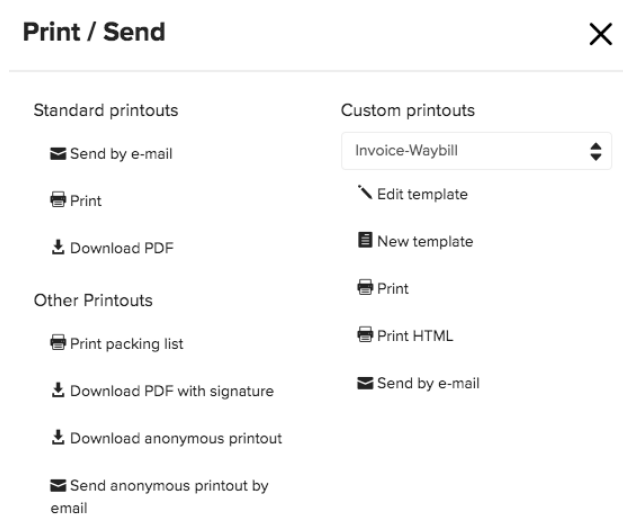
From there, find the custom printouts section in the Print/Send window.
Click on the custom printouts dropdown bar to select a template
Select New template or edit template depending on what you wish to do
We strongly recommend duplicating a template before editing it to preserve the original template layout.
In the Classic Back office version, you can access the program in a similar manner, moving to a document and finding the following rows on top of the document:

In order to access Actual Reports, press on the third button in the row:  . Before pressing the button, choose the template you want to edit. There are no other changes to access due to version changes.
Template copying / saving:
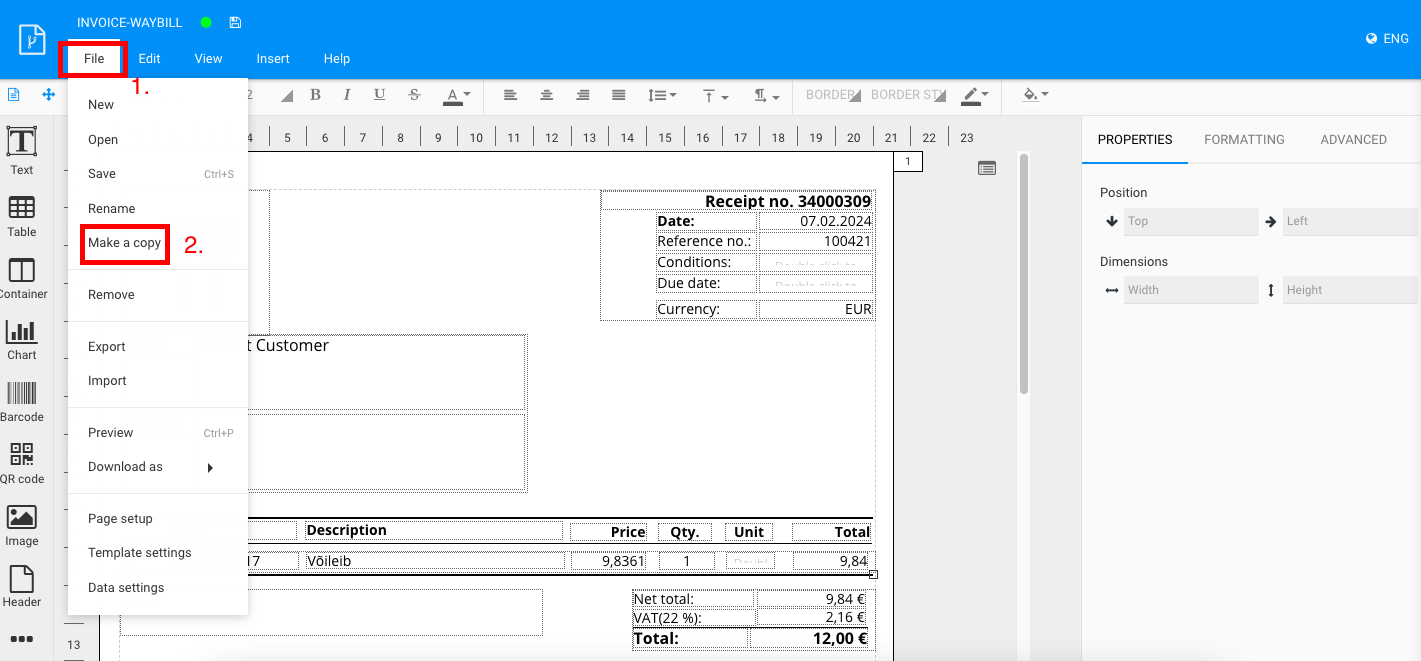
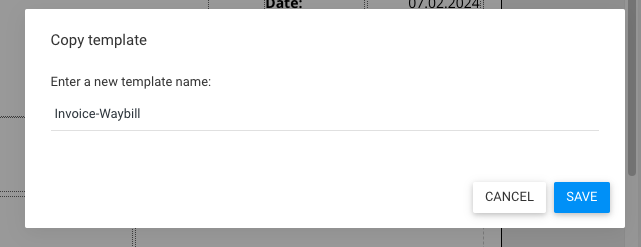
Once you’ve opened the Actual Reports designer, then press on the button named “File” (1) then on “Make a copy” (2):
Once you’ve pressed on the button, a section named “Copy template” will open, where you can change the name of the document:
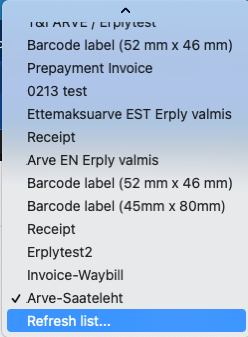
If you go back into the menu, where you opened the “Print / Send” section and update the list by pressing on the button “Refresh List”, the list will show :
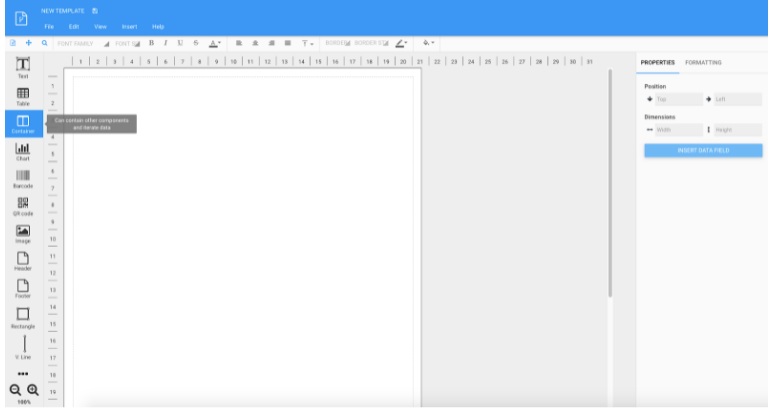
Design elements
Actual Reports has a wide variety of built-in printing options that can be populated with data for semi-automated printing tools.
Use Actual Reports to design a document with:
- Text boxes
- Tables
- Charts
- Barcodes and QR codes
- Add images
- Lines, shapes, and symbols
- Checkboxes and radio buttons
Click on a design element from the left sidebar to add it to your document.
Elements can be fine-tuned for specific designs. Click on an item in your document to change its appearance, associate data with it, and more.
Properties: Define basic item attributes, such as size and location.
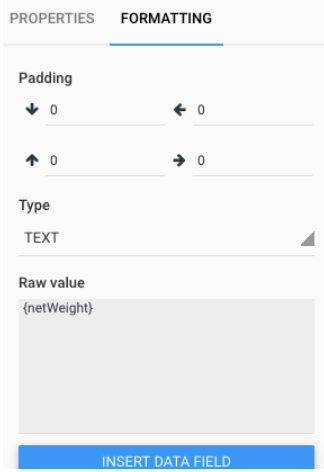
Formatting: Adjust the layout and content within an item.
Inserting data
Selecting the Insert Data Field button on items like text boxes and barcodes will allow you to link data to an element.
1. Navigate to the Properties tab and select Insert Data Field.

Erply will populate a list of data fields from the back office. Each data field lists its coding and how that field would populate in a given document.
In this example, if you populate a field with the code “customerMobile,” it would pull the mobile phone number assigned to the customer associated with the document. In this example, it would populate “555-555-5555.
Type of data | How to format | Example |
Data without subfields | Enter the data field within curly brackets. | {documentName} |
Data with subfields | Enter the parent data field followed by two colons and the sub-field desired, within an opened and closed curly bracket. | {documentRows::code} |
Pro tip: You can add text before or after a data field to indicate what generated data is being populated.
Creating and editing containers
A container is a template within a template that uses data to populate documents within Erply. Containers are used to automatically list data for each new line on a document, such as a receipt with multiple items.
In the below example, the container is used to hold the values of a product’s code and it’s name.

Containers can be created from scratch, but it’s easiest to start with a pre-made container that exists within a template. When adding containers to a document template, we recommend the following steps:
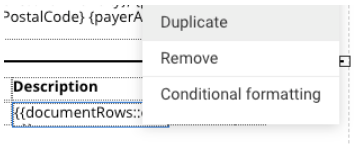
- When creating a new column in a document template, clone a field by right-clicking the field and selecting duplicate.
2. Move the data field to its desired location in the document template. We recommend clicking on the data field to open the Properties tab, and moving it by adjusting the position values.
This method is a much more accurate way to move an item than clicking and dragging.
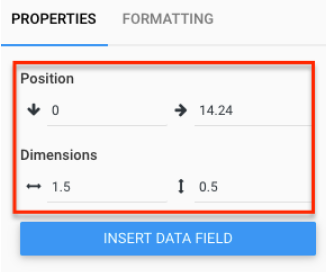
Tip: Increasing a position number will move it down or to the right depending on the direction marker selected.
Decreasing a position number will move it up or to the left depending on the direction marker selected. |
|---|
3. If you need to change the size of the data field, use the dimensions value in the properties tab.
4. Click on your new item and select Insert data field to populate it with your desired data.

You can confirm that the old data field was successfully removed by clicking on the item and opening the Formatting tab. The Raw value box should only contain the data fields that you selected.
Frequently asked questions
I’m not seeing any data when I select “Insert Data Field.”
We recommend duplicating an existing template similar to the one you’re working on, then redesigning the new template. This ensures all data that you need is populated into the document template.
This is also helpful for knowing exactly what pieces of data are associated with each data field.