A prepayment invoice is an invoice that allows you to accept advance payments from your customers. Prepayments are used when customers will be making more than one payment on an order.
Benefits of Prepayment Invoices
Flexible payment options
Give your customers more ways to shop at your store. Allow customers to pay a percentage-based or a flat prepayment fee upfront, or allow them to enroll in a prepayment plan.
Prepayments for any work process
Prepayments are commonly used to:
- Allow customers to prepay for an expensive item over a period of time
- Require order to receive down payments before they are shipped.
Improve inventory accuracy
Because prepayment invoices do not pull inventory from your records until an invoice is created, your inventory counts will remain up-to-date across all store locations and warehouses.
Create a Prepayment Invoice
Erply offers two prepayment options: layaways and prepayment invoices.
Please note that prepayments do not subtract inventory from your counts until an invoice is created (more information in the “Finalize a prepayment” section below)
In the back office
Navigate to Sales -> Create an Invoice and set the invoice type as Prepayment Invoice.
POS Option 1: Layaways for prepayment
Layaways are typically used to create prepayment orders. They require upfront payment that can be set up with payment plans.
Learn more at our layaways guide.
POS Option 2: Orders for prepayment
Prepayments can be made by creating orders.
Learn more at our save as order guide.
Add Payments to Prepayment Invoice
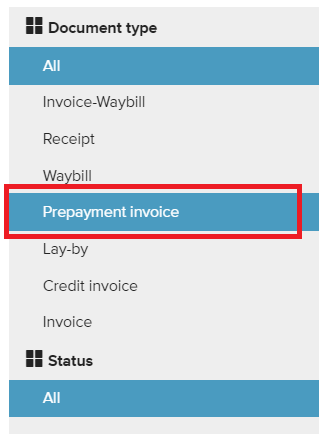
In the back office, navigate to Sales -> Invoices and locate the Document type menu on the left-hand menu bar and select Prepayment invoices. This will ensure Erply only displays prepayment invoices.
Click on a prepayment invoice to get started.
Prepayments can be filled out like regular invoices but have a few special fields:
Prepayment%: How much prepayment to be collected from the customer.
Advance Payment: How much prepayment to collect based on the chosen specified percentage.
Shipping date: indicates the date at which this item is to be sent to the customer.
Click the Dollar sign button in the bottom menu to add a payment.
Enter the payment amount and press Save to add it to the invoice.
Repeat this process any time that you’d like to add a payment.
You can adjust the payments at any time by clicking on the dollar sign button and reselecting the payment.
Finalize a Prepayment
Remember that prepayments do not remove inventory unless they are converted into an invoice, thus you need to finalize them.
Start by opening your prepayment and selecting the To Invoice button in the bottom menu.
Erply will create an invoice waybill, which will reflect the sale, payments, and product movements associated with the original prepayment invoice.
Once Saved, the invoice-waybill will be created and linked with the prepayment invoice, and inventory will be pulled from stock.
Cancel a Prepayment Invoice
In the back office, navigate to Sales -> Invoices -> Document Type -> Prepayment Invoices.
Select an invoice that has a status of open or unpaid.
When viewing the Prepayment invoice, Press the Cancel button on the bottom menu tab.
Erply will not ask for confirmation when canceling an invoice, but we’ve included steps below that explain how to revert a canceled invoice.
After canceling and saving the prepayment, you will be moved to the main invoice screen. From here you can see that the selected invoice’s status has been changed to canceled.
Note: depending on your store policy, you may need to refund the customer for canceled prepayment invoices.
Revert a canceled prepayment invoice
In the event of incorrectly canceling a prepayment invoice, open the invoice and select the Clock icon on the bottom menu.
When selected, you are able to view the history from previous changes made to this document. Select any of the previous changes that apply.