Benefits of the Customer Display Application (Berlin)
Stronger customer engagements
Use customer display app to create personalized in-store experiences and encourage customer purchases.
Display rotating ads and promotions
Capture electronic signatures
Accept tips and donations
Display product and sale information specific to a customer’s cart
Full customization
Design your POS display with product photos, logos, videos, and more, then fine-tune your designs with HTML and CSS. Different layouts can be assigned to each customer display device.
Hardware flexibility
The customer display app will run on any device with a screen and an internet connection. Show your displays on a tablet, computer, secondary monitor, or any other display hardware in your store.
How to use the customer display app
You can log into the Customer Display app at the following link:
http://app.erply.com/services/display-berlin/
Please be advised that you must follow the setup steps below in order for the Customer Display app to function properly.
Add a logo
In the back office, navigate to the Settings module and select Configuration. Locate the Company logo on invoices section.
From here, you can choose a logo to upload on your invoices and POS receipts.
Setting up the POS
At the POS, click the Gear icon to open the settings menu.
Press Configuration.
Scroll down and check off enable customer display application and enable Svipe box. Hit Save to save these settings.
Note: Custom Panel Source
This box allows you to specify the content on the right-half of the Customer Display application. Any designs must be inputted in standard HTML format.
Logging in to the Customer Display
Log into the Customer Display app at the below link:
http://app.erply.com/services/display-berlin/
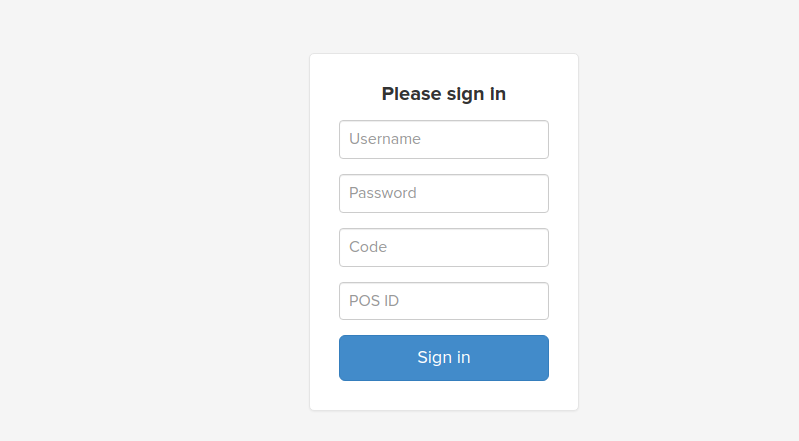
You must log in with the following credentials:
Username: Employee’s username.
Password: Employee’s password.
Code: Erply customer code that you log into your account with (usually a 5-6 digit code).
POS ID: Your POS ID or register number.
This can be round in the back office by clicking Retail chain → Registers and looking at the # column.
Configuring the Customer Display app
The Customer Display app is intended to run on a second screen. This second screen is typically connected to the computer running the register, but it can run independently as well.
You may set up the customer display app on an iPad, iPhone, Android, or any other device that can run a web browser.
To split the screen or to set up a second screen, the computer must be able to detect an additional screen or monitor.
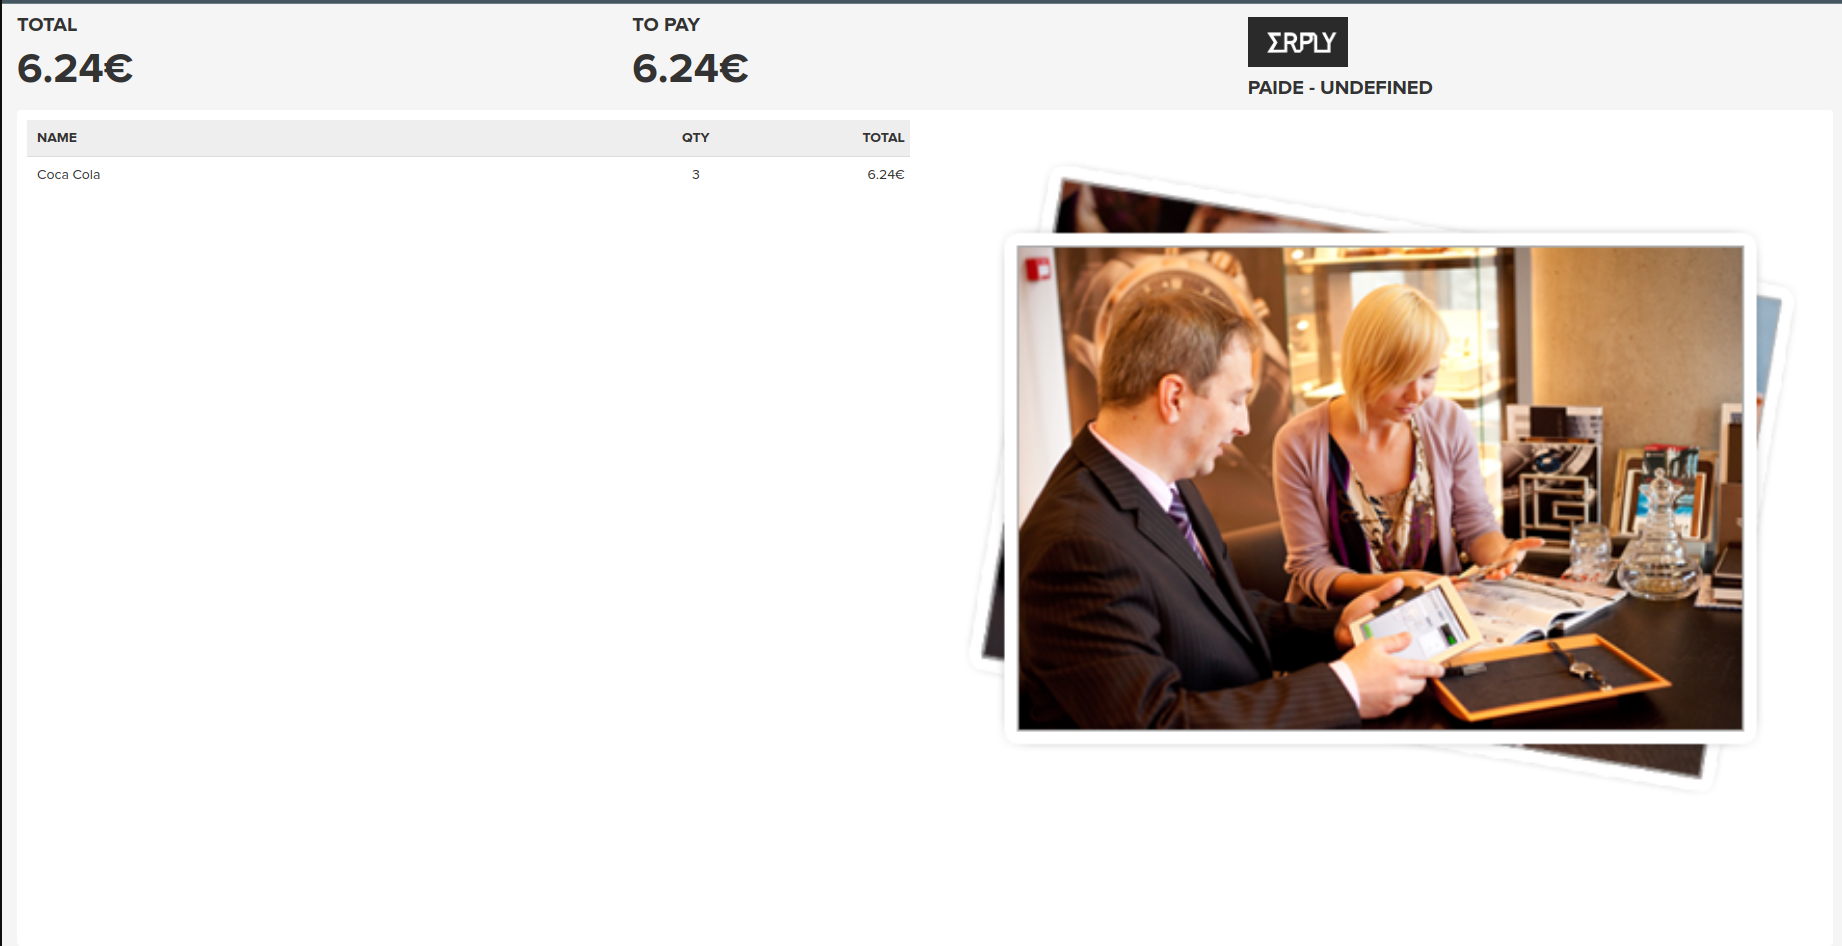
Run a test sale
Once you configure your screen through the Customer Display app, log back into Erply and start adding items to the cart.
The Customer Display app will update in real-time, as shown below. The right side of the POS screen is fully customizable using HTML.
Additional ways to customize your display
As noted above, the Custom panel source POS setting can be used to customize the right side of your display screen.
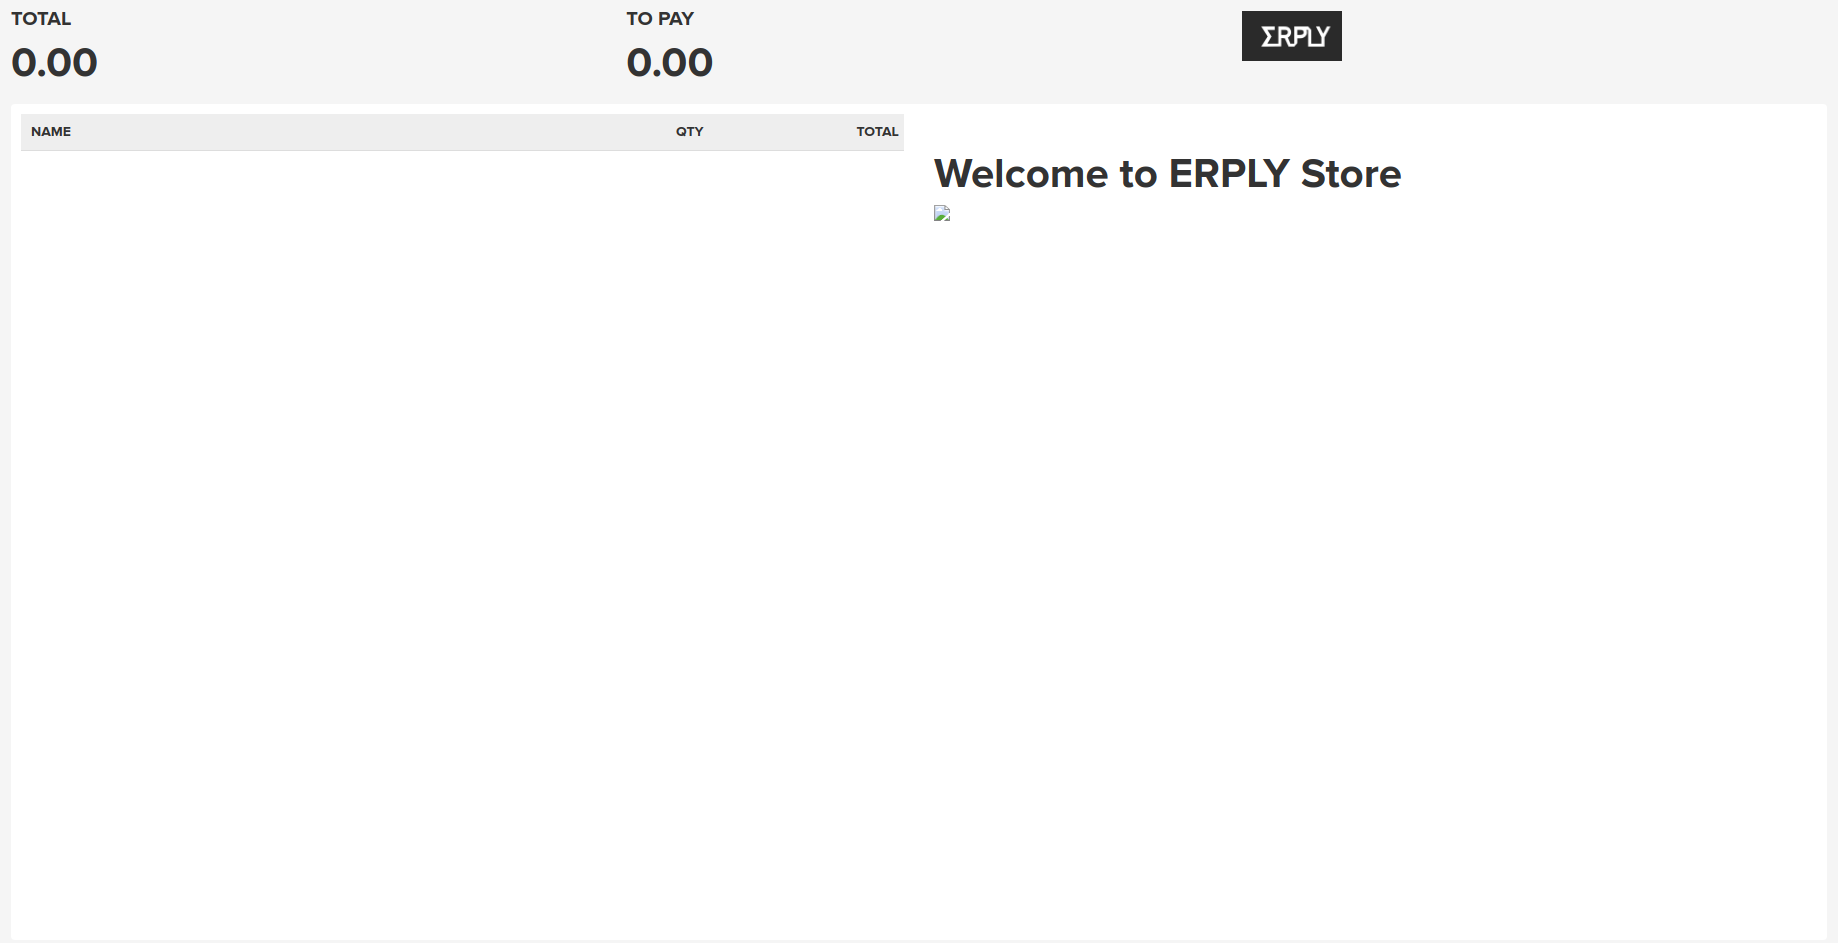
Replace default image with store logo and replace default text
You can replace the default image with your store logo/image or/and text. The code to do that is as follows:
| <h1> Welcome to ERPLY Store </h1> <img src = “LINK_TO_IMAGE”> |
Example code:

How the Customer Display app screen will change: