Physical Stocktaking is a process of counting products (whether all or some specific group; category etc) in a location. After the count in a location is done, then physical stocktaking report is created. In that report, it’s possible to change the count of already counted product; add some missing product, or do some other changes.
Differences with current Physical Stocktaking
New stocktaking allows to modify the table as needed for the user
1.1 To choose only necessary columns to the table
1.2 More filtering options
1.3 More sorting options
Also, user can add more products to the stocktaking, if it is still in progress.
User can unconfirm already confirmed stocktaking to edit it.
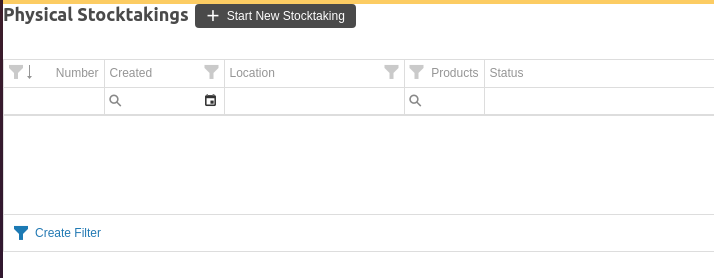
List of physical stocktakings
Table contains created stocktakings, whether still in progress or already confirmed. Stocktakings are sorted from newest to oldest. The table holds the information of
stocktaking id
creation time
warehouse name
how many products are added to the stocktaking
the status of the stocktaking - whether in progress or confirmed. If confirmed, then confirmation time and who confirmed the stocktaking are also added
optional filters, that were added in the beginning of stocktaking creating;
- whether lay-by items are included or excluded
Only those stocktakings, where the user has the warehouse access to, are shown in the list. Which means that if there is stocktaking made in warehouse “Location 1”, but user doesn’t have the access to this warehouse, then the stocktaking is not shown in the list.
Deleting a stocktaking
In the table, it is also possible to delete the stocktaking. Red trash button is added as the last column. One stocktaking can be deleted at a time. To be able to delete the stocktaking, then user has to have the rights to delete the stocktaking (Settings - User groups - opening the user group - physical stocktaking - deleting rights are added).
If the user doesn’t have the right to delete the stocktaking and clicking on the delete button, then confirmation popup appears.
User gets the message “Sorry operation denied, missing user right”
If the user has the right to delete stocktaking, and clicking on the button, then confirmation popup appears.
If clicking on “Cancel”, then the popup closes and stocktaking remains
If clicking on “YES”, then popup closes and stocktaking is deleted and cannot be found from the list
Creating new stocktaking
New stocktaking can be created by clicking on the “Start New Stocktaking” button on the top left corner on physical stocktakings view.
Corresponding rights have to be added to the user for adding new stocktaking Settings - User groups - opening the user group - physical stocktaking - adding rights are added).
When clicking on the “Start New Stocktaking” button, then popup appears. On that popup, it is required to fill the “Location” field. All the locations, where the user has the access to, are listed in dropdown.
It is possible to add other filtering field on that popup. For example, a specific product group, category, supplier, brand etc. Also, whether only products with positive stock, or with negative stock as well and so on.
When clicking on the “Start New Stocktaking” button on that popup, then the popup closes, and those products, that match with the requirements, are added to the list.
Next step is to add counted quantities to the products and to save the form. Only numbers and “.”; “,”, “-” can be added to the field. If adding comma “,” as a decimal separator, then it will be converted to dot “.”.
Counted Value, Variance Qty and Variance fields are filled after the calculations.
Stocktaking form
When opening existing stocktaking from the list, then more detailed view about the stocktaking is shown.
On the top left corner, there is an information about the opened stocktaking - document number; created time; warehouse and whether lay-by items are included or not. If other filters are applied to the stocktaking as well, then those are listed there as well.
All the products added to the stocktaking are listed with the details (product group; category, price, quantity etc). At the end of the columns, there are totals calculated for each one. This is visible on every page.
It can be chosen, how many products per page are shown (7; 15; 30). By default, there are 15 products per page.
And it can be moved from page to page by clicking on the page number or the arrow buttons.
To leave the stocktaking form, then by clicking on the “back” arrow button on the top left corner, the list of all created stocktakings are shown. If there are changes made during the process, then confirmation popup appears for asking, whether to leave without saving. If clicking on “OK” button, then the changes are not saved and user leaves the form. If clicking on “Cancel” or “x” button, then the stocktaking form appears again, where it is possible to save the form, if needed.
Searching
Products can be searched by each column - name, group, code, quantity etc. The search locates for every column under the column header.
Then the specific products are shown in the table so that the product can be found more easily (especially, if there are a lot of products). Multiple columns can be used for the search.
General search can also be used, which searches from the product name; product code; barcode column.
Sorting
Columns can be sorted from “smallest to largest”/”A-Z” and “largest to smallest”/”Z-A”. These columns are indicated with the up or down arrow. The sorting can be removed from the column by right clicking on the column header and choosing “Clear sorting”.
Filtering
All the columns appearing in the table, can be filtered. One or multiple filters can be applied to the table. For adding a filter to the column, then it can be done by clicking on the filtering button on column header. The filtering options then appear in a small tab. The filtering option can be chosen by checking those options and then clicking on “OK” button. Those columns, where filters are applied, the filtering button is darker.
To remove a specific filter, then it can be done by clicking again on the “Filtering” button and uncehcking those options.
Or, if all the filters need to be removed, then it can be done by clicking on the “Clear” button on the bottom right corner. “Clear” button is visible only, if at least one filter is applied to the table.
Calculations
If “Count Qty” field is filled, then following fields can be calculated as well - Counted value, Variance Qty and Variance value.
Counted value - Item cost multiplied by count qty. For example: item cost: $10, counted: 5 - counted value: $50
Variance quantity - Difference between counted quantity and System quantity (if lay-by items are excluded, then those as well). For example:
1. Lay-by items are included. Count quantity: 5, System qty: 10 - variance quantity: Count qty-System qty = -5 (it doesn’t affect, what is the value of LayBy Qty)
2. Lay-by items are excluded. Count quantity: 5, System qty: 10, LayBy Qty: 2 - variance quantity: Count qty - (System qty - LayBy qty) = -3
Available Qty values are calculated so that layby quantity is subtracted from system quantity. For example:
System quantity: 10; Layby quantity: 5; available quantity: system-layby= 5
Finding uncounted products
If there are products that are not yet counted (Count Qty field is empty), then those products can be found easily.
For that, click on the filtering button on the Count Qty column header - dropdown appears. Check the (Blanks) choice and click on “OK” button. The list refreshes and only those products, where the counted quantity field is empty, are shown.
Filling not counted fields with zero
If there are not counted products and user wants to fill these fields with zero (0), then it’s quick to do so. On the top right corner, there is a button “Enter zeros for not counted items”.
The button is visible only, if the stocktaking is unconfirmed. Also, if the stocktaking is unconfirmed, then there has to be at least one count quantity field without any value. Otherwise the button is disabled and cannot click on it.
If the requirements are met and clicking on the button, then all those fields missing any value, are now filled with 0. After saving the form, other fields are calculated as well.
Reverting the changes
If user has inserted a wrong product or some wrong value, then it is possible to undo those changes.
One change at a time is reverted. It can be done as many times until the form was last saved. If the form is already saved, then those changes before saving cannot be reverted.
Adding missing products to unconfirmed stocktaking
Missing products can be added only to unconfirmed (in progress) stocktakings. If the stocktaking is already confirmed, then it’s not possible to add more products (unless unconfirming the confirmed stocktaking).
Corresponding rights have to be added to the user for adding new products to the created stocktaking (Settings - User groups - opening the user group - physical stocktaking - editing rights are added).
If there are missing products from the unconfirmed stocktaking that were not added automatically, then it is possible to add those. Click on the “+” button on the top right corner.
New popup appears, where you can find the product. Insert at least 3 characters from the product code and click on magnifying glass button (or click on “Enter”). Then all the found products are listed on that popup. Choose the correct product and click on it
If the product doesn’t yet exist on the stocktaking, then the popup closes and the product is added to the first row on the list.
If the product already exists on the stocktaking then message is shown about it and the list remains open. The popup can be closed from the “x” button on the top right corner, or when clicking on the “Cancel” red button.
If no products can be found, then message is shown about it.
If a product is just added to the stocktaking, and wanting to add another product, then the form has to be saved at first. Otherwise the changes will be lost.
Confirming the stocktaking
If stocktaking’s status is still in progress and user wants to confirm the stocktaking, then it can be done on the stocktaking form by clicking on the “Confirm” button on the top right corner.
Corresponding rights have to be added to the user for confirming the stocktaking (Settings - User groups - opening the user group - physical stocktaking - editing rights are added).
If stocktaking is confirmed, then the button will be disabled. It’s not possible to add new products nor change the product’s quantity.
If there are products, which Count qty is not filled, then after clicking on the “Confirm” button, there will be a popup. On that popup, it’s possible to fill the empty fields with zero (by clicking on “YES”). And it is also possible to confirm the form so that the fields remain empty (“NO, confirm with leaving them blank”).
Unconfirming confirmed stocktaking
If stocktaking is already confirmed, but user finds some mistake that needs to be changed, then it is possible to unconfirm the stocktaking.
Corresponding rights have to be added to the user for changing the status to unconfirmed (Settings - User groups - opening the user group - physical stocktaking - editing rights are added).
There is a button “Unconfirm” on the top right corner
After clicking on that button, the stocktaking has “In progress” status, which means that the user can add products to the stocktaking as well as changing/adding the counted quantity of some product. If user then confirms the stocktaking, then new confirmation time is added to the document.
Creating filters
If special filters are needed from general filters, then this can be done easily. On both stocktaking list and created stocktaking form, there is a button on the bottom left corner “Create Filter”.
When clicking on “Create Filter”, then popup appears, where new filters can be created. One or multiple filters can be created, so whether they all have to be applied (choosing AND) or only one of those filters (choosing OR).
For example, if stocktakings from specific date range are needed, then this can be done by the following steps:
On that popup click on “+” button and on the opening drop down, choose “add condition”
Choose “Created” option from the first drop down
Choose “Is between” option from the second drop down
Add the date range that needed
Click on “OK” button
Now only those stocktakings that have been created between that date range are shown in the list (as it is And condition).
The created filters can be deleted, if opening the popup once again. In the beginning of the created filter, there is a red “x” button. When clicking on that “x” button, then the row is removed and that filter doesn’t apply to the table anymore.
If all the filters (both general and created) need to be removed from the table, then it can be done with one click. On the bottom right corner, there is a button “Clear”. When clicking on that button, then no filters are applied to the table anymore.
Stocktaking export
It’s possible to export the stocktaking in Excel. Whether all the rows are exported, or only selected rows.
Frequently Asked Questions
How to mark products in stocktaking that need to remain negative?
At the bottom of the stocktaking form, there is an option button "enter default amounts for the rest of items...".
This will automatically fill in the original quantities (e.g., 0 or -1) for products with empty fields in the stocktaking form.