Benefits of stock replenishment within Erply
Maintain a lean inventory structure
Erply’s automated replenishment tools mean you never have to worry about ordering too much (or too little) of an item. Set a minimum stock level and Erply will notify you when inventory levels hit that minimum, no matter how many retail stores you manage.
Data-driven inventory ordering
Get an overview of inventory levels and availability across your entire retail chain, then use that data to understand customer purchasing patterns -- and plan your ordering processes accordingly.
How to replenish stock
This guide covers the following stock replenishment procedures:
Stock replenishment principles
Define an item’s restock and reorder points
Passive inventory ordering
Auto-generated inventory ordering (recommended)
Stock replenishment principles
Reorder point: The lowest point that you would like the inventory levels of a specific item to drop to before ordering more.
Restock level: The inventory level for a specific item that you would like to order ack up to, once the item hits is Reorder point.
For example:
iPhone order point = 10
iPhone restock level = 50
Say you have 8 iPhones in stock and are placing an order for more. Erply will prompt you to place an order for 42 iPhones.
8 (current stock) + 42 = 50 (restock level)
Define an item’s restock and reorder points
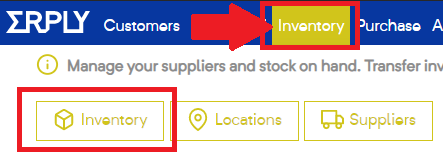
To define an item’s restock and reorder points, open it’s item card. You can do this by navigating to the Inventory module, selecting Inventory, then clicking on a product.
Scroll down to the Stock levels section to define the restock and reorder points.
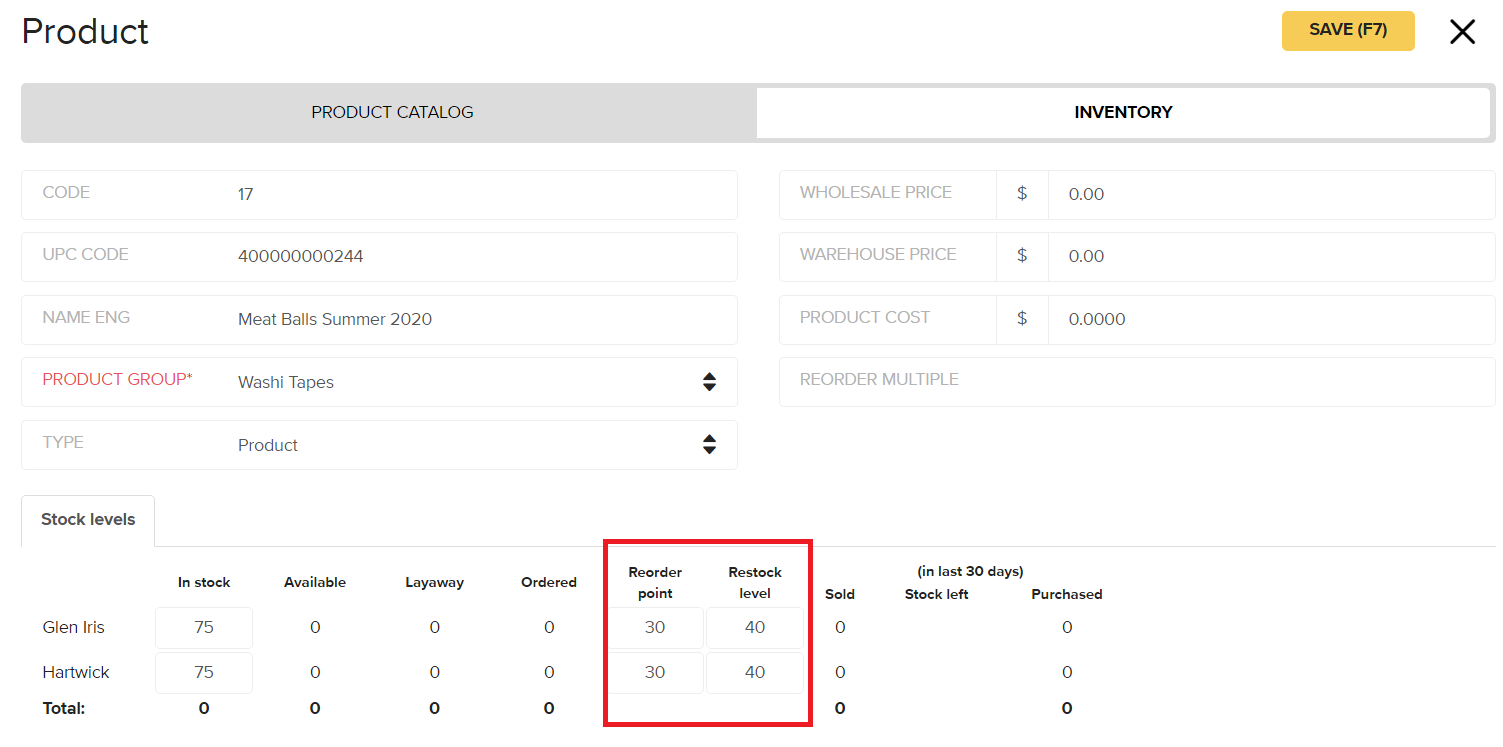
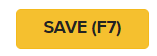
Make sure to Save when you are done.
Passive inventory ordering
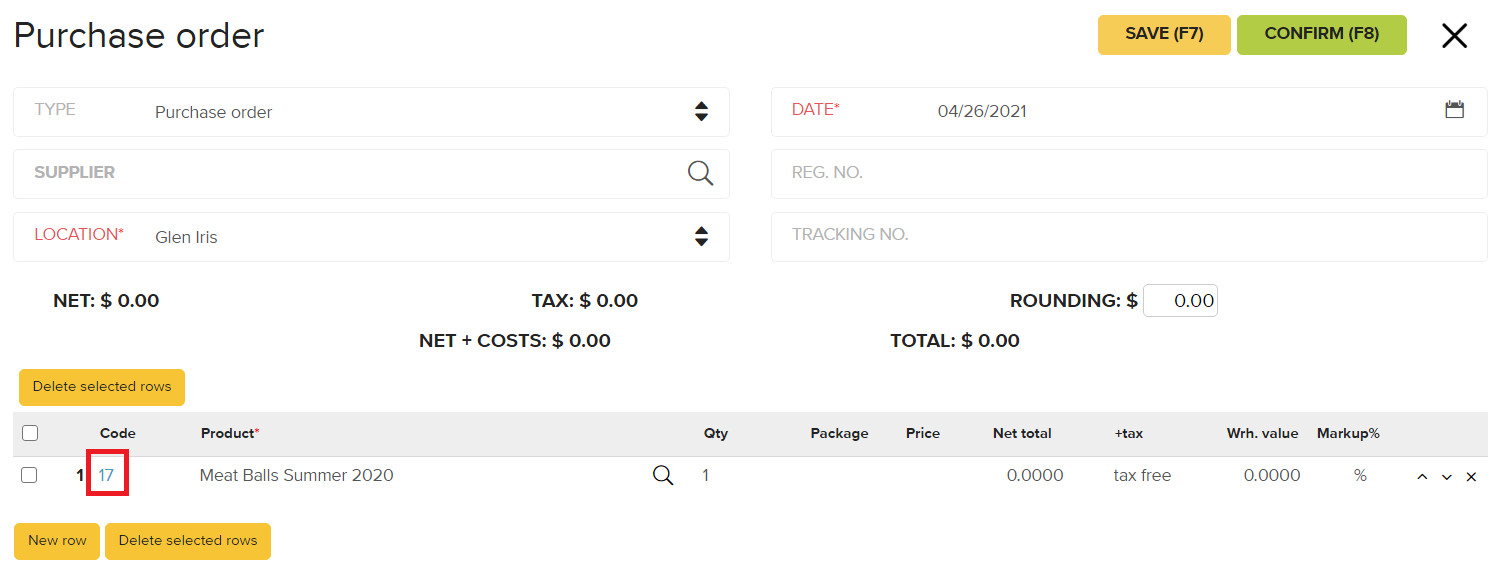
When creating a purchase order, you can open an inventory card to view the product’s inventory information. Use this information to forecast how much of that item to order.
The inventory card will display restock levels.
Click on the magnifying glass icon to open a list of your existing products.

Erply will display all products, along with inventory information showing how much of that product is in stock, in layaway, and available.
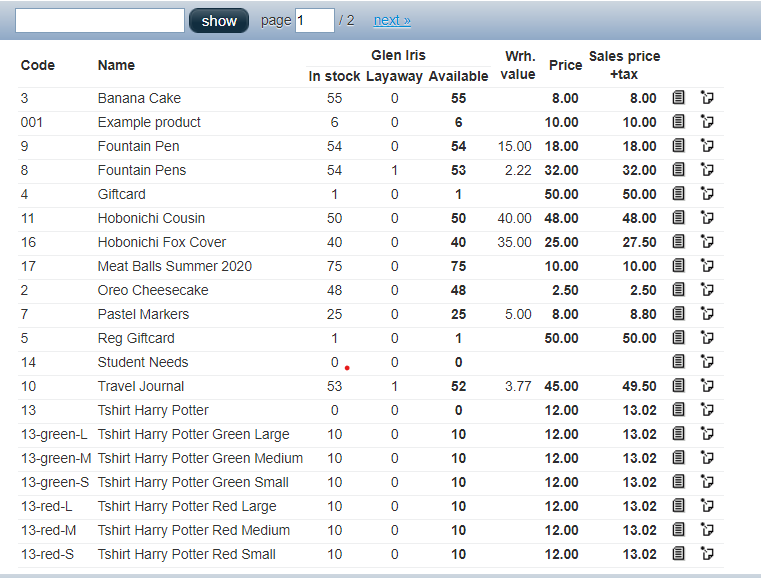
To only view the inventory information of a specific item in your purchase order, click the item’s product code under the “code” column.
Eprly will open the item’s product card. Click the Inventory tab and scroll down to the Stock levels section to view product stock information.
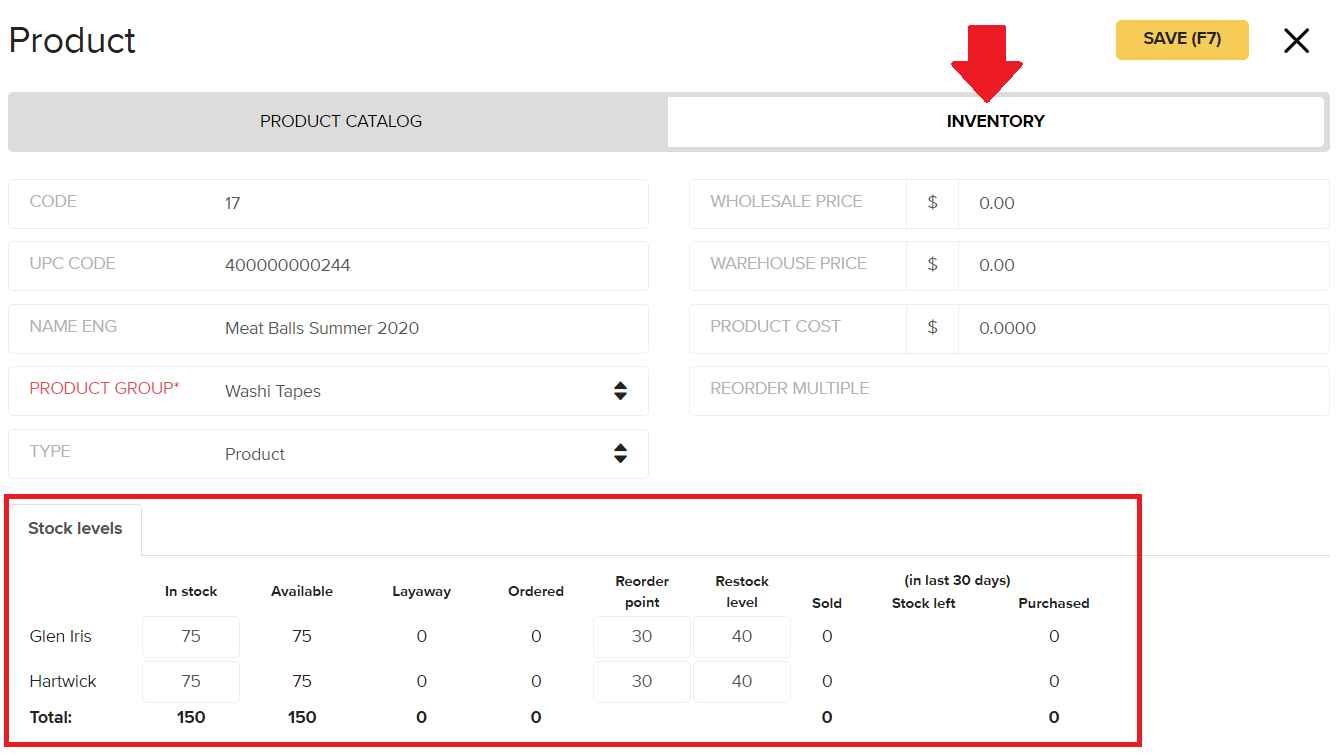
You can use this data to determine how much of that product you should order for each of your store locations.
Auto-generated inventory ordering
We recommend following this ordering process.
Automatic inventory replenishment happens by using the Stock Replenishment report in the Erply back office. Predefined restock and reorder points are used to auto-generate POs.
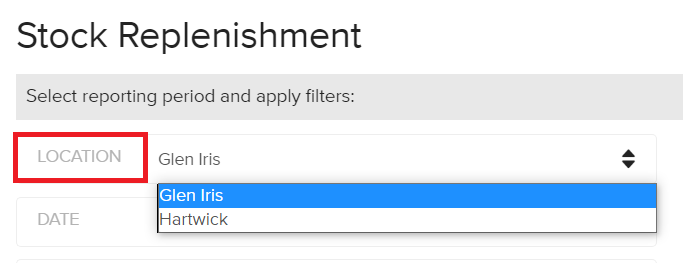
To open a Stock Replenishment report, click on the Purchase module and select Stock replenishment.
You can choose which location to restock by clicking on the Location field on the main screen of the report.
You have two report options here:
Stock Replenishment Report (CSV)
Inventory below reorder point or above restock level
Stock Replenishment Report (CSV)
This report allows you to replenish stock for a specific location. All items with inventory levels below their reorder point will be highlighted in pink.
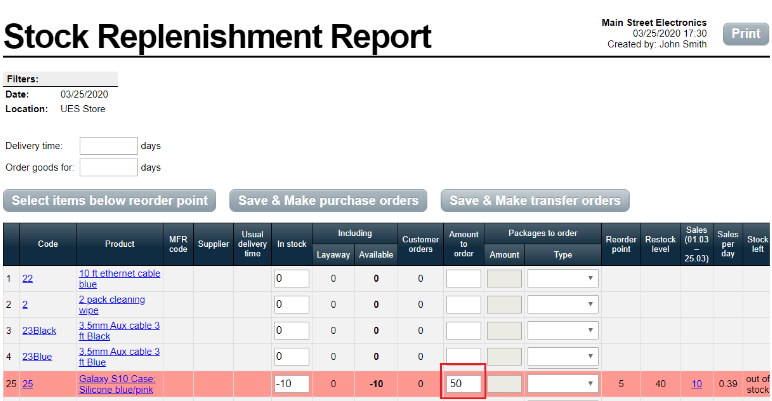
Clicking on the Select items below reorder point button will automatically add an “amount to order” for these items. The amount to order is based on your predefined restock and reorder levels.
In the above example, you’ll see the Galaxy S10 case has a restock level of 40, and a stock value of -10. Erply automatically calculated 50 as the “amount to order,” to bring stock levels back to their defined reorder point.

By selecting the 2nd grey button “add selected items to Purchase orders”, you can have the system auto generate the PO going out to supplier for this item.
-you can see this generated PO after clicking this button, under the “Purchases” Module:
The Save & Make purchase orders button tells Erply to auto-generate a PO to the supplier for the selected items.

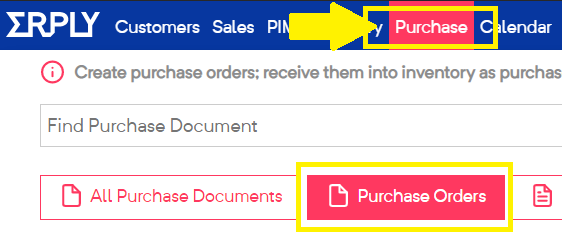
After confirming that you would like to create a purchase order, you can find these newly generated POs by navigating to the Purchase module and selecting Purchase orders.
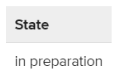
You'll see the PO created and ready to be sent to the supplier. Look for the PO that has a State of “in preparation”
Inventory below reorder point or above restock level
While this report doesn’t allow you to reorder new inventory, it does give you a birds’ eye view of all products with inventory levels below their reorder points.