Benefits of Timeclock
Boost timeclock accuracy
Erply’s automated timeclock software eliminates manual data entry errors, keeping your records as accurate as possible. Employees can clock in at the POS with the click of a button. Those records are automatically stored in the back office for payroll processing. Timeclock entries can be adjusted in the back office if an error does occur, such as an employee forgetting to clock out.
Honest clockin reports
75% of businesses are impacted by buddy punching, an instance where one employee clocks another employee in. With timeclock, you can issue each employee a secure login password or pin to prevent fake or incorrect clockins.
Full transparency for happier employees
Timeclock guarantees timely and accurate pay, ensuring that you and your employees are always on the same page. Because timeclock is accessible from anywhere, your employees have clear access to their work data whenever they need it.
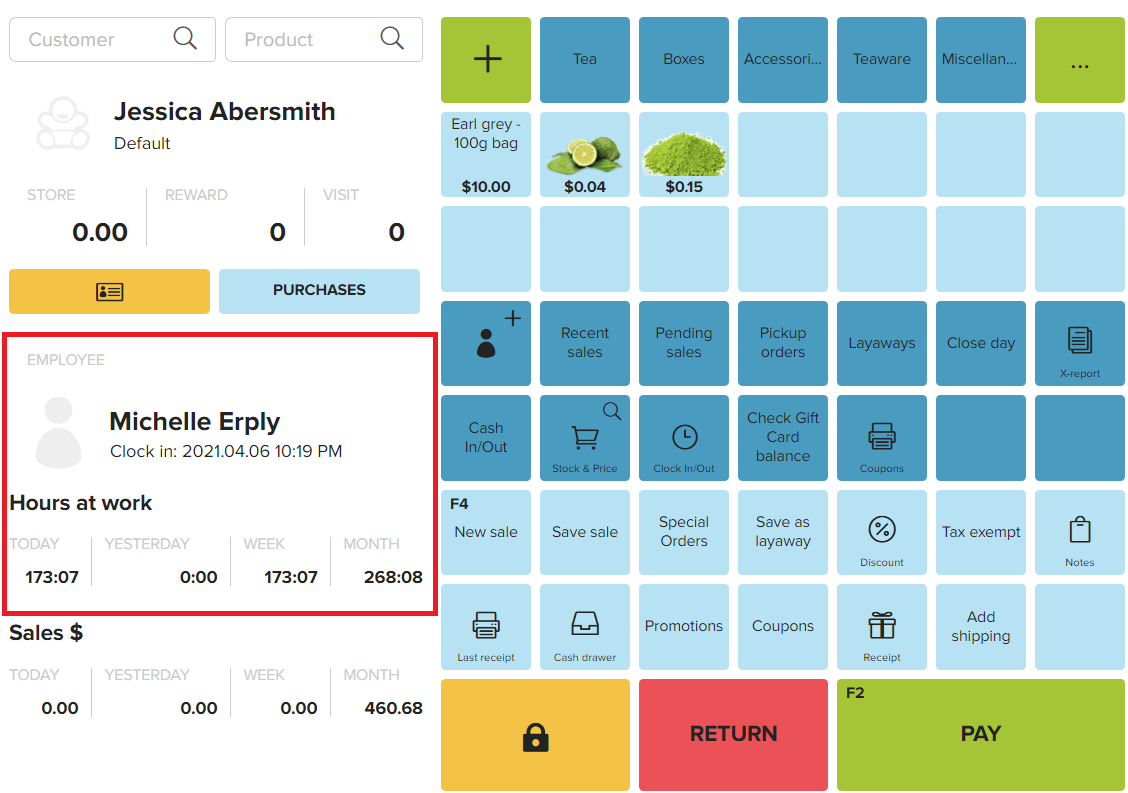
Clocking an employee in or out
POS > Functions > Clock In/Out
By using "Clock in/out" module, employees can clock in and out from POS to register their work hours and to keep a track on their hours worked.
If logged into POS:
Click on “Clock In/Out” function button, that opens a new form.
To clock in an employee, then add the employee from the “Employee” list and the employee’s PIN or password. Click on the “Clock in” button. If the clock in is successful, then the employee is added to the “Clocked in employees” list.
To clock out an employee, then choose the employee from the “Clocked in employees” list by clicking on that customer name. Add the employee’s PIN or password and click on the “Clock out” button. If the clock out is successful, then the employee is removed from the “Clocked in employees” list.
If not logged into POS:
Open the Sign in form. There is a clock button on the top right corner - click on it. “Clock in/out” form opens, where client code, username and password fields have to be filled. When clicking on the “Clock in/out” button and the employee information is correct, then:
- For clock in - locations list opens, where to choose the correct location and click on “Clock in” button
- For clock out - confirming the clock out by clicking on “Clock out” button
Employee’s work hours
POS home screen will show an employee their total hours worked by day, week, and month.
Hide hours worked in POS
Employee hours worked can be enabled or disabled in POS. The setting can be found:
POS > Settings > Configuration > Hide employee stats
Pulling timeclock reports
Back Office > Settings > Timeclock entries
Back Office > Retail Chain > Timeclock entries
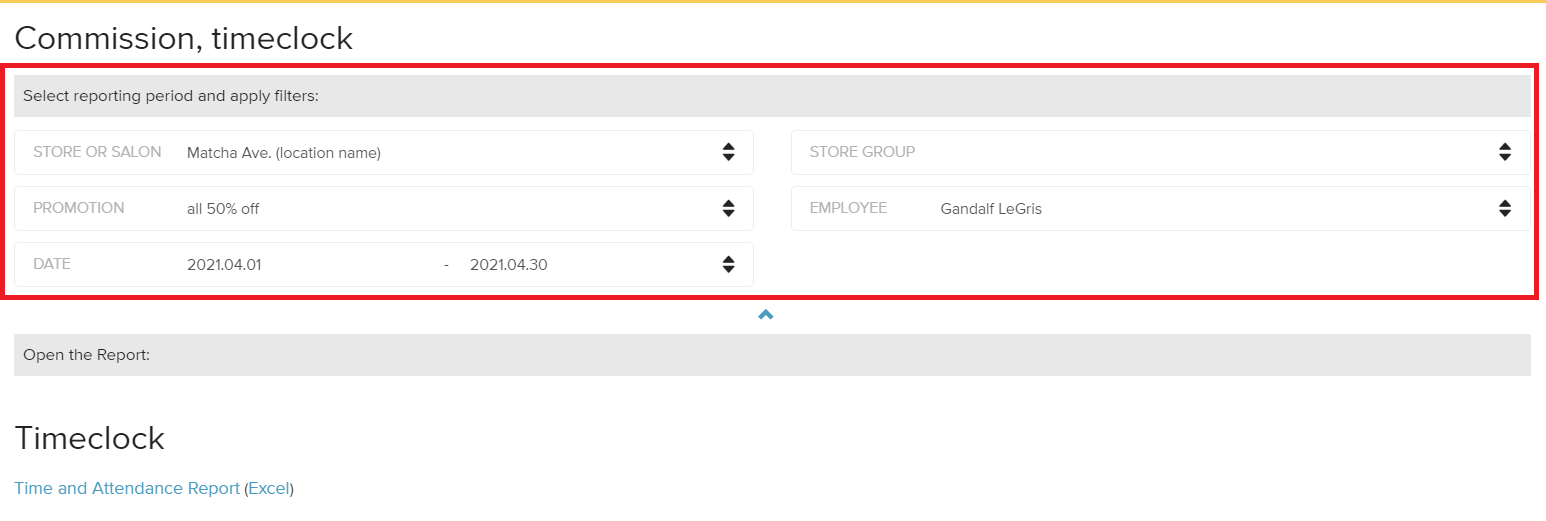
Back Office > Reports > Commission and timeclock > Time and Attendance Report
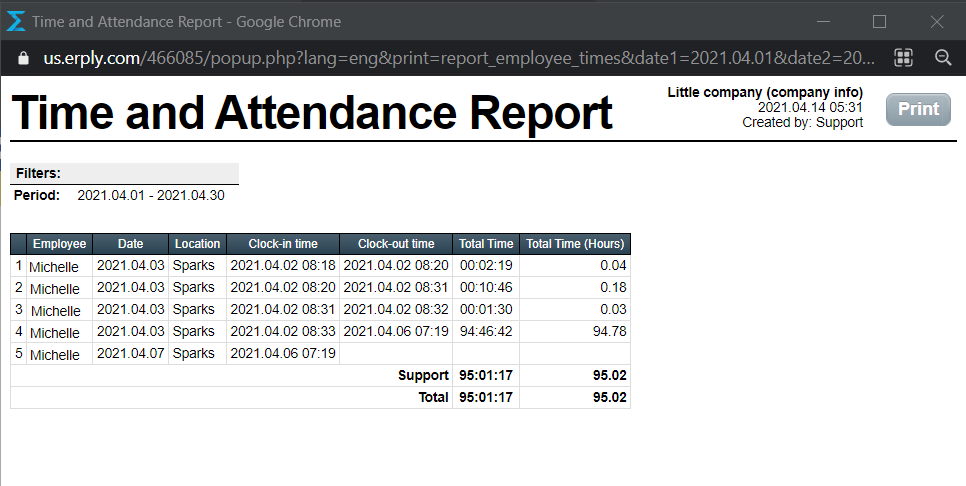
Timeclock reports can be pulled in the back office to gain an overview of total hours worked. Reports can be fine-tuned to view reports by store, by employee, and more.
Configuring the list of employees displayed in the clock-in window
This has been preliminarily documented as of March 2023. This feature does not work in Brazil POS yet and will appear in a future release.
Some roles in the company might not be required to clock in. To make the employee dropdown more concise and remove unnecessary groups of users, please follow these steps:
- Go to Settings > "Configuration Admin" in back office.
- Or use the URL https://conf-admin-ui.erply.com/?clientCode=<your-account-number> if your account does not have the new menu bar and “Configuration Admin” is not listed.
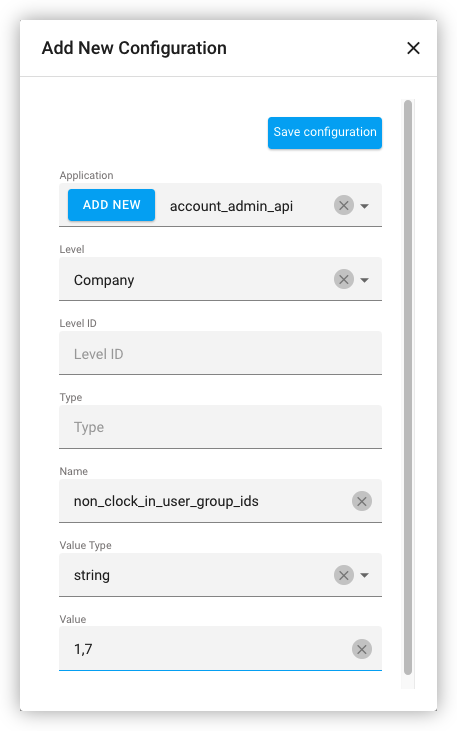
- Under “App configuration”, click “Add new configuration”
- Fill in the fields:
- Application:
account_admin_api. Click “Add new” if this application does not appear in the dropdown. After you have added a new application, an entry gets added to the dropdown and you can select it. - Level:
Company - Level ID: leave empty
- Type: leave empty
- Name:
non_clock_in_user_group_ids - Value type:
string - Value: a comma-separated list of the IDs of user groups that are not required to clock in, and do not have to be listed.
- Example:
1,7. Do not use any spaces between the entries. - To find out the ID of a user group, go to Settings > User groups in bac k office. Oen a user group. You will see the group's ID in the address bar, after
edit=…(Example: edit=8)
- Example:
- Application:
Frequently asked questions
What do I do if an employee forgot to clock out?
All timeclock records can be manually adjusted in the back office by an employee with the proper user rights.
Will Erply automatically clock out employees at the end of each day?
No, all employees will remain clocked in.
Can the POS be used if nobody is clocked in?
Yes, but we recommend that all employees clock in so your timeclock records are accurate.
Can more than one employee be clocked into the same POS?
Yes.
Terms to Know
Location: The store where an employee is clocked in or clocked out.
Time: The time recorded in Erply that an employee clocked in or clocked out.