Benefits of Inventory Transfers
Inventory Transfers allow you to move products from one location to another within the same Erply account.
With Transfer Orders and Inventory Transfers, you can track the whole process of requesting the products to another location, accepting the request, sending the products and receiving them.
Terms to know
There are two types of Inventory Transfer documents in ERPLY:
Transfer Order: Requires a receiving process before stock items are moved into the new location. You can configure what happens to stock in the interim in your settings/configurations page:
Inventory Transfer Order puts items on hold: The Items being transferred will be put on hold, still in the inventory. but cannot be sold. This can be used to avoid any complications during an inventory transfer.
Inventory Transfer Order removes items from inventory: Items being transferred will be removed from inventory. Can be used to avoid any complications during an inventory transfer.
Inventory Transfer: Inventory is immediately moved upon saving the document. An Inventory transfer is created as part of the receiving process for transfer orders.
How to use Transfer Orders and Inventory Transfers
Creating a Transfer Order
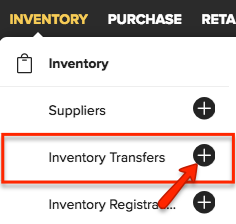
Step 1: Got to the INVENTORY module, click on the "+" next to Inventory Transfers in order to create a new Transfer Order.

Transfer Orders offer the most documentation in ERPLY and are designated as Best Practice in the system.
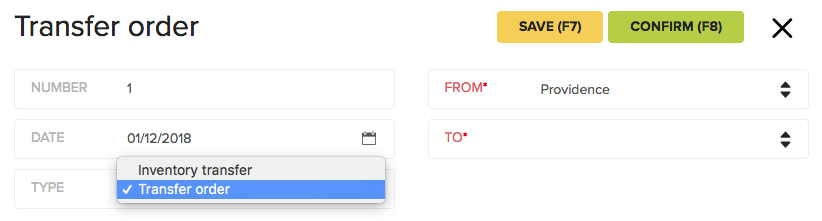
Step 2: Fill out all necessary fields such as designating the location which stock is coming FROM and the location where the stock is going TO. Select “Transfer order” as the Type by clicking on the dropdown menu. You may also make notes about the transfer in the grey column on the left hand side.
Step 3: Click Select Add to add in the items to be transferred.
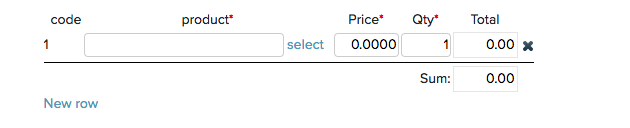
Note: To keep your cost of goods sold, inventory valuations, and margins correct, you should make sure the price on the items entered is correct on the transfer documentation.
Step 4: When satisfied, click Save, and then Confirm the transfer order.
Receiving a Transfer Order (creates a linked Inventory Transfer)
Step 1: Once the stock arrives at the new location. Go to the INVENTORY module and select inventory transfer to retrieve the transfer order. Then, select create transfer in the toolbar at the bottom of the page.

Note: If any items on the transfer order did not arrive, alter the warehouse transfer to reflect what was received. If the missing items arrive later, you will be able to receive them on another warehouse transfer which will also be associated to the original transfer order.
Step 2: Save and Confirm, inventory has now been moved to the new location. A delivery act can be printed out and attached to the physical stock to obtain signatures upon delivery.

Both processes give you additional options for creating a delivery act for receiving and documenting signatures.
Additionally, you can creating an invoice waybill straight from the transfer, in case this transfer is being moved on behalf of a customer who is buying all or some of the goods. Invoices created this way should be treated like any invoice and altered to reflect the transaction prior to confirming. If you will be transferring 2 items, but only 1 is being sold, the created invoice will put a quantity of 2 into the invoice. Alter this to “1” prior to confirmation or adding payment.
Creating an Inventory Transfer directly (without starting with a Transfer Order)
Step1: Got to the INVENTORY module, click on the "+" next to Inventory Transfers in order to create a new transfer.
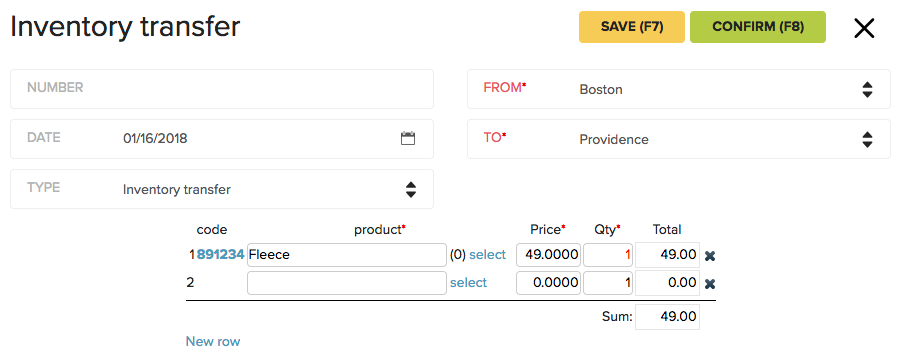
Step 2: Fill in the necessary information such as specification of from where, to where, adding the items. Inventory Transfers will move stock immediately. This is helpful in situations where the stock has already moved, or where extraneous documentation is not necessary.
Step 3: When satisfied, click Save, and then Confirm the inventory transfer. For regularly scheduled and recurring transfers, you may select the “copy” option to copy an existing transfer to repeat it.