Create a Sales Document in Erply Back Office
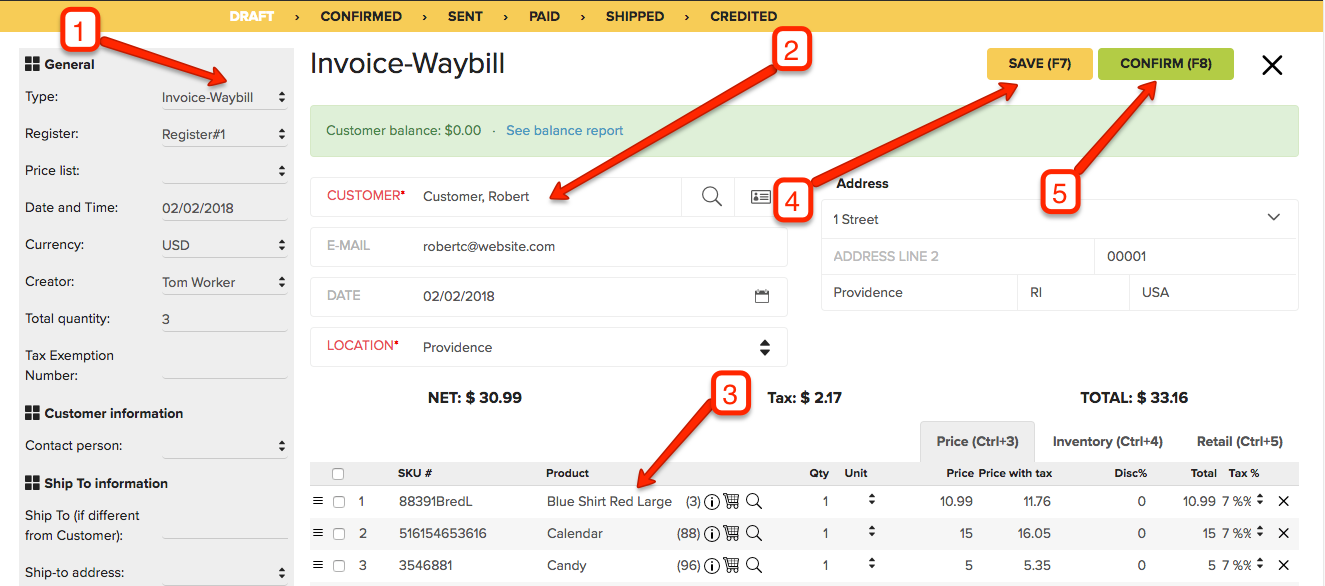
Navigate to Sales -> Create an Invoice.
Follow these steps to configure the sales document.
 | Step 1: Select the invoice type. Step 2: Select the customer. Step 3: Add the products you want to sell. Step 4: Click save if you want to save the order and edit it later. Step 5: Click confirm to confirm the order. Note: More options are available to you on the left grey column. Once you click Confirm, a code will be assigned to the Invoice. |
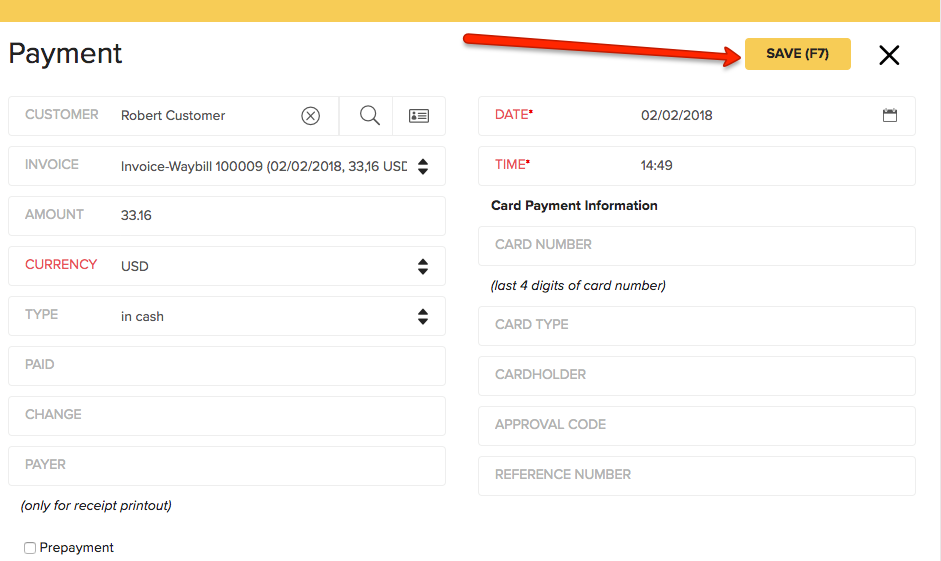
Take the payment
Go to Sales -> Invoices and locate your invoice. On the invoice row, click on More… -> Insert payment.
Take your payment the way you prefer and click on Save once you are satisfied with the results
