Erply enables you to send out SMS notifications to your customers upon making a sale, an order or when an work order has been finished. For sending out text messages we are using Twilio.
To start using the service you must first create a Twilio account or if you already have an existing Twilio account then you need to create a new messaging service in Twilio.
To create a new account visit Twilio
Here is a step by step guide for setting up the SMS Notifications Service
Step 1 - Create a new Twilio account
Go to Twilio and on the right top corner click on "Sign Up"
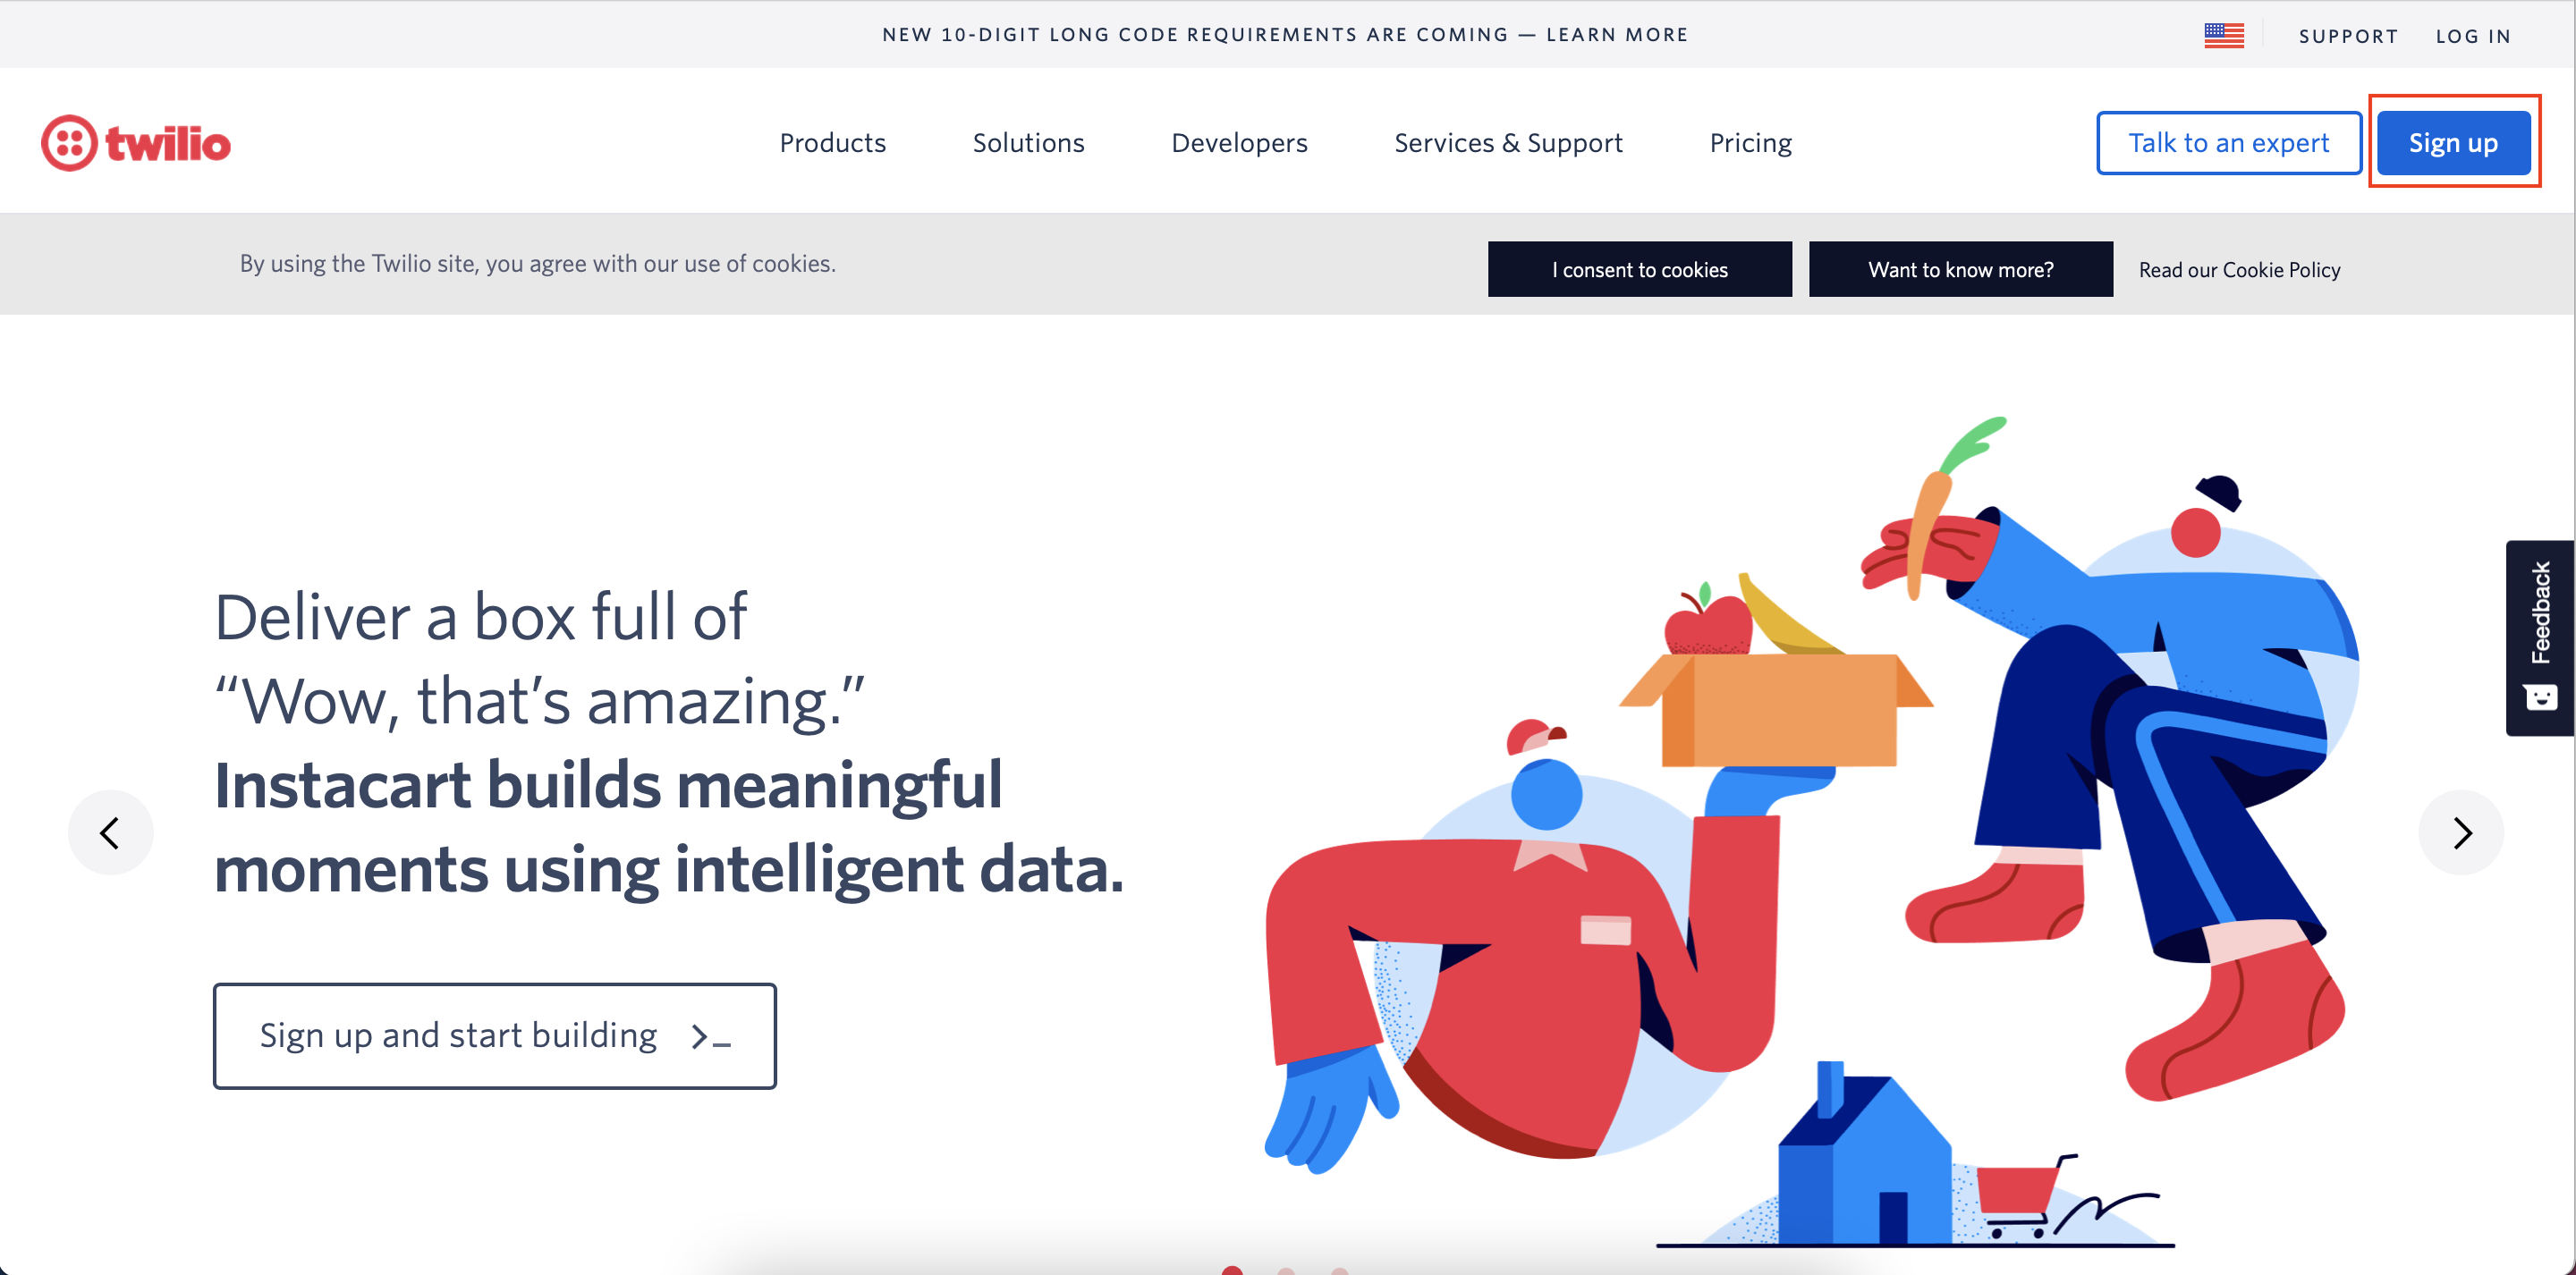
After clicking on “Sign up” you will be directed to a sign up form and Twilio will guide you through the sign up process.
Step 2 - Set up a new “Messaging Service”
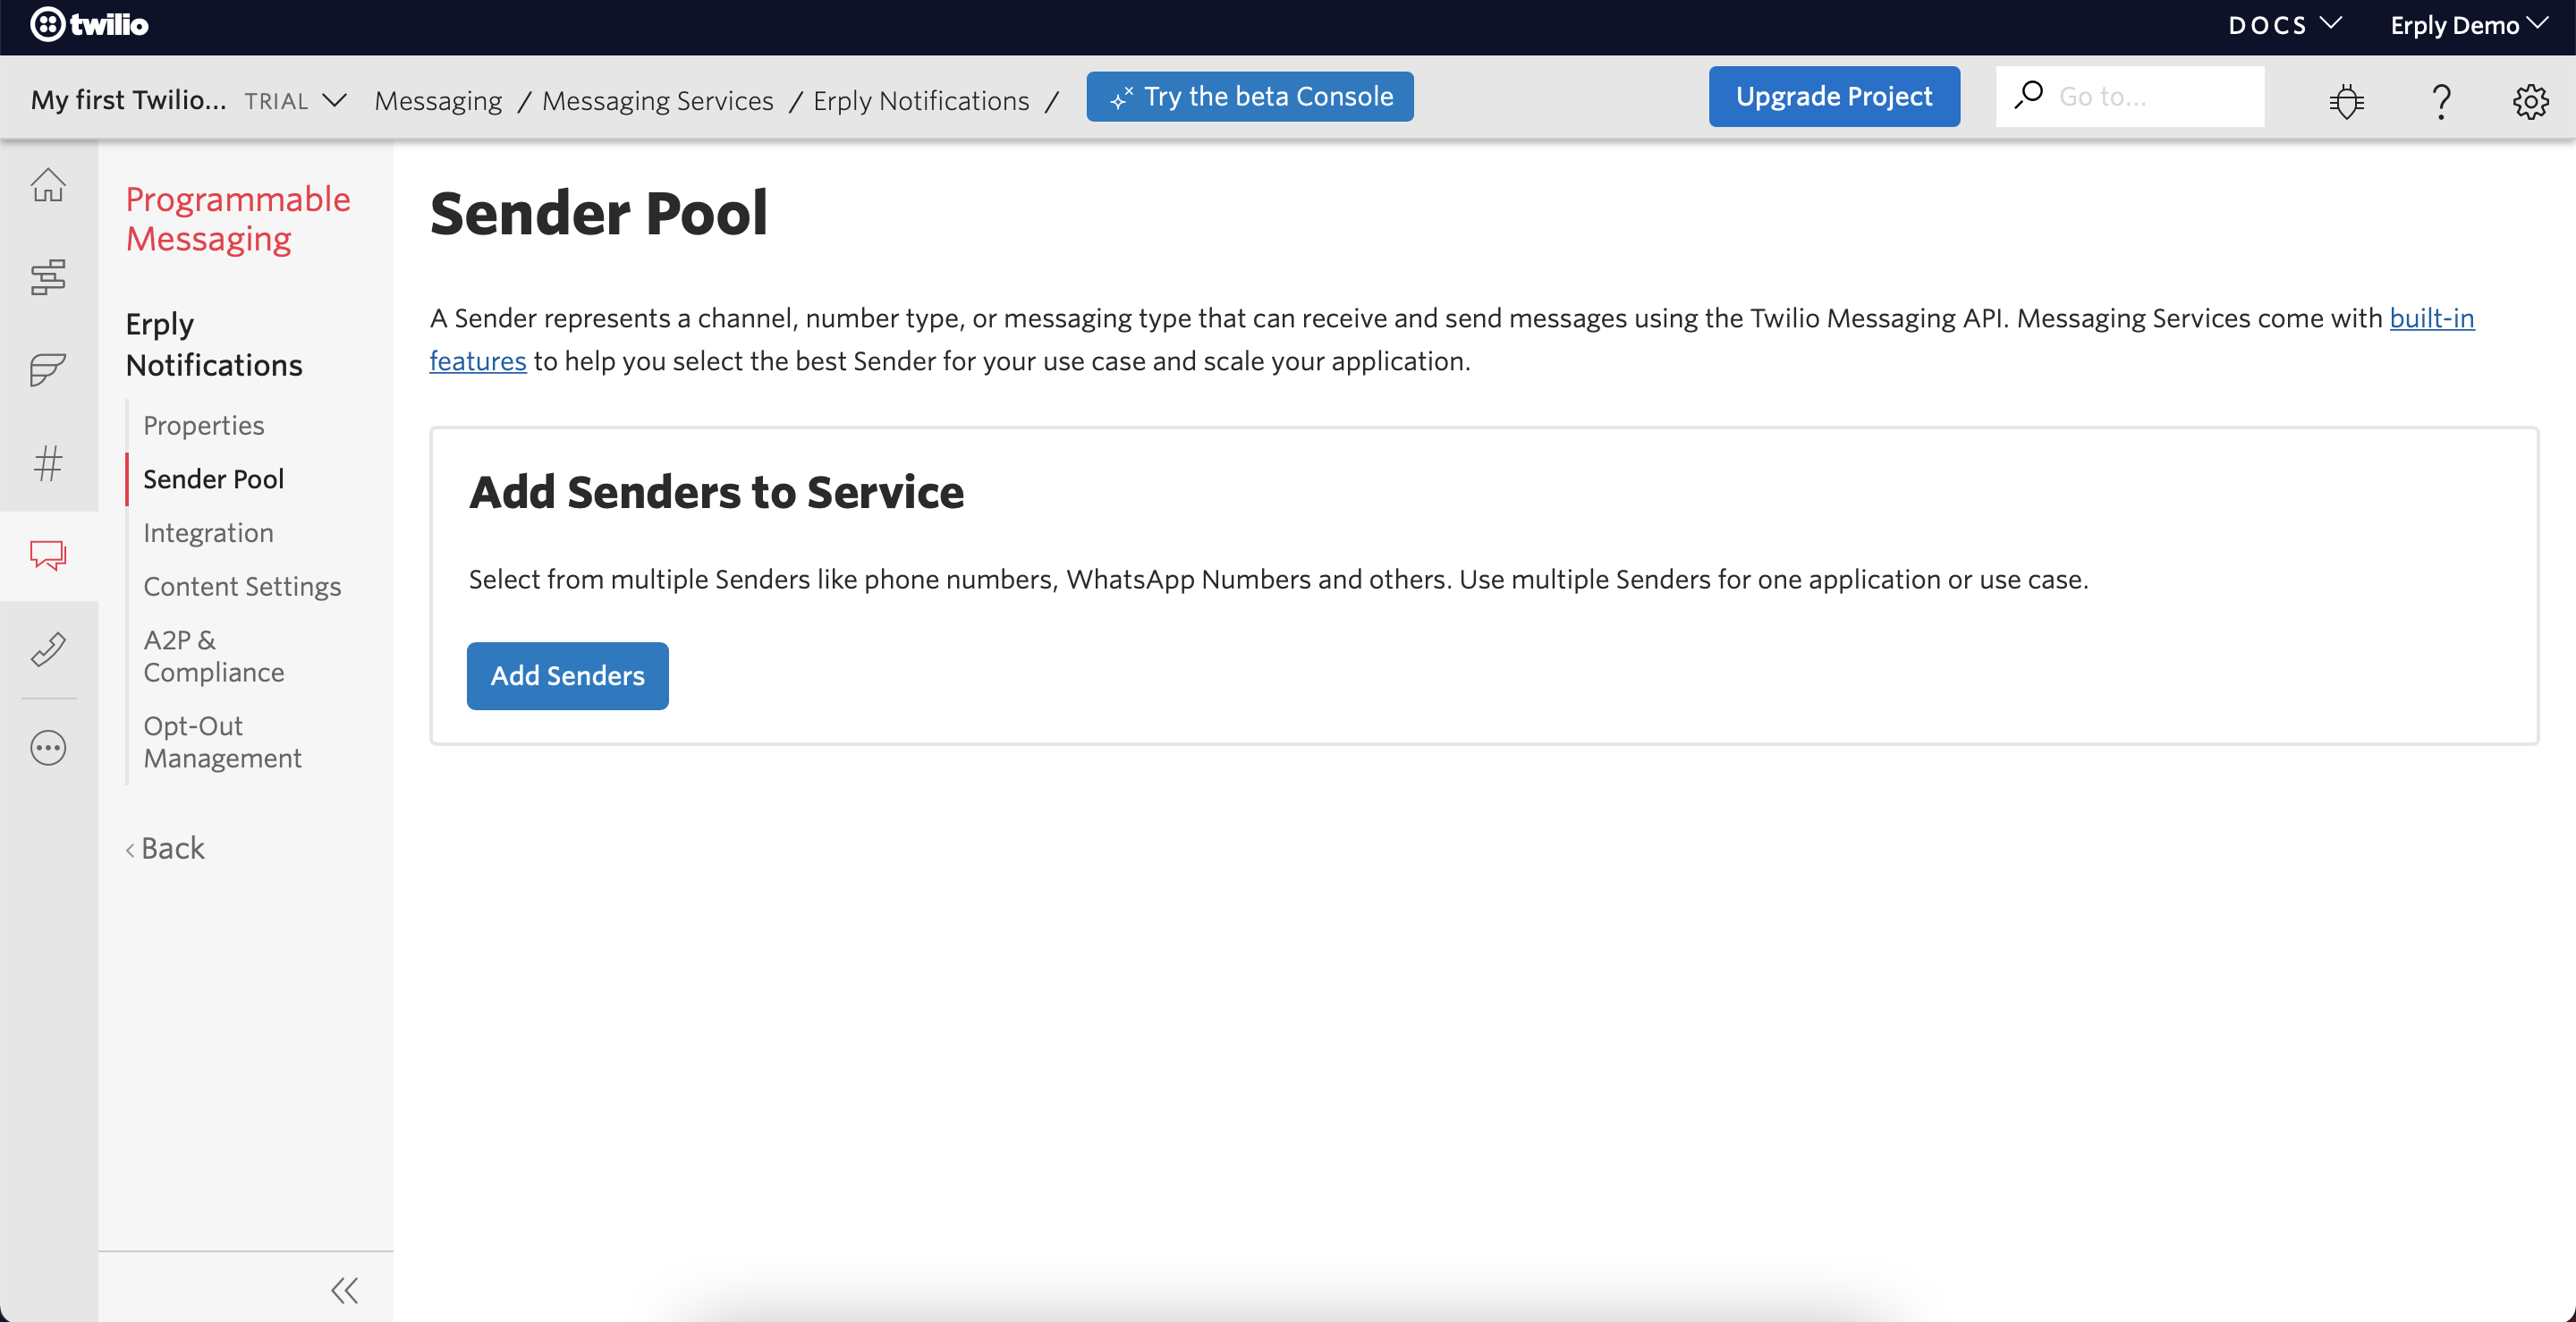
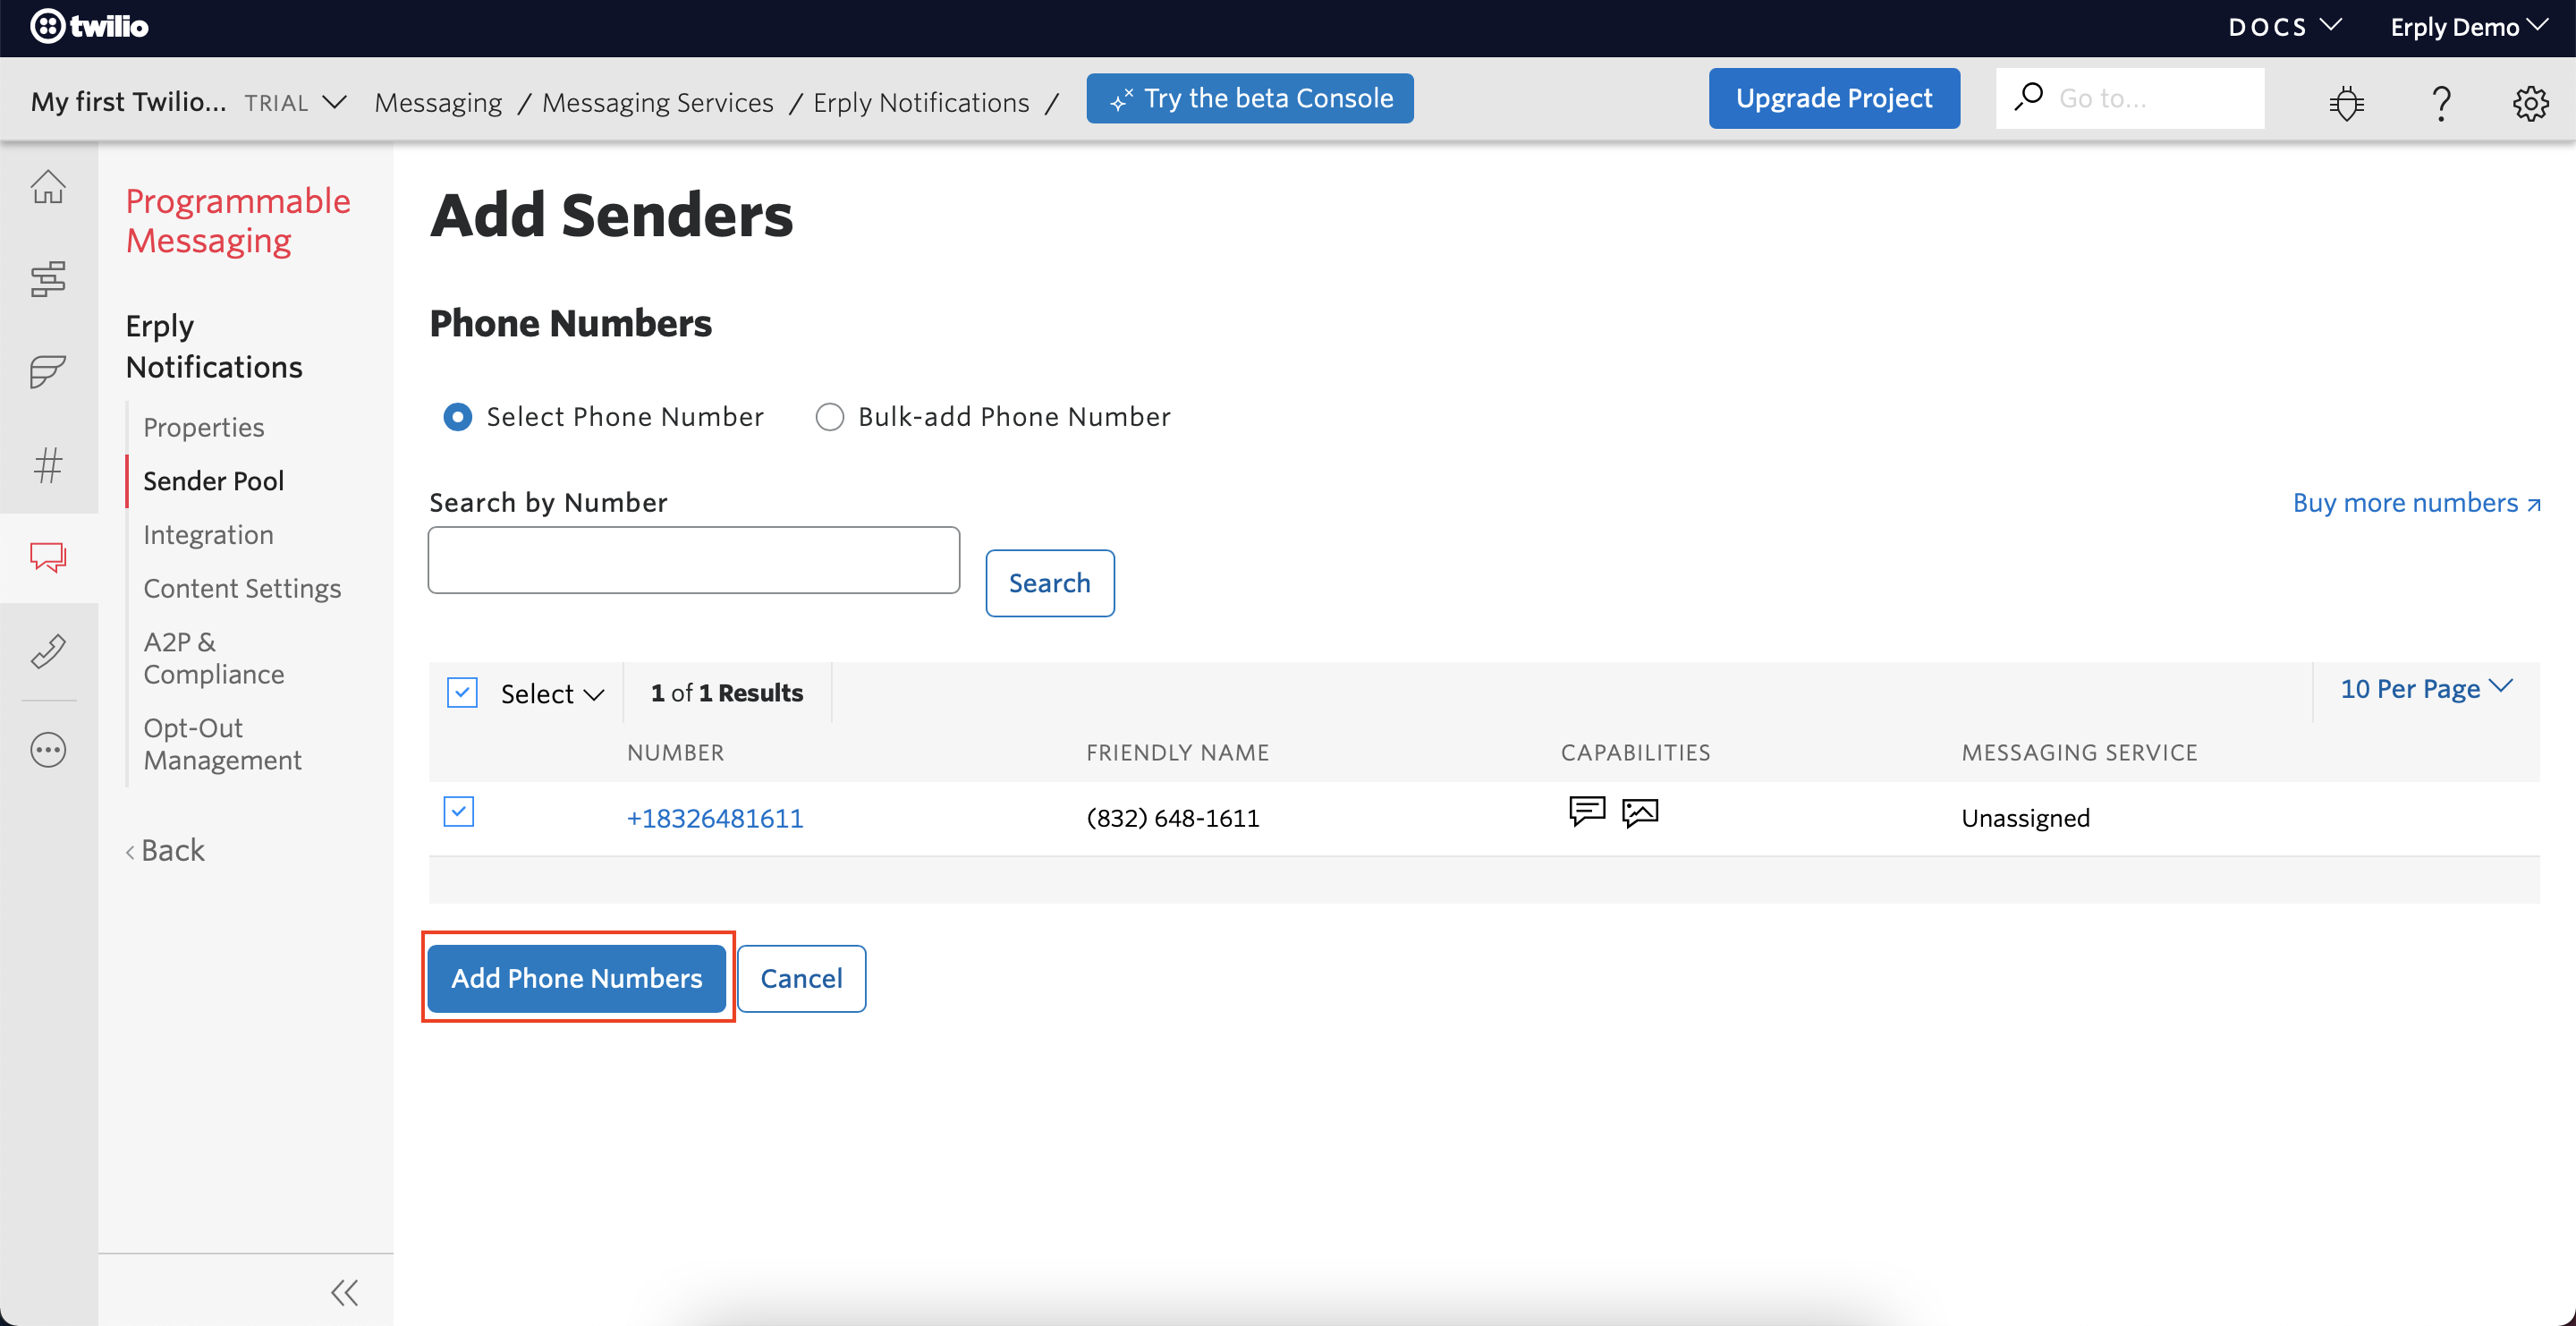
Once you are logged in to Twilio you must create a new “Messaging Service”. To do so, you must navigate to Programmable Messaging -> Messaging Services and from there you must create a new Messaging Service.
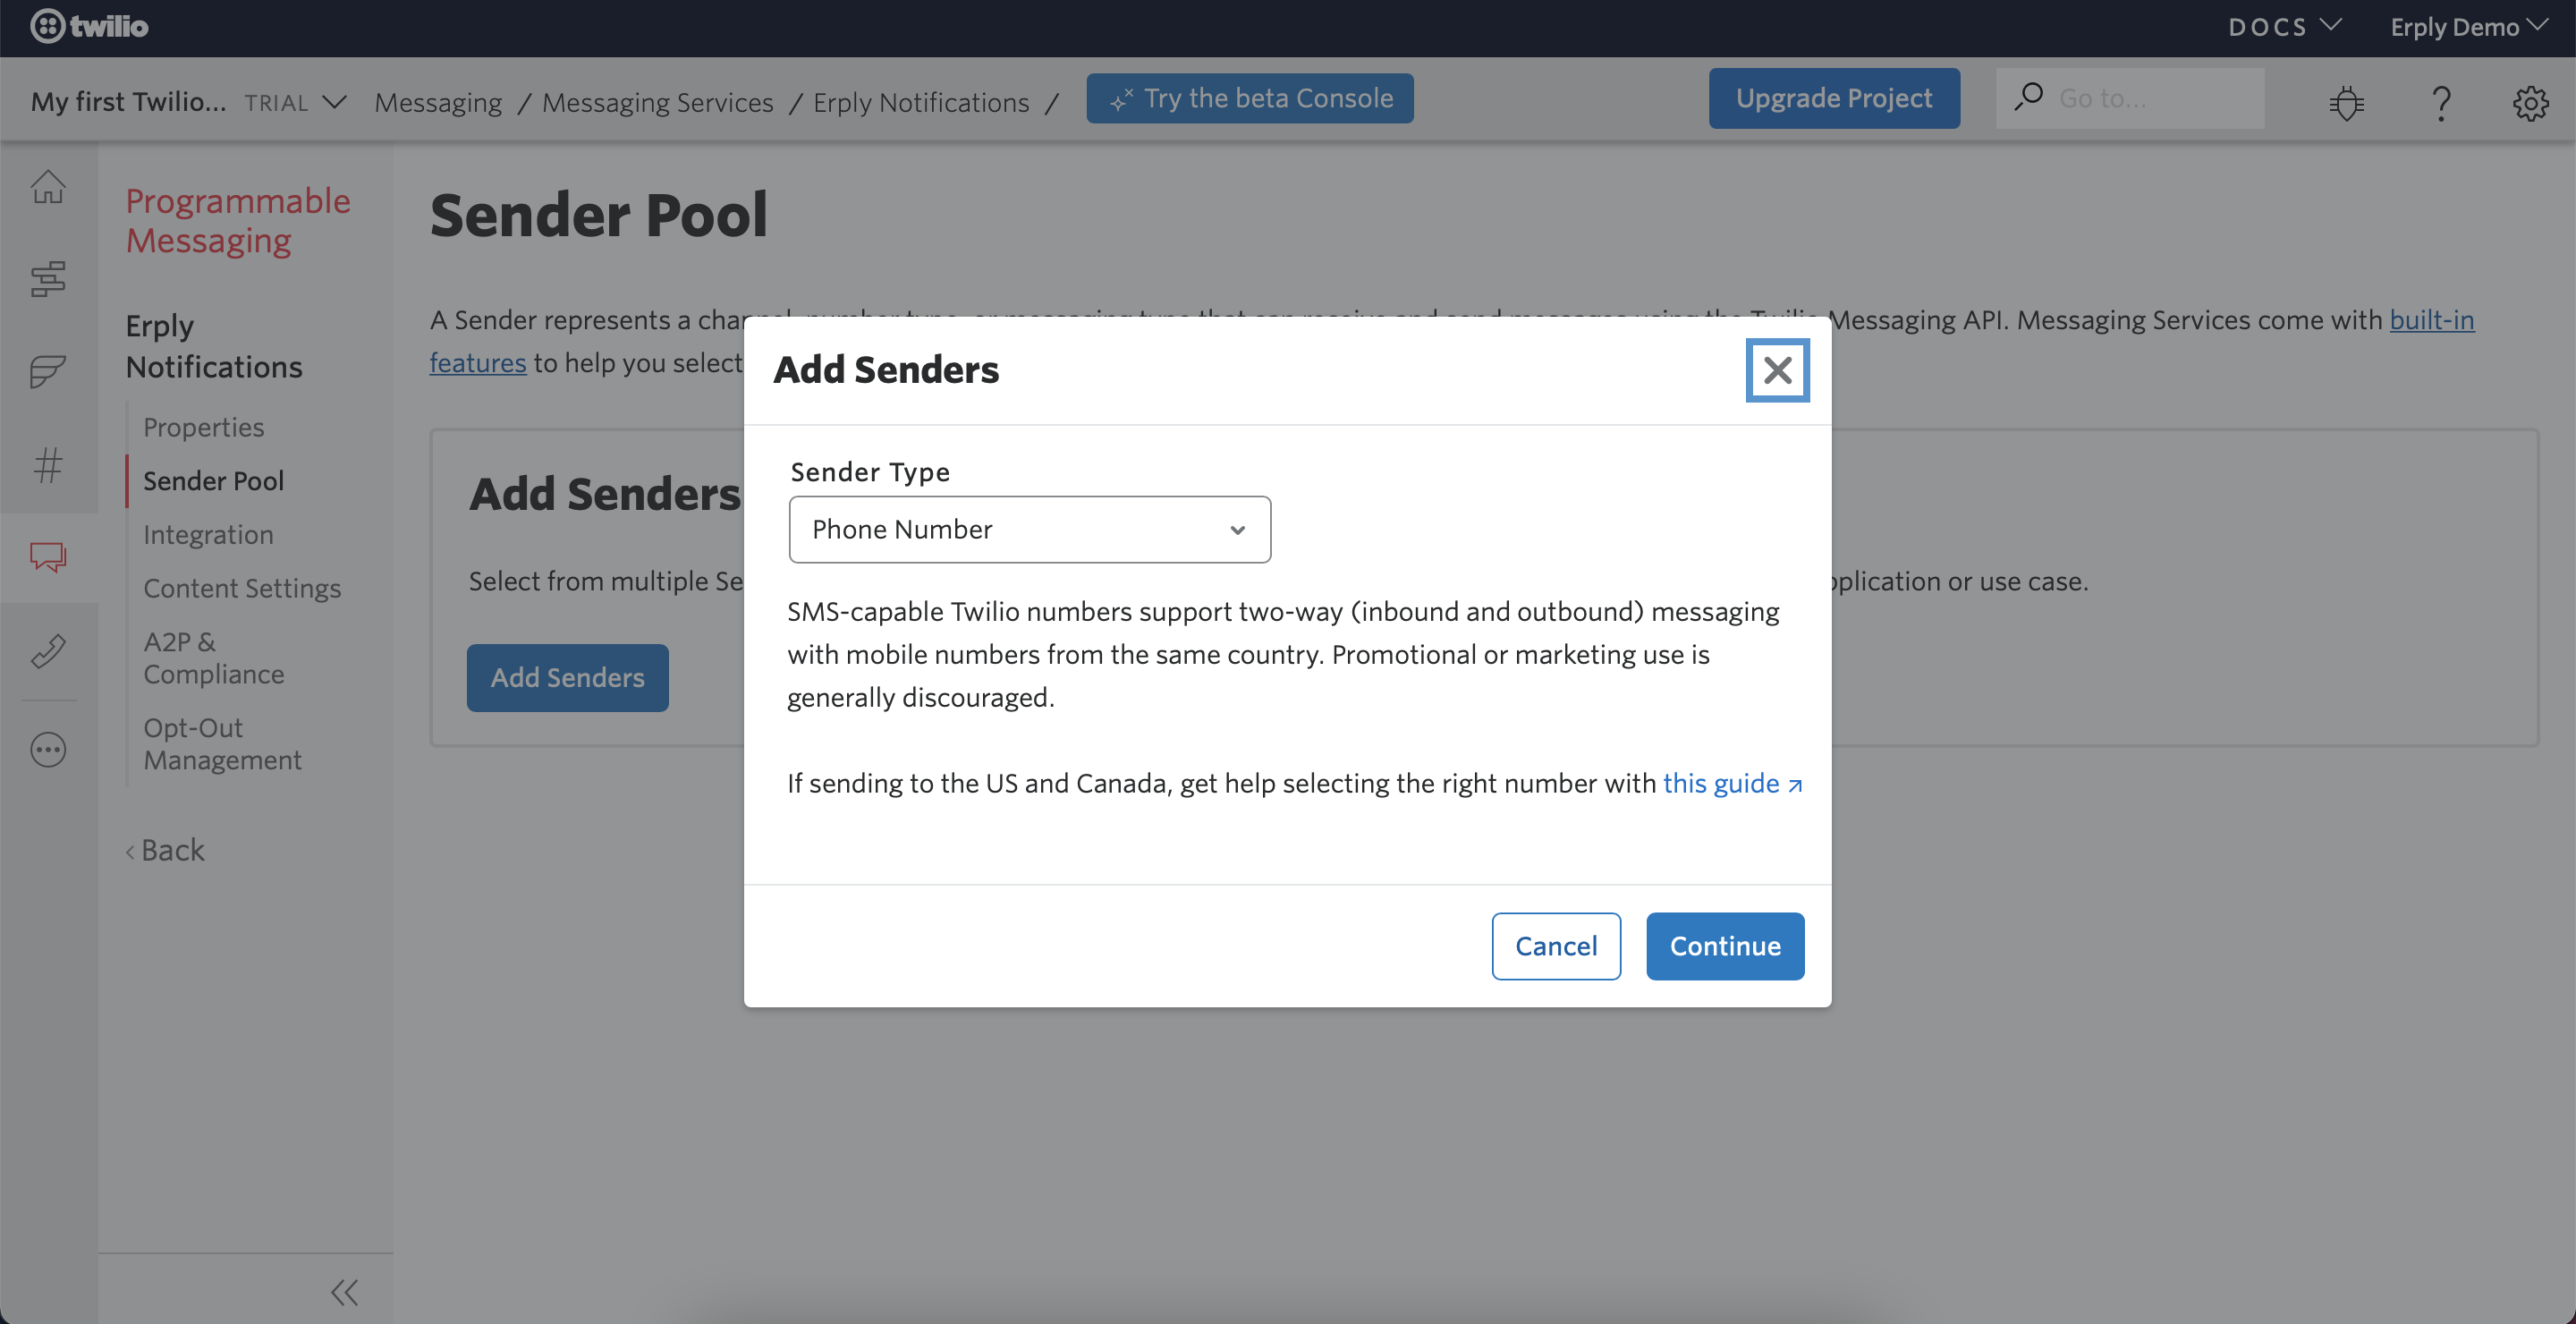
In order to start sending out SMS notifications you must purchase a phone number. Twilio will guide you through this process. For testing purposes you can use a trial number which can be set up from the Twilio dashboard.
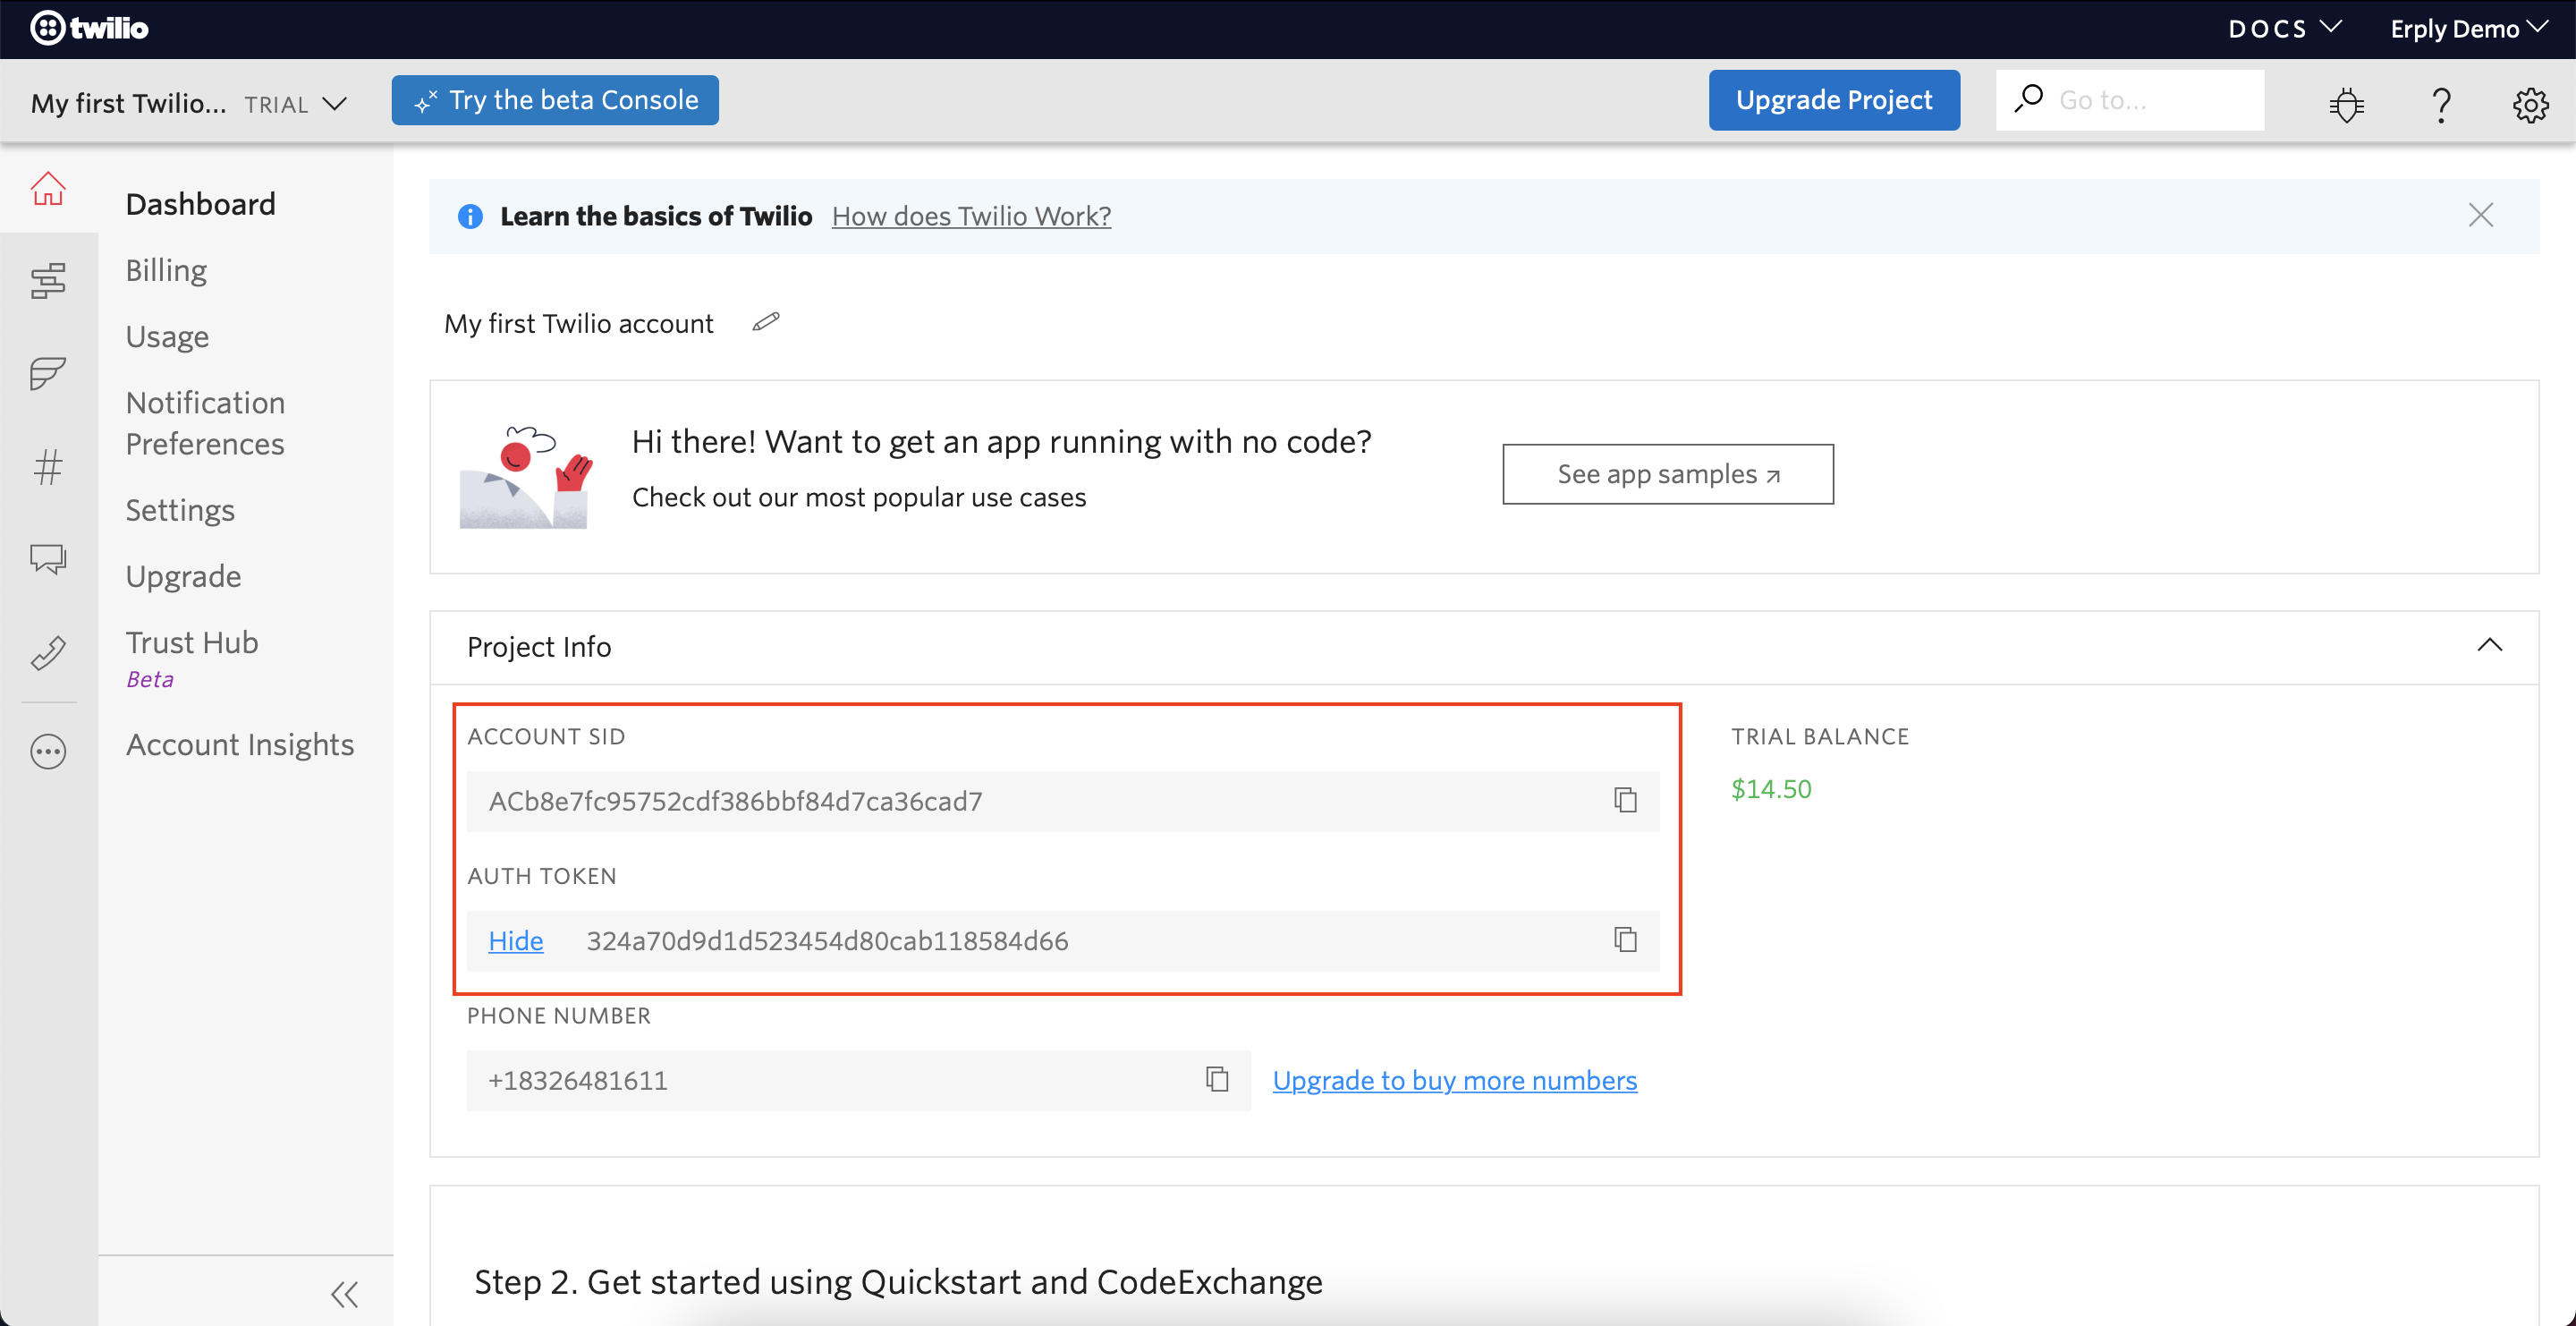
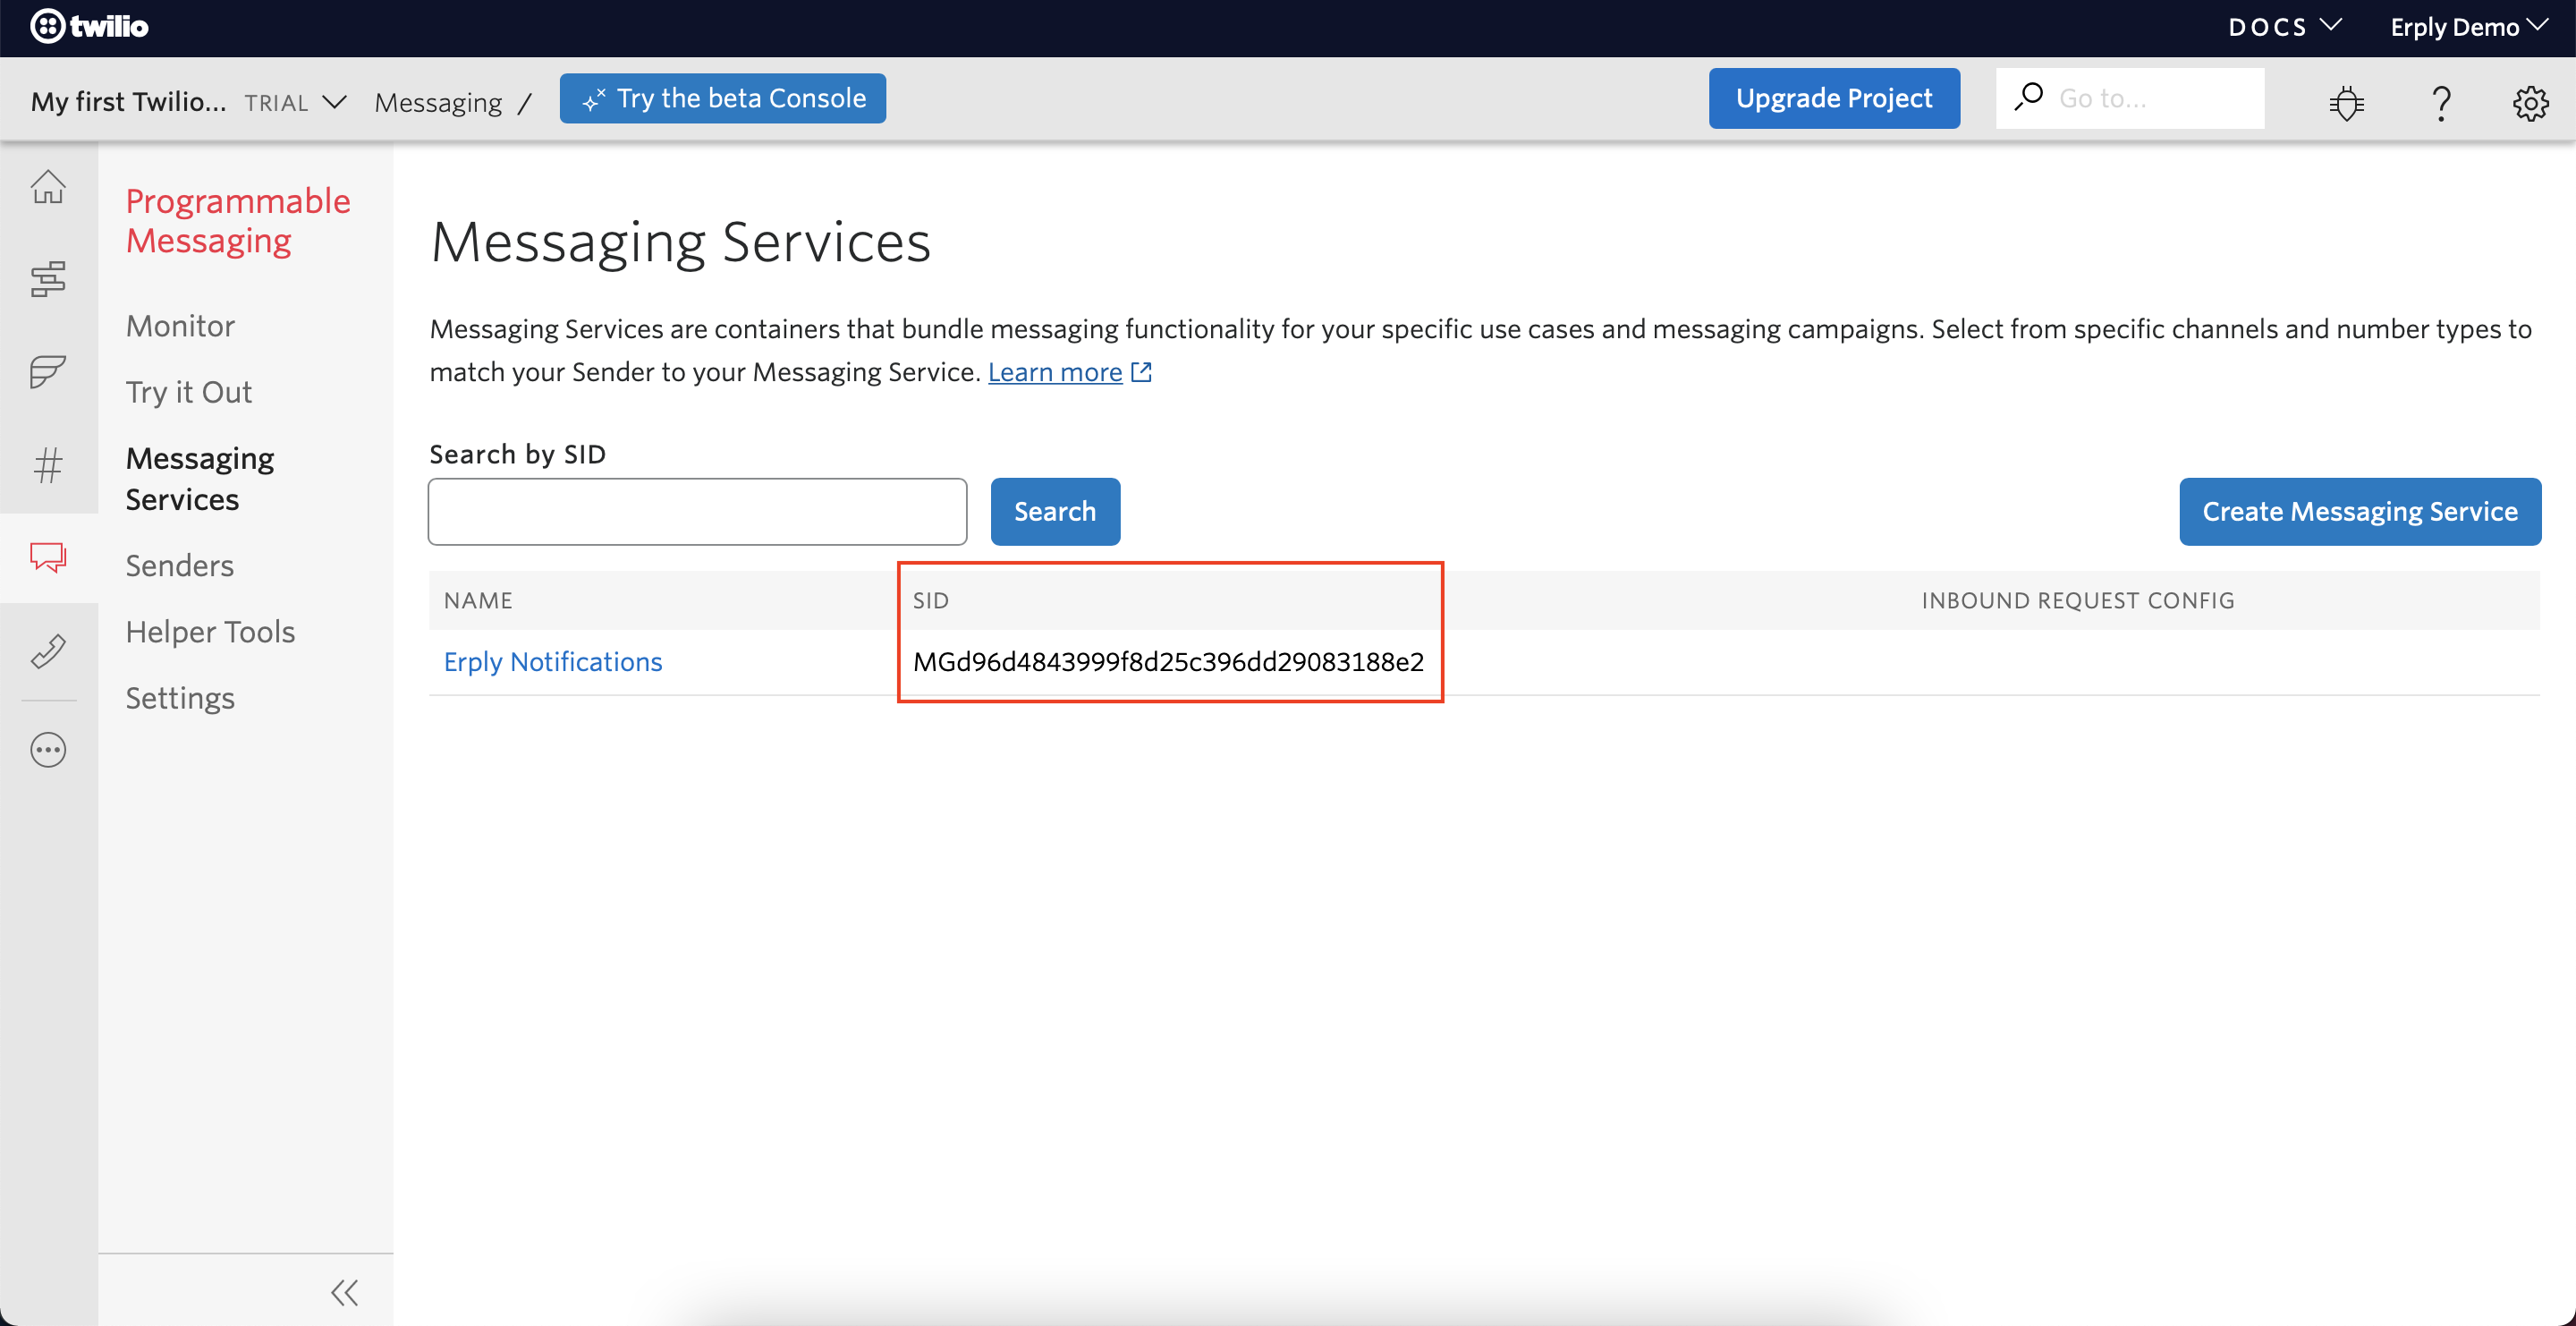
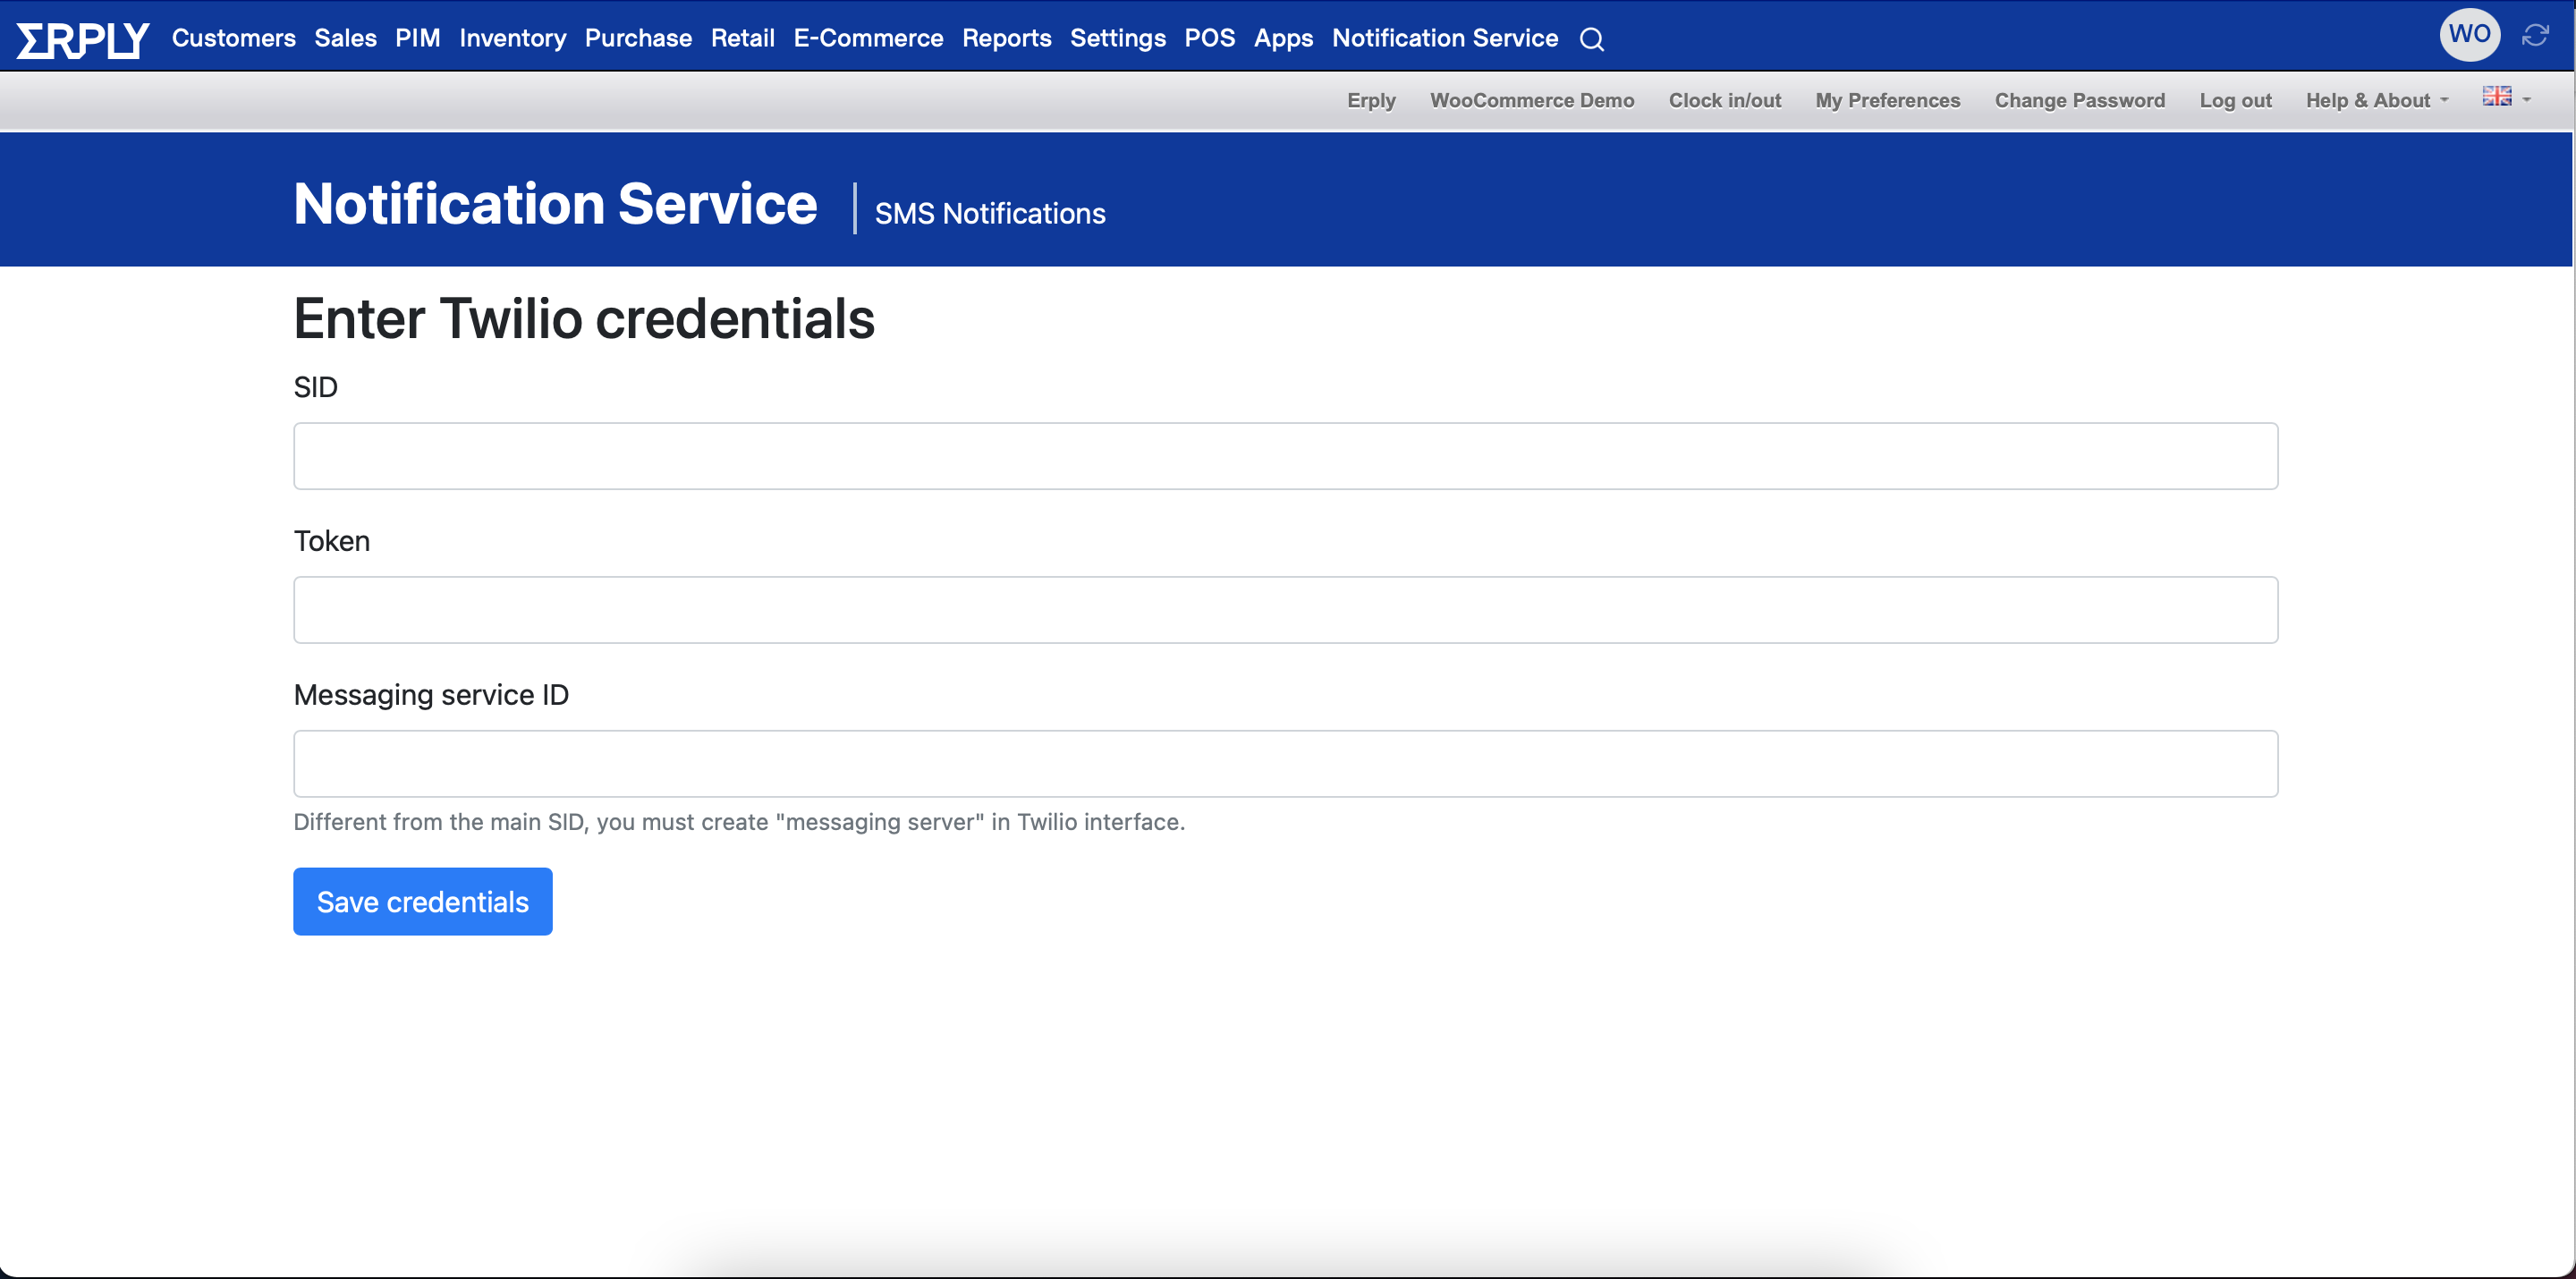
Step 3 - Retrieve Twilio credentials to be used in Erply
Notifications service requires your Twilio credentials for the setup. You will need to have:
- Messaging Service SID
- Account SID
- Auth Token
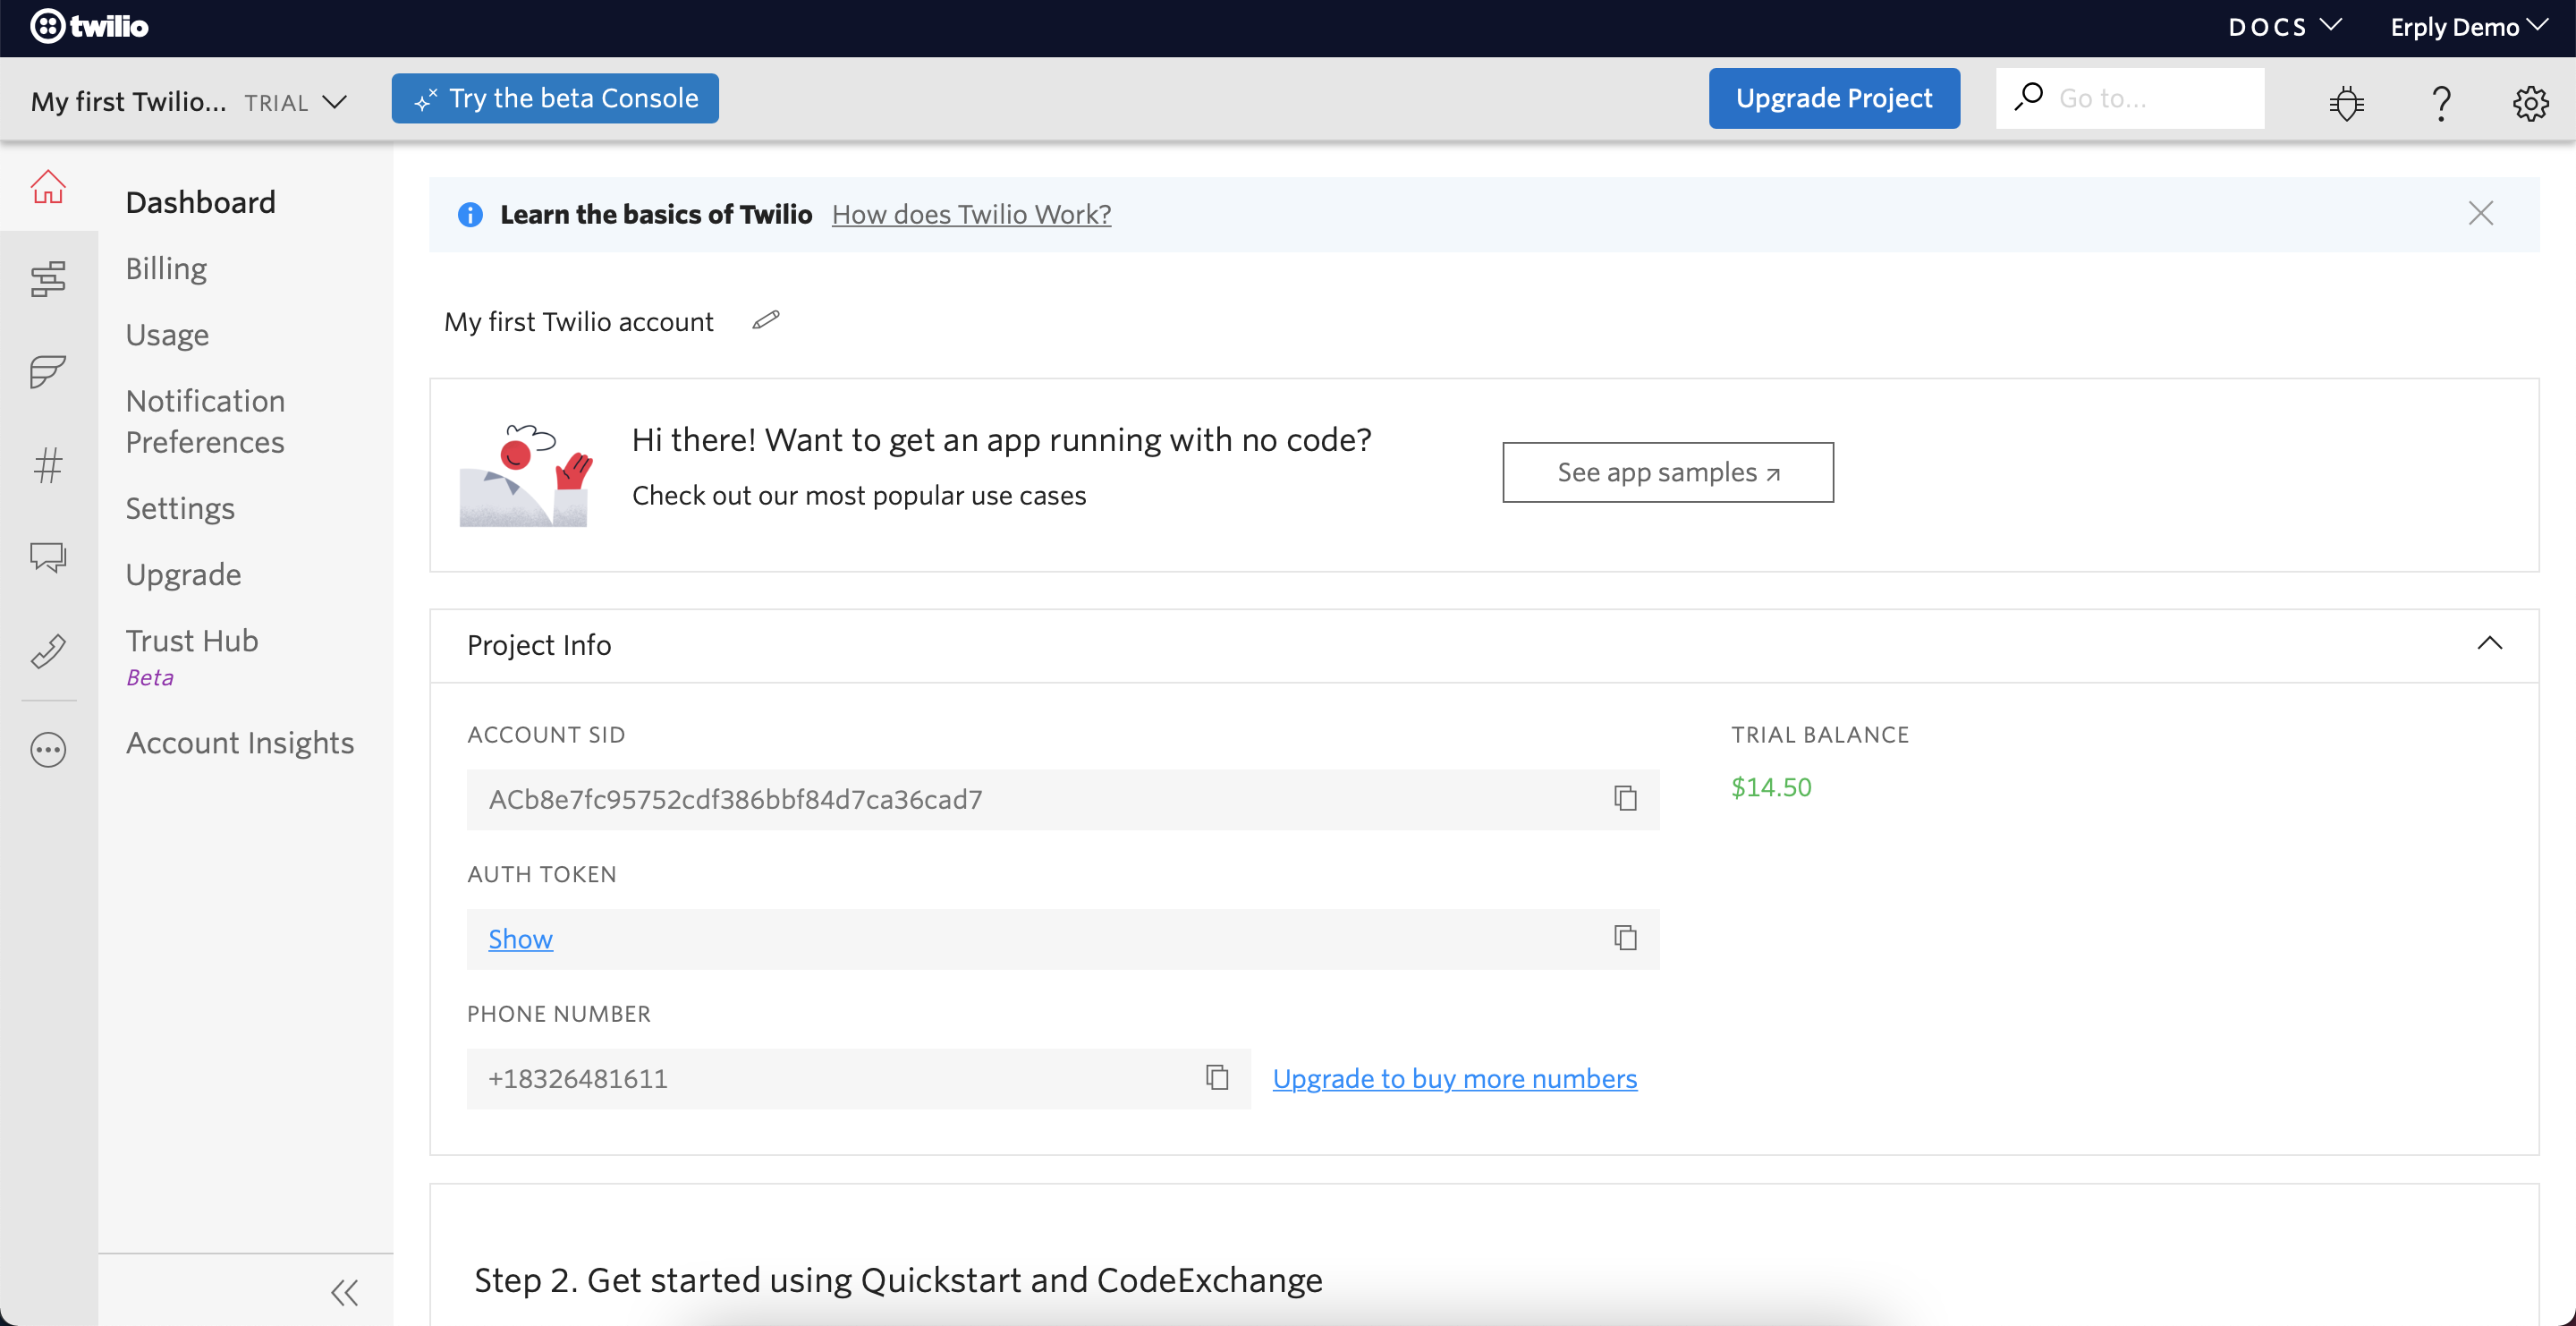
To retrieve the Account SID and Auth Token go to your Twilio dashboard. You will see the credentials in the Project Info section
To retrieve the Messaging Service SID please navigate back to the messaging service that you created in the second step and copy the Messaging Service SID
Step 4 - Set up the SMS Notifications Service in Erply
Log in to your Erply backoffice and navigate to Settings -> Notifications Service from the main menu (If you do not see this in your menu, please contact our customer support at support@erply.com who will enable this on your account)
Parameter needed is jsplugin_notification_service_enabled = 1.
From here, you are able to set up the service using the credentials that you retrieved in the third step of this guide. Just insert the credentials to their respective fields and click on “Save Credentials”
After you have saved the credentials and authenticated yourself you are able to set up notifications for different Erply events.
Step 5 - Set up notification events in Erply
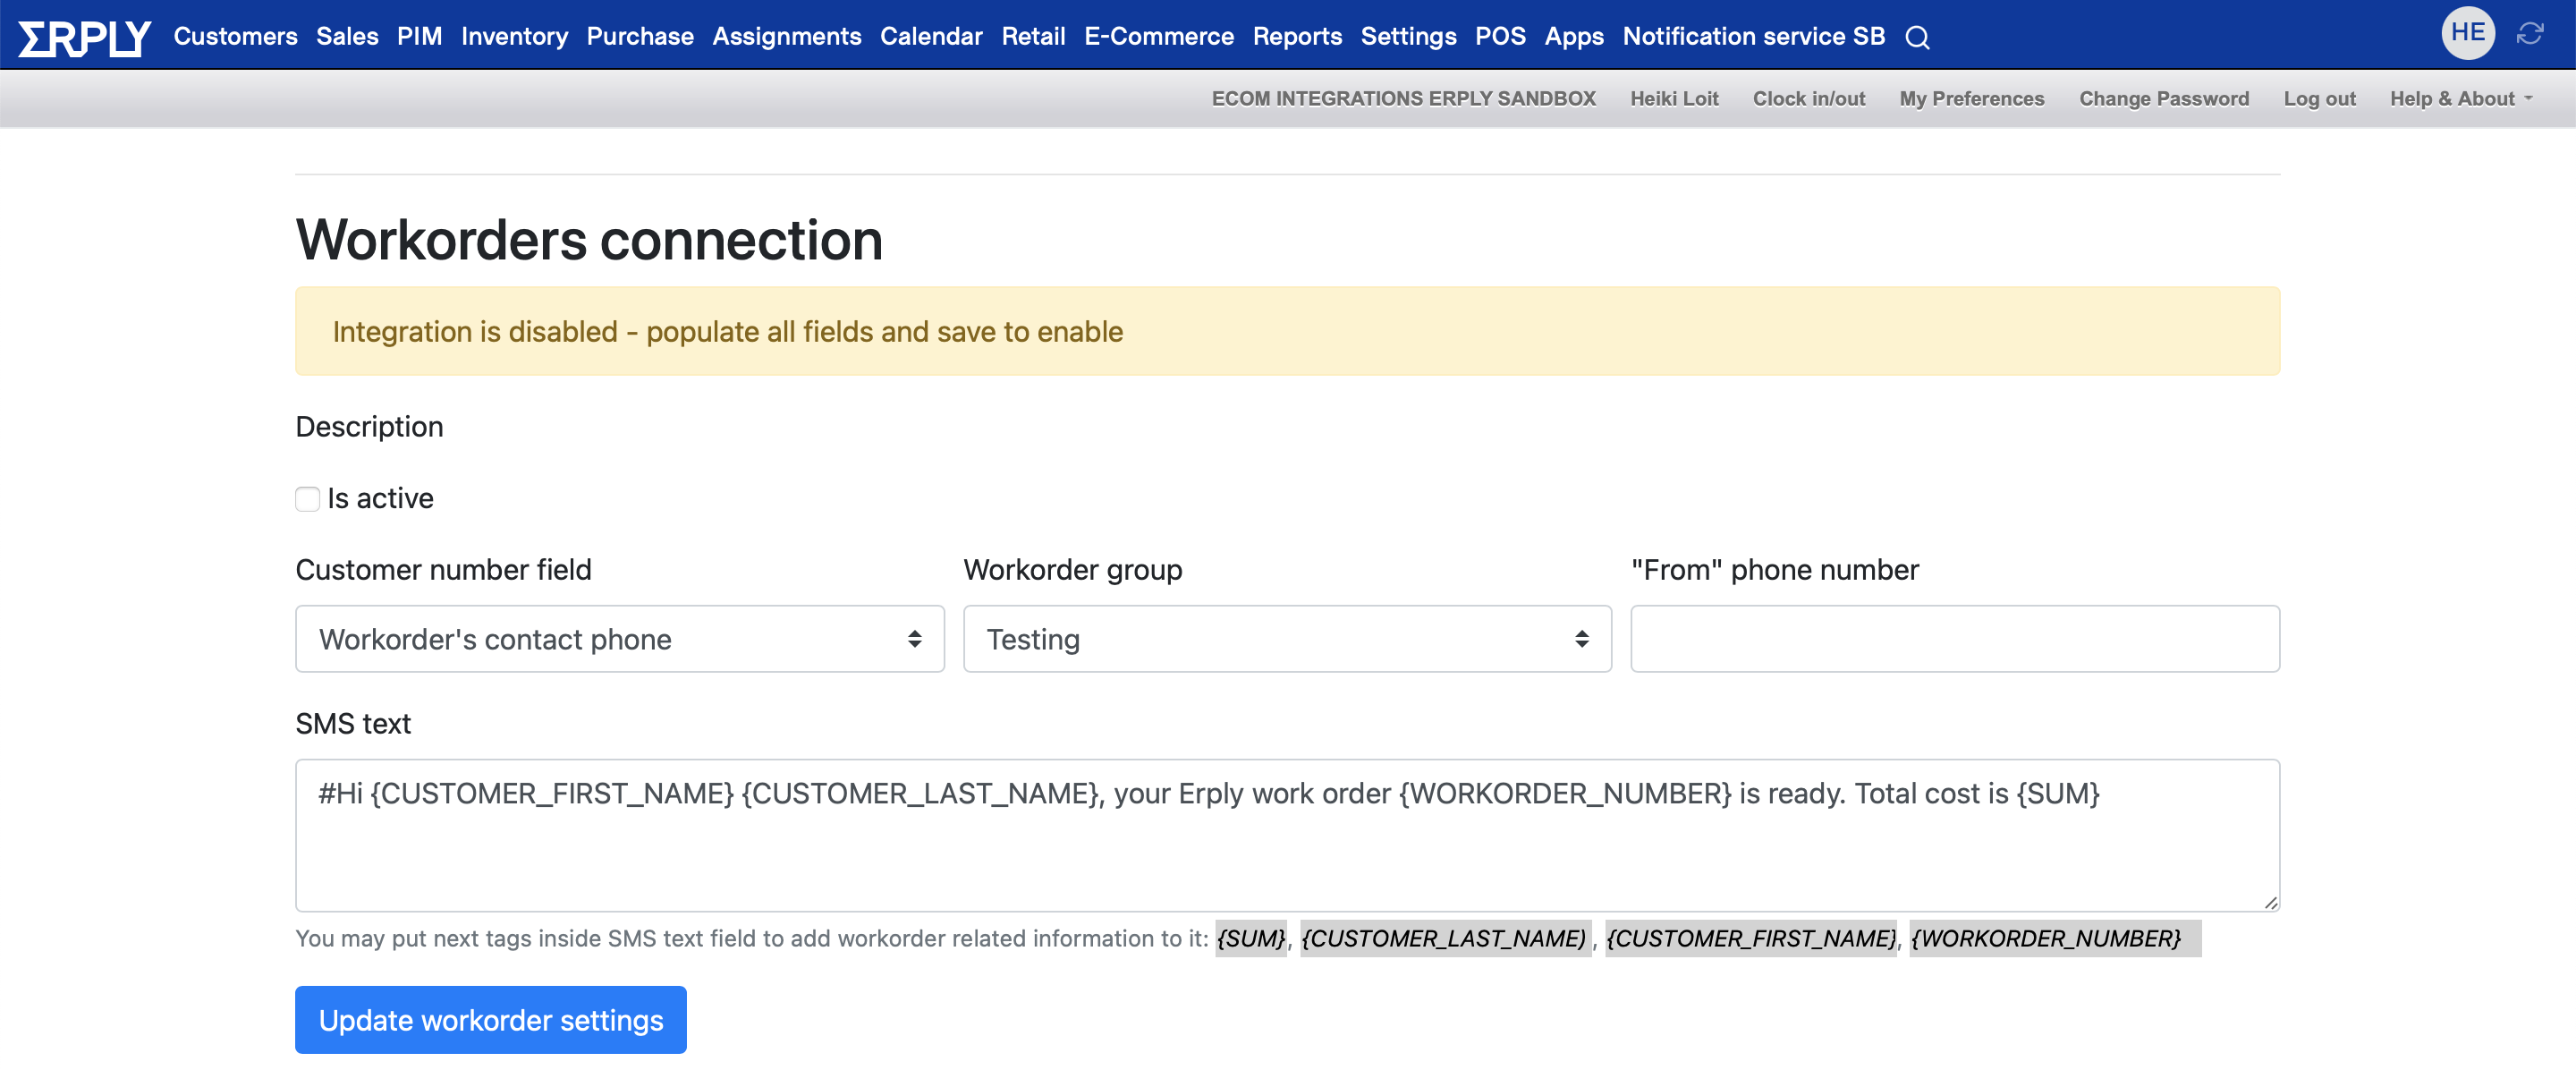
You are able to send out notifications upon completion of a work order (Assignments module must be active on account) or send out notifications for sales events: Orders, Invoice-Waybills and Receipts.
Work Orders
The notifications service is able to send out notifications once a work order has been marked as completed and a specific group has been chosen for the work order.
You can choose to which phone number the notification will be sent out from the Customer Number field dropdown. You can also create the notification template using tags - meaning that this data will be captured from the work order or from the customer card. Tags that can be used for work orders are: {SUM}, {CUSTOMER_LAST_NAME}, {CUSTOMER_FIRS_NAME}, {WORKORDR_NUMBER}
SUM is the cost of the work order to be paid by the customer
CUSTOMER_LAST_NAME is the customers last name from the customer card
CUSTOMER_FIRS_NAME is the customers first name from the customer card
WORKORDR_NUMBER is the number of the work order
You also need to specify the “From" Phone number - this is the number you have purchased in Twilio for sending out the notifications and can be found from Twilio
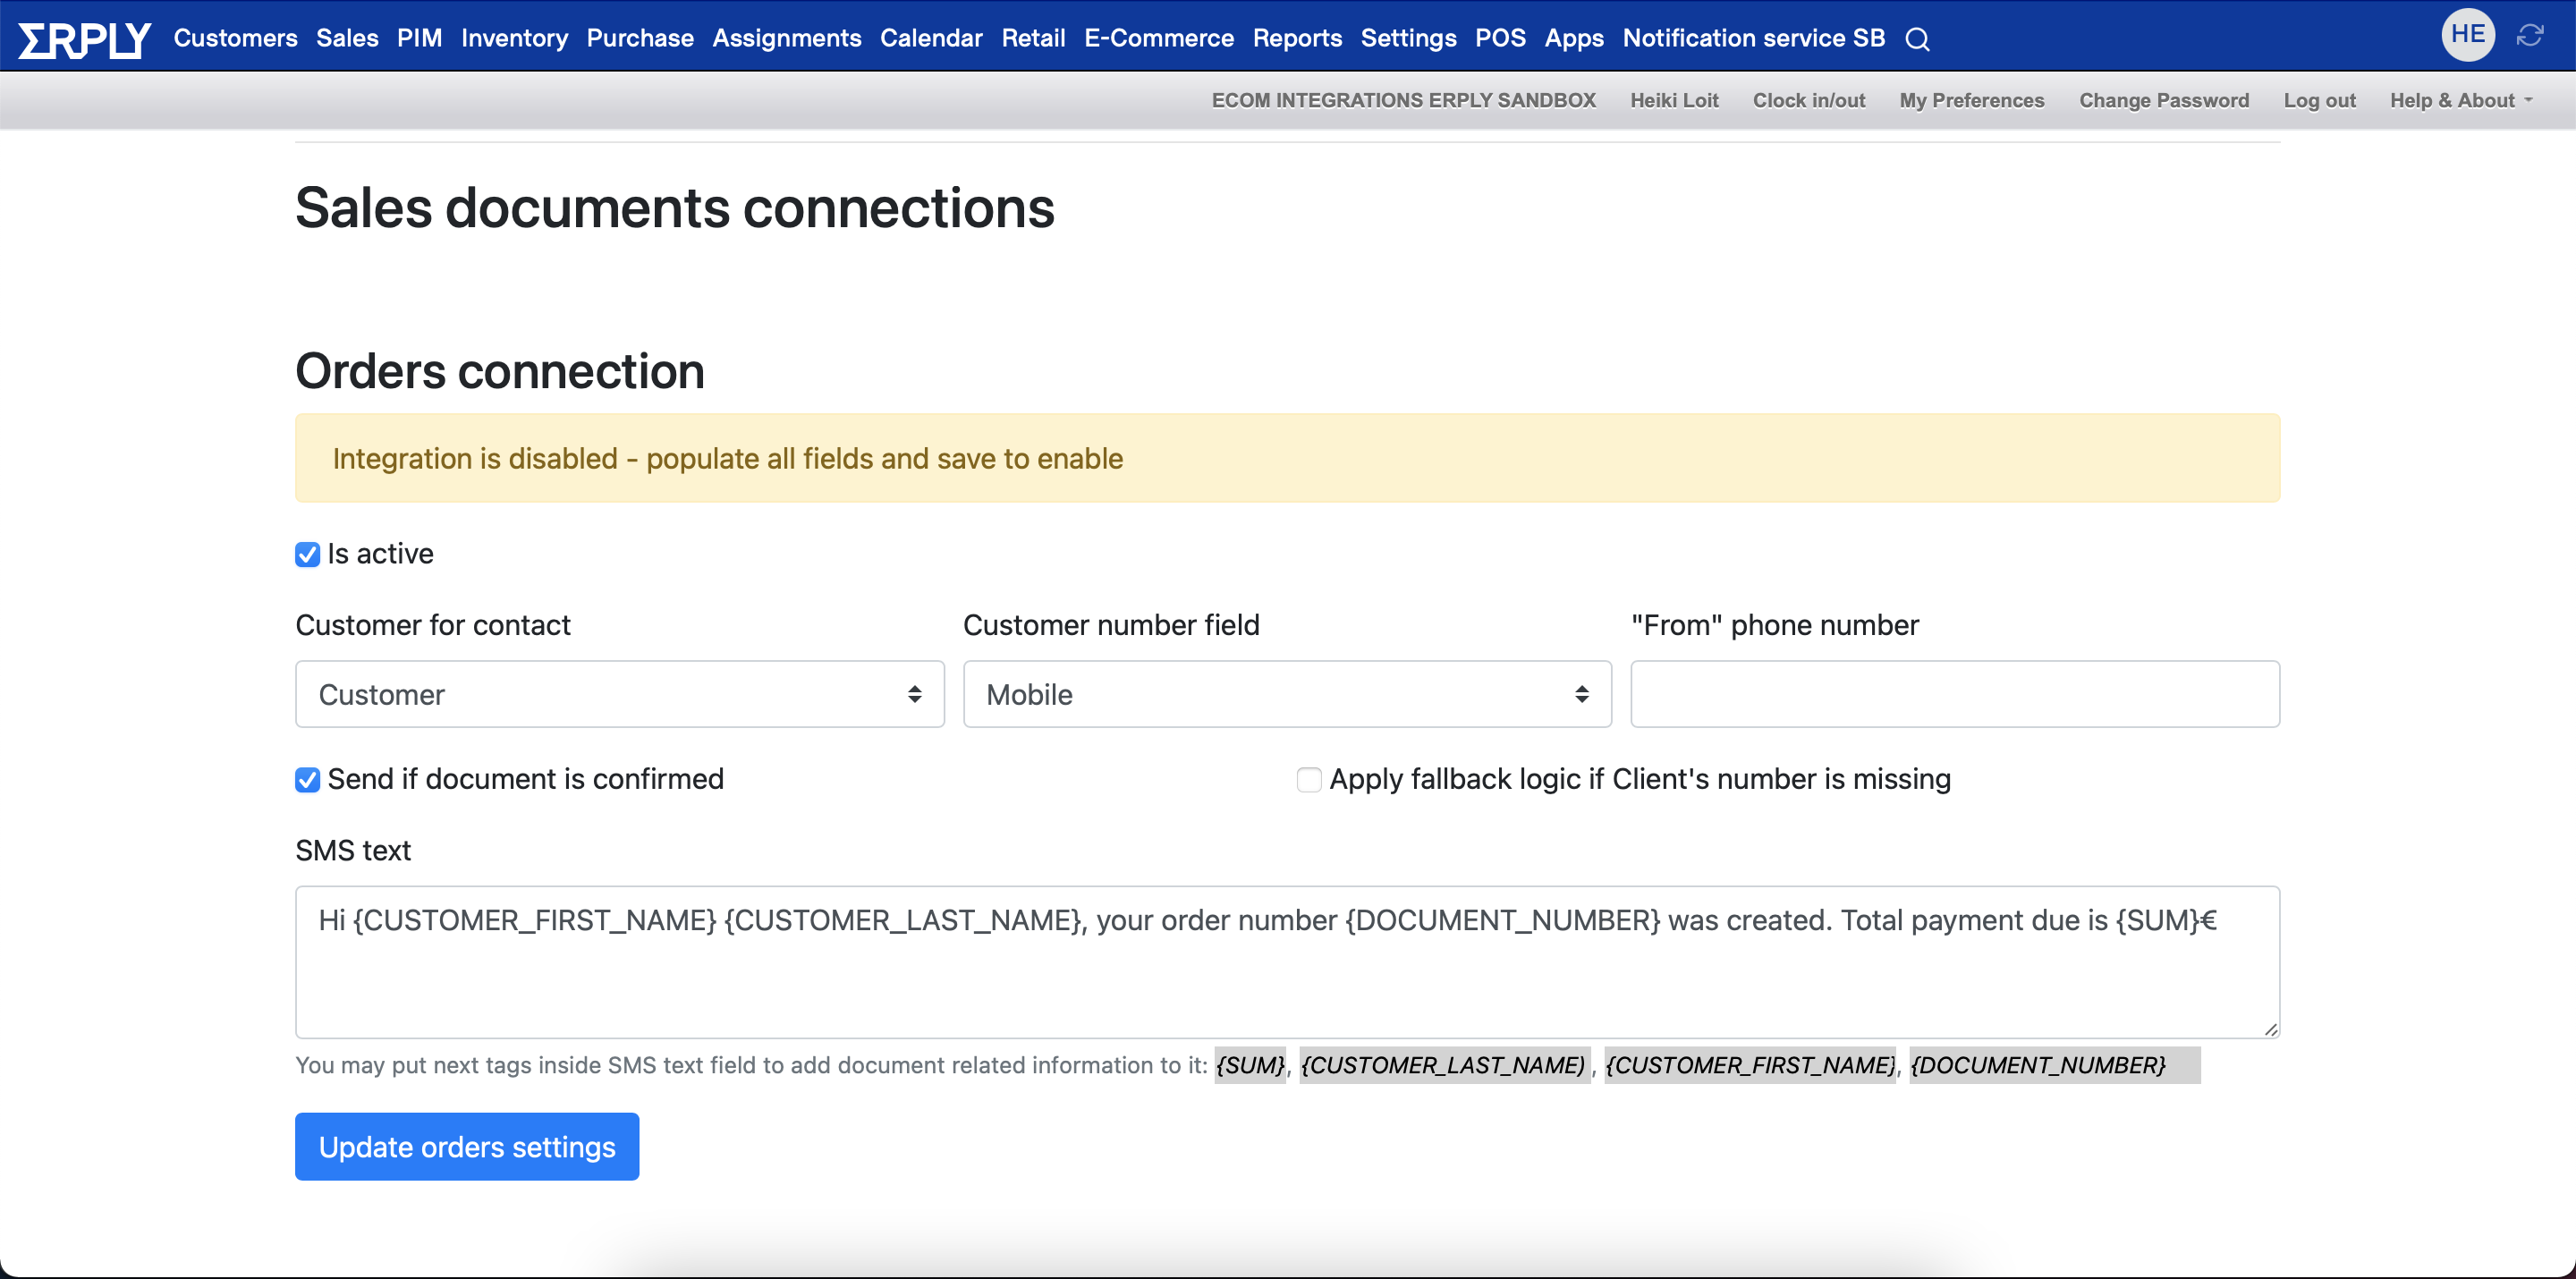
Sales Documents
Setting up the notifications for sales documents is similar to work orders.
You need to specify where to take the customers data. On each sales document in Erply you can have a: customer, customer contact person, ship to customer and ship to contact person. You must then choose from which field to take the phone number: Mobile or Phone and then once again insert the “From" phone number that you have purchased through Twilio to send out the notifications.
For all sales documents you can also specify if the document must be confirmed or not in order for the notification to be sent out.
For each sales document type you can also create a notification template and use tags in the template. The following tags can be used: {SUM}, {CUSTOMER_LAST_NAME}, {CUSTOMER_FIRS_NAME}, {DOCUMENT_NUMBER}
SUM is the cost of the sale to be paid by the customer
CUSTOMER_LAST_NAME is the customers last name from the customer card
CUSTOMER_FIRS_NAME is the customers first name from the customer card
DOCUMENT_NUMBER is the number of the document (order, invoice-waybill, receipt)
Fallback setting
You can use the “Apply fallback logic if Client's number is missing” setting. This setting will apply a fallback flow for sending the notifications and the flow is as follows:
If customer for contact is “Ship to contact person” and there is no phone/mobile number then fall back to “Ship to customer”, If “Ship to customer” has no phone/mobile number then fall back to “Customer contact person”, If “Customer contact person” has no phone/mobile number then fall back to “Customer” and if “Customer” has no phone/mobile number then skip sending message.
Each notification will only be sent once and can not be triggered manually at this time.