Erply Introduction
ForecastingApp by Erply is an analytics and forecasting solution for Erply. With ForecastingApp you can easily analyse your entire sales and inventory using a single dashboard and specific reports.
Get Started
To get started you need to create an account:
- Go to https://analytics.erply.com/
- Enter your Erply credentials and click Sign Up. NOTE: you will need to have an email address associated with your user’s employee in Erply. See here: https://wiki.erply.com/article/869-adding-a-user-and-employee
- Ensure your email address is correct and agree to Terms of Service
- Launch
- You will receive an email once the account has been set up
- Follow the instructions in the email
If your Erply user name is the same as your email address, then you can access ForecastingApp simply by clicking on the Sign In button.
Complete Erply Data Integration
- Create Erply service user as explained in the topic Erply Service User
- Use the Erply service user credentials to set up data synchronization.
- Once the initial load has been completed, you will receive an email and can start exploring your data.
Video guide: Youtube link
Load Historical Data
The first data load only fetches your most recent data. You want to load more data to get the most out of the analytics platform. Please follow the steps to do so:
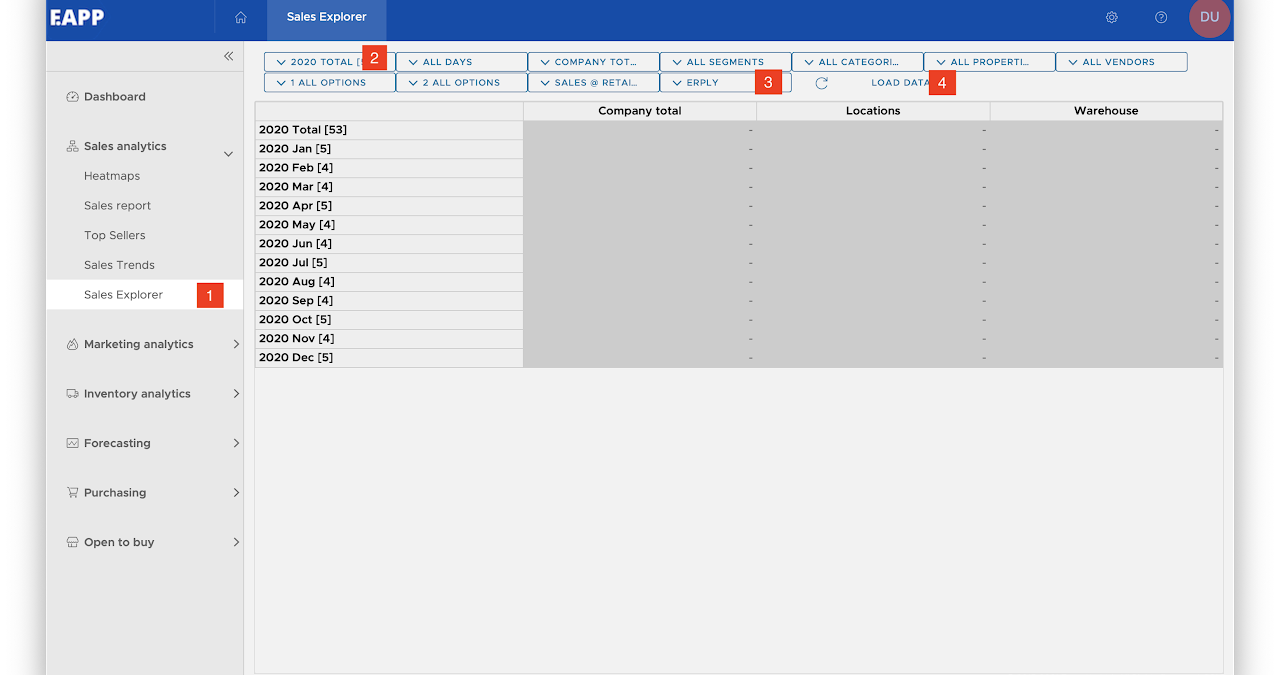
- From the navigation menu, choose Sales Analytics->Sales Explorer
- Select time period you want to load
- Make sure the connector is set to Erply
- Click Load Data
- The system will start processing the data, and you will receive an email once this is done.
More Users
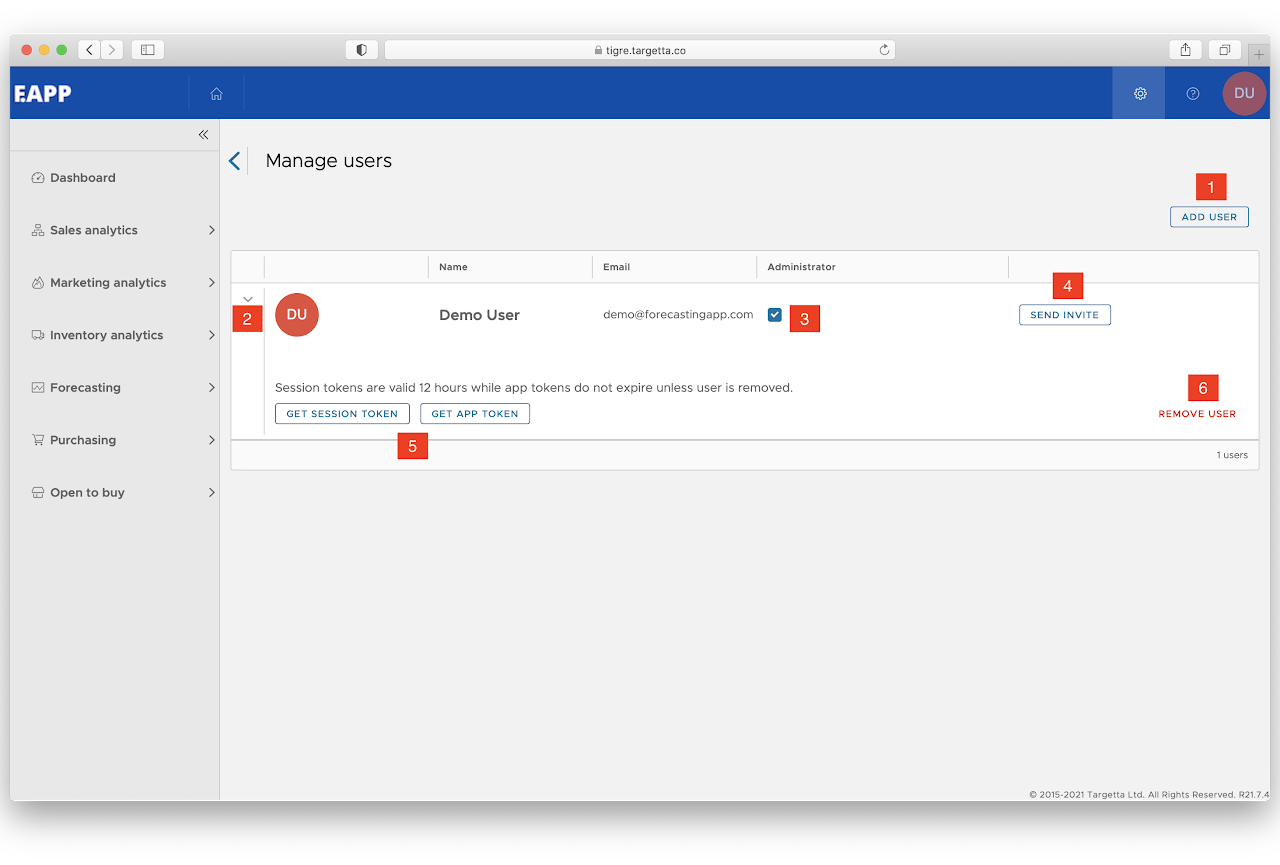
User maintenance is accessible via Settings->Users menu. To add a new user, click on the Add user button.
- Add a new user. Type in the user's full name and email address or user id. We recommend using a user id in case you want to create an extra user for API connections. In this case, you can assure that this user cannot set or reset password thus access is only granted with a token.
- Expand/collapse user details.
- Toggle administrator access. Administrators can access all settings. You can not remove the administrator right from yourself.
- Send an invite via email.
- Obtain session or app token. Session tokens are valid for 12 hours whereas app tokens do not expire.
- Remove user access.
See more details how to manage users under the topic Users and Permissions
Authenticate using Erply user name and password
It is possible to authenticate users with Erply user name. For this purpose you will need to create new users with Erply user name as email. Disregard error message, it will work just fine.
NOTE: in case Erply user name is not an email address you can not send invites or any other messages. Also, users can not raise helpdesk tickets.
Once added the user can log in via https://analytics.erply.com
Getting help
At any time, you can find help at your fingertips. Click on the (?) button at the top right of the navigation bar, and you can browse the knowledge base with articles and video guides. You can also send a message to our support desk.