1. Set up your list of accounts
This is a one-time manual step — to define the list of accounts that belong to a country chain.
This step is required for several Ground Control features to work. For example, without defining the list of accounts, the "Self-checkout POS" section will initially appear empty.
Erply technically knows which account numbers belong to a chain; but we have made it a manual step because it is additionally possible to give each account a name (for example the town where the store is located) and assign a store code (if there is a prior coding system in use). Since Erply does not know the names and codes, these have to be defined manually.
To set up the list of accounts, please go to Settings > Multi-account users > Accounts:
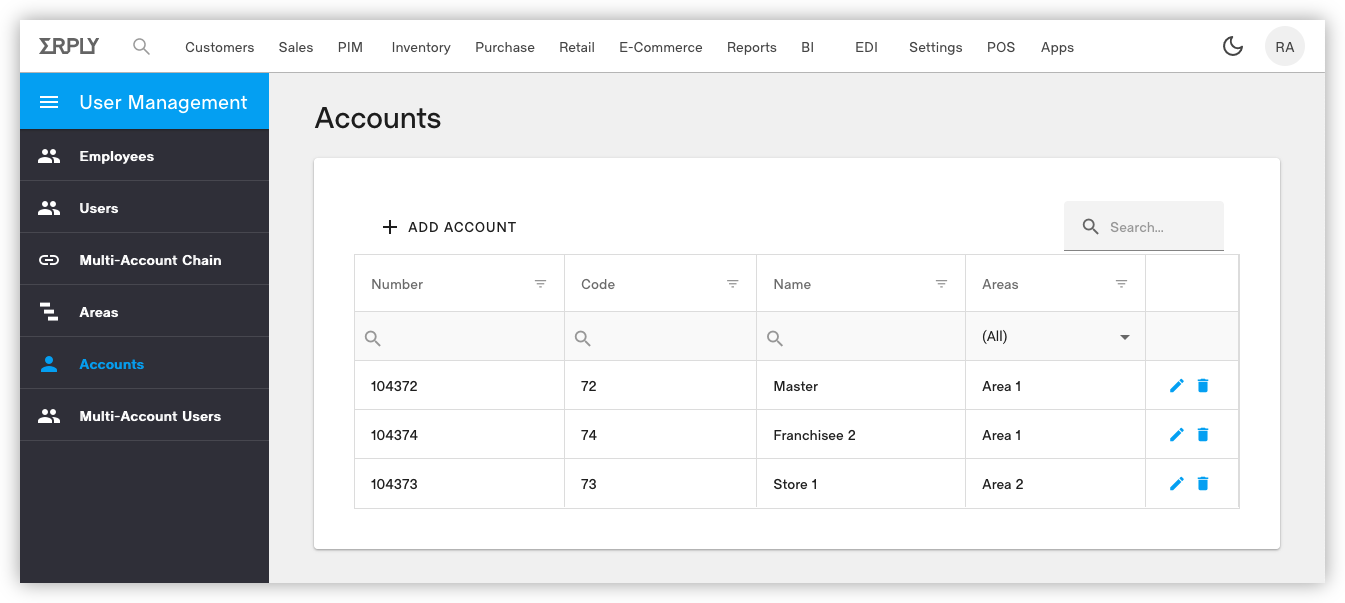
Please note that the "Account number" field (Erply client code) has to be filled correctly, because it cannot be edited later.
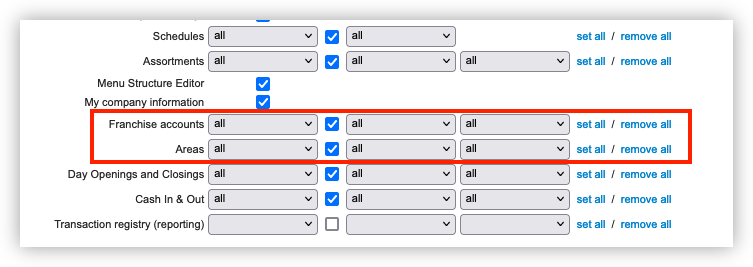
If the page says “You do not have permissions”, please go to Settings > User Groups and grant the following permissions:
2. Permissions
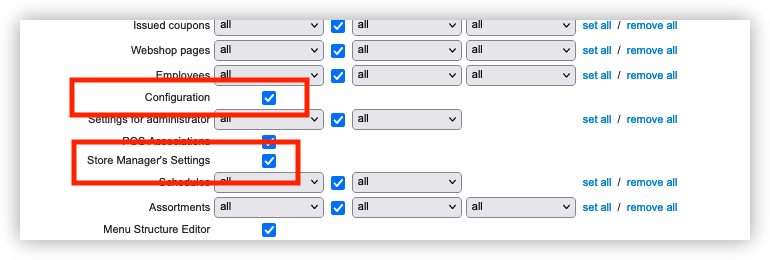
The features in Ground Control require the following three permissions:
- The “view” permission for store regions (for populating the “Store regions” filter in various modules)
- Check box “Store manager's settings”
- Check box “Configuration” (required for viewing logs)
All of these can be granted in Settings > User Groups:

3. Installer
The Installer microservice is a communication hub that coordinates work between microservices installed on the register.
To install it, please go to the register, or log in remotely. Open https://posow.erply.com/hardware/installer/installation/* in the browser and log in. Go to "Hardware" → "Installer app" → "Installation". Click on "Update Installer".
After a successful installation, please reboot the computer. Clicking the "Test connection" button will display the currently installed version.
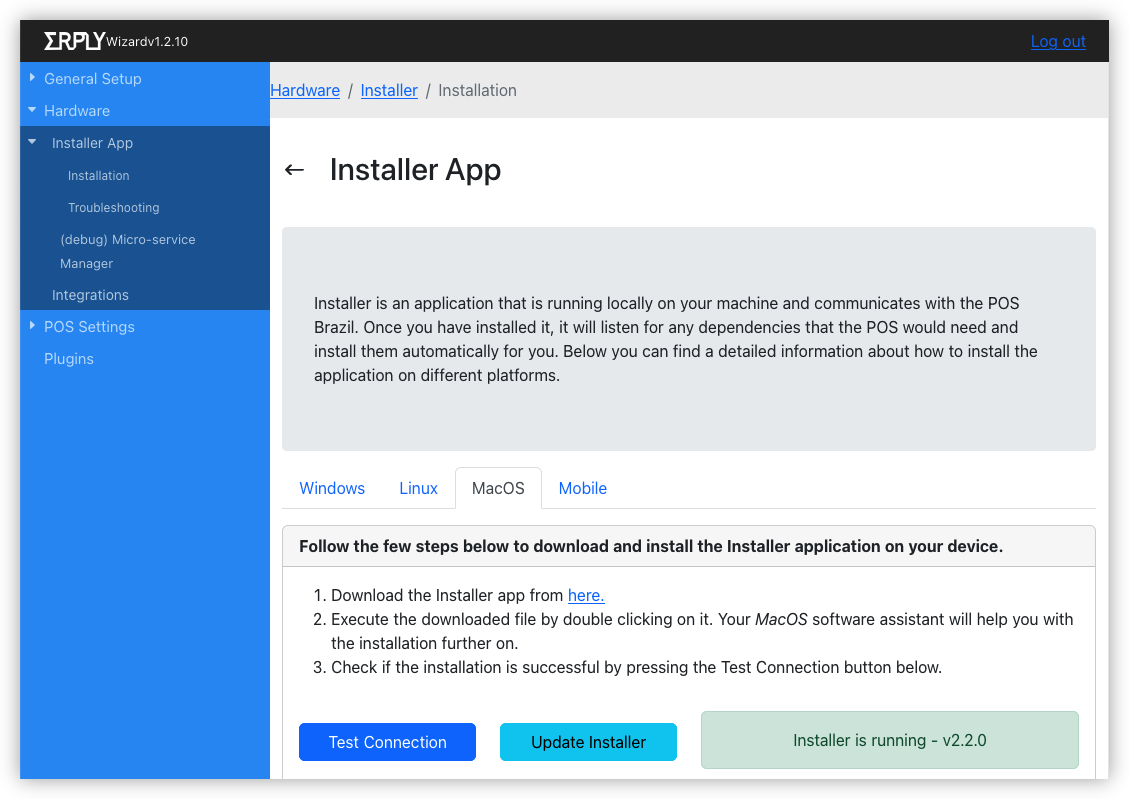
The required installer version is 2.3.1. Version 2.3 introduces the persistent connection to a control server (Command Broker API) that lets it receive remote commands.
Trying to update the installer sometimes can produce a slightly misleading error message “Update failed”. The actual reason of that failure is that there is no newer version available.
4. logger-ms
Microservice "logger-ms" (version 0.0.14 or above) must be installed and running on every register. Upon login, POS calls the logger-ms service with an account number and register ID — so that log files would get tagged with the correct account number and register ID when uploaded.
Logger-ms can be installed on the register from the web app "POS Onboarding wizard":
https://posow.erply.com/hardware/installer/msconfig > "Add new micro-service" > "logger-ms".
If the installed version is less than 0.0.14, click the "Update to latest" button on that page to upgrade.
In case the update fails, the "Network" tab in browser console can show the reason of the failure. A successful call is shown below; in case of a failure, the same view will show the reason of the failure:

One possible reason for a failure is a Windows error "file is in use and cannot be deleted". In that case, a computer restart will resolve the issue.
5. Self-checkout POS or Brazil POS
Ground Control requires self-checkout POS (the “unified”, ie. cloud version: https://d-sco.erply.com/ or https://sco.erply.com/) or Brazil POS.
The key responsibility of POS is to pass the ID of the selected register to the microservices; this links an Erply register and a physical machine together. Erply registers are defined in back office and are identified by IDs; machines (devices, hosts) are identified by a UUID.
After logging into self-checkout POS and picking a register, the POS will make two calls to local services. These calls can be observed by opening the browser's console, "Network" tab:
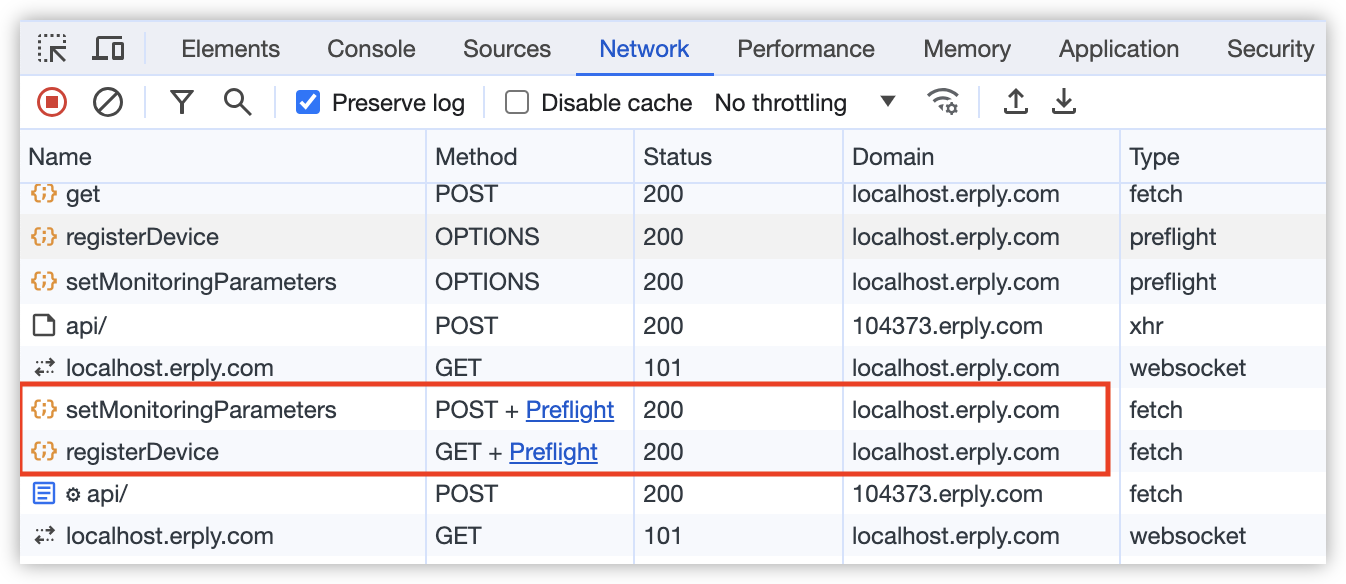
If POS does not make these calls, a reason might be invalid POS configuration that prevents POS from fully starting up. The Self-checkout POS page lists requirements and mandatory fields.
The "setMonitoringParameters" call is sent to the metrics-collector-ms microservice. This service is responsible for regularly reporting the list of installed and running services, their versions, and the general status of the machine (operating system version, browser version, available disk space).
The "registerDevice" call is sent to the logger-ms microservice. It associates the machine with an Erply register ID. To verify whether a device mapping has been created, please go to Settings > Configuration Admin in back office. Find application "pos-device-list":
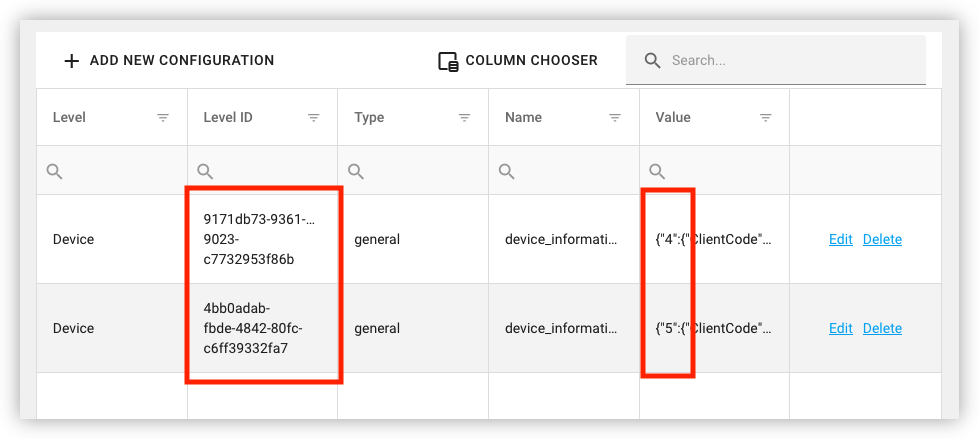
On the screenshot above, the column "Level ID" contains the UUIDs that uniquely identify a machine. Highlighted on the right are the corresponding register IDs.
When a machine gets decommissioned, delete the mapping record manually from Configuration Admin, to make the obsolete register disappear from Ground Control.