This guide explains how to:
- Configure locations in main company information
- Add a new location
- Change existing location
- Add a register
Configuring main company location
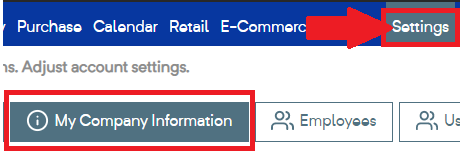
You can view and edit your business’ main location in the back office. Navigate to the Settings module and select My company information.
Here you can view and configure a wide variety of company information.
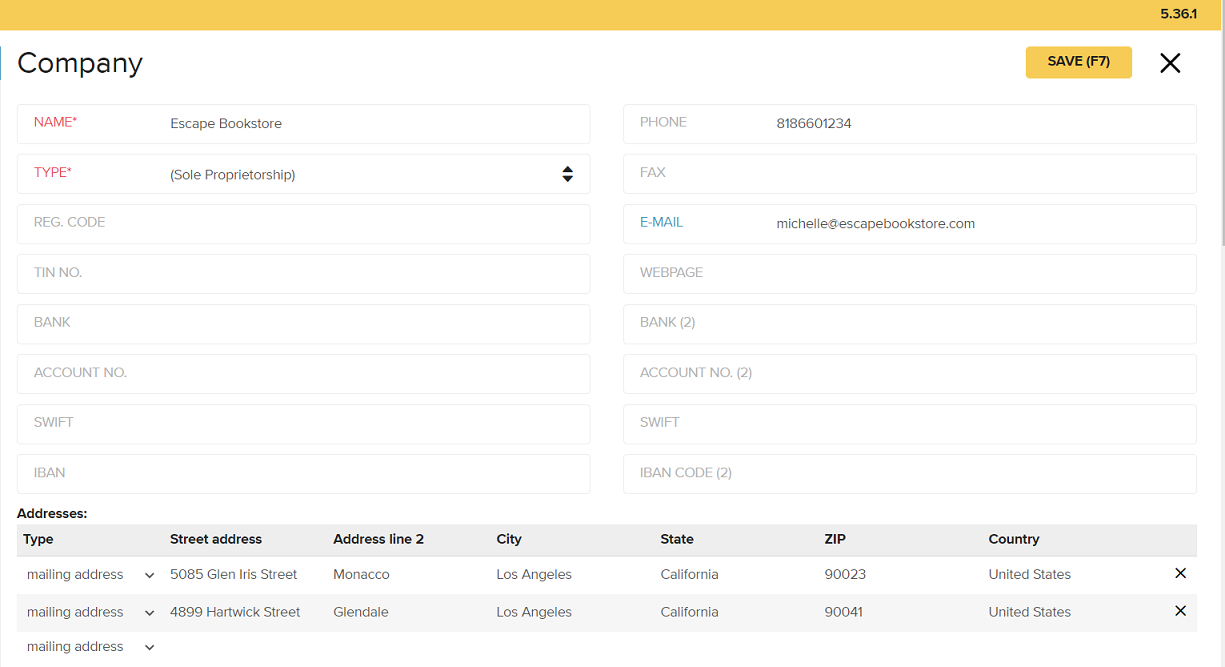
If you have multiple locations, scroll down to the Address section. If you want to add a new brick-and-mortar POS location, you’ll need to add its address here.

Click the blank line to add a new address. Make sure to hit the Save icon on the address’ line item to save that additional location in your company information.
Adding a new location
This step will enable you to make locations that are accessible at the POS for sales. Navigate to the Retail chain module and select Locations.
Erply will display a list of all locations. You can click on a location to edit it, or click New to add a new location.
Name your location so you and your employees can easily identify it, and add other contact information.
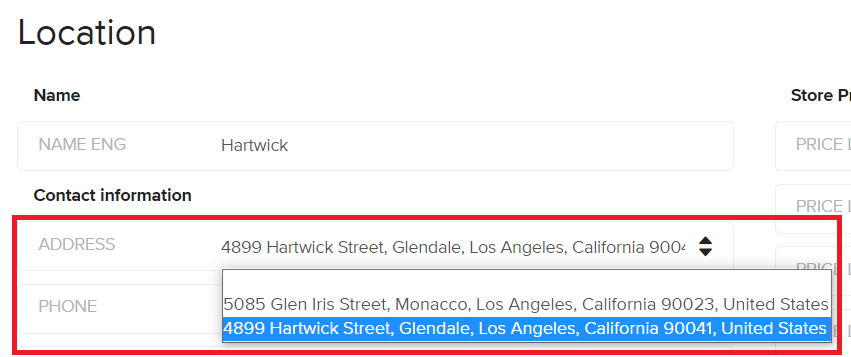
When you click the Address field, a dropdown bar will appear with all addresses added to your company information. If the correct address does not appear, please repeat the steps listed in the Configuring main company location section above.
Scroll down to the section titled The following users will get access to new location. Check off all users that you want to have access to this location at the POS.
If a user is unchecked, they will not be able to open this location or make sales at the POS.

Save when you are done.

Changing existing location
Choose the location you wish to change from Retail -> Locations.
By clicking on the location, you open it's information card, where you can make the necessary changes. When you've finished, click Save.
Adding a register
Go to Retail -> Add a Register. Choose the warehouse location you wish to tie with the register being created. Any items sold from the register will go through the chosen location.
Give the register a name you and your employees can easily recognize. Once you've added all necessary information, click Save.
For more detailed instructions, visit our guide to creating registers.