Overview
A physical stocktaking is used to double-check and correct inventory counts in Erply.
The physical stocktaking process consists of:
- Physically counting the items.
- Confirming the counts in Erply back office.
- Creating an inventory registration and an inventory write-off, to adjust the inventory in Erply.
Recommendations
A physical stocktaking involves handling a lot of data. It is not uncommon for product catalogs to contain a million items, with several thousands of these in stock at any given moment.
The larger the inventory, the more important it is to follow a good workflow. Here are some useful tips.
Do Not Perform a Stocktaking Concurrently With Sales
When starting a physical stocktaking, Erply records the inventory quantities at that exact moment. All counts are later compared to these initial values. The stocktaking is not continuously updated as items are sold — and even if it were, Erply would not know if a count was taken before or after the sale.
We recommend to do physical stocktakings outside of normal business hours.
Use Scanning Apps
Whenever possible, use a mobile scanning tool — instead of pen and paper, or filling in the stocktaking sheet in back office.
To see the list of available options, please go to “Inventory” > “Physical Stocktaking (Mobile)“ in back office.
The back office stocktaking sheet lists the entire contents of the stocktaking at once, and usually does not work very well above 10,000 items, or does not load at all. The mobile scanning tools do not have that limitation.
A Stocktaking Can Be Started From a Scanning App
It is not necessary to start a physical tocktaking in back office, before opening up the scanning app. Stocktakings can also be started from within the apps.
If you do create a stocktaking sheet in back office first, we recommend to use the option “products with non-zero stock”. There is no reason to use “all products”, this will just make the sheet much longer. If a product is scanned, and according to Erply, it is out of stock, it will be automatically added to the sheet.
Divide the Work
If the inventory is large, it is helpful to divide the work between multiple people.
When using mobile scanning apps, it is OK if multiple people scan the same product. If two employees both find and scan two pieces of the same item, the final count will be 4.
The stocktaking sheet in back office must not be used by multiple people simultaneously. Furthermore, it also cannot be used at the same time with mobile scanning tools. If it is preferable to use the back office sheet, it is only possible to divide the work by taking stock by product group or product category.
Use “Physical Stocktakings (New)" for Review and Corrections
When reviewing the results and making corrections at the end of the stocktaking, the newer module (“Physical Stocktakings (new)“) handles large sheets (10,000s of items) better than the old one.
However, the final step — creating the inventory registration and inventory write-off — can only be done in the old module.
List of Stocktakings in Back Office
In the back office, navigate to the Inventory module and select Physical Stocktakings.
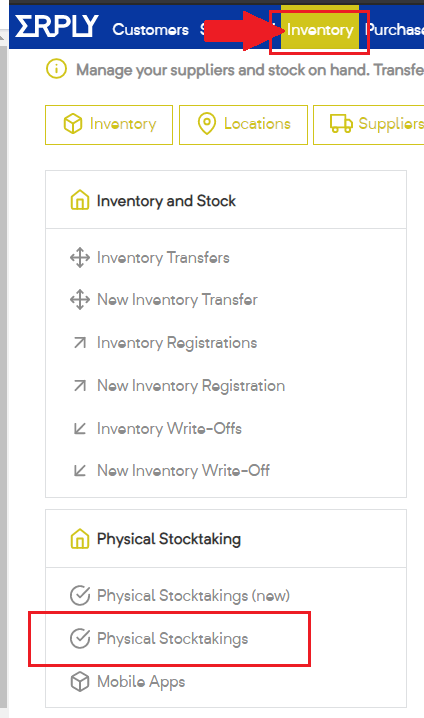
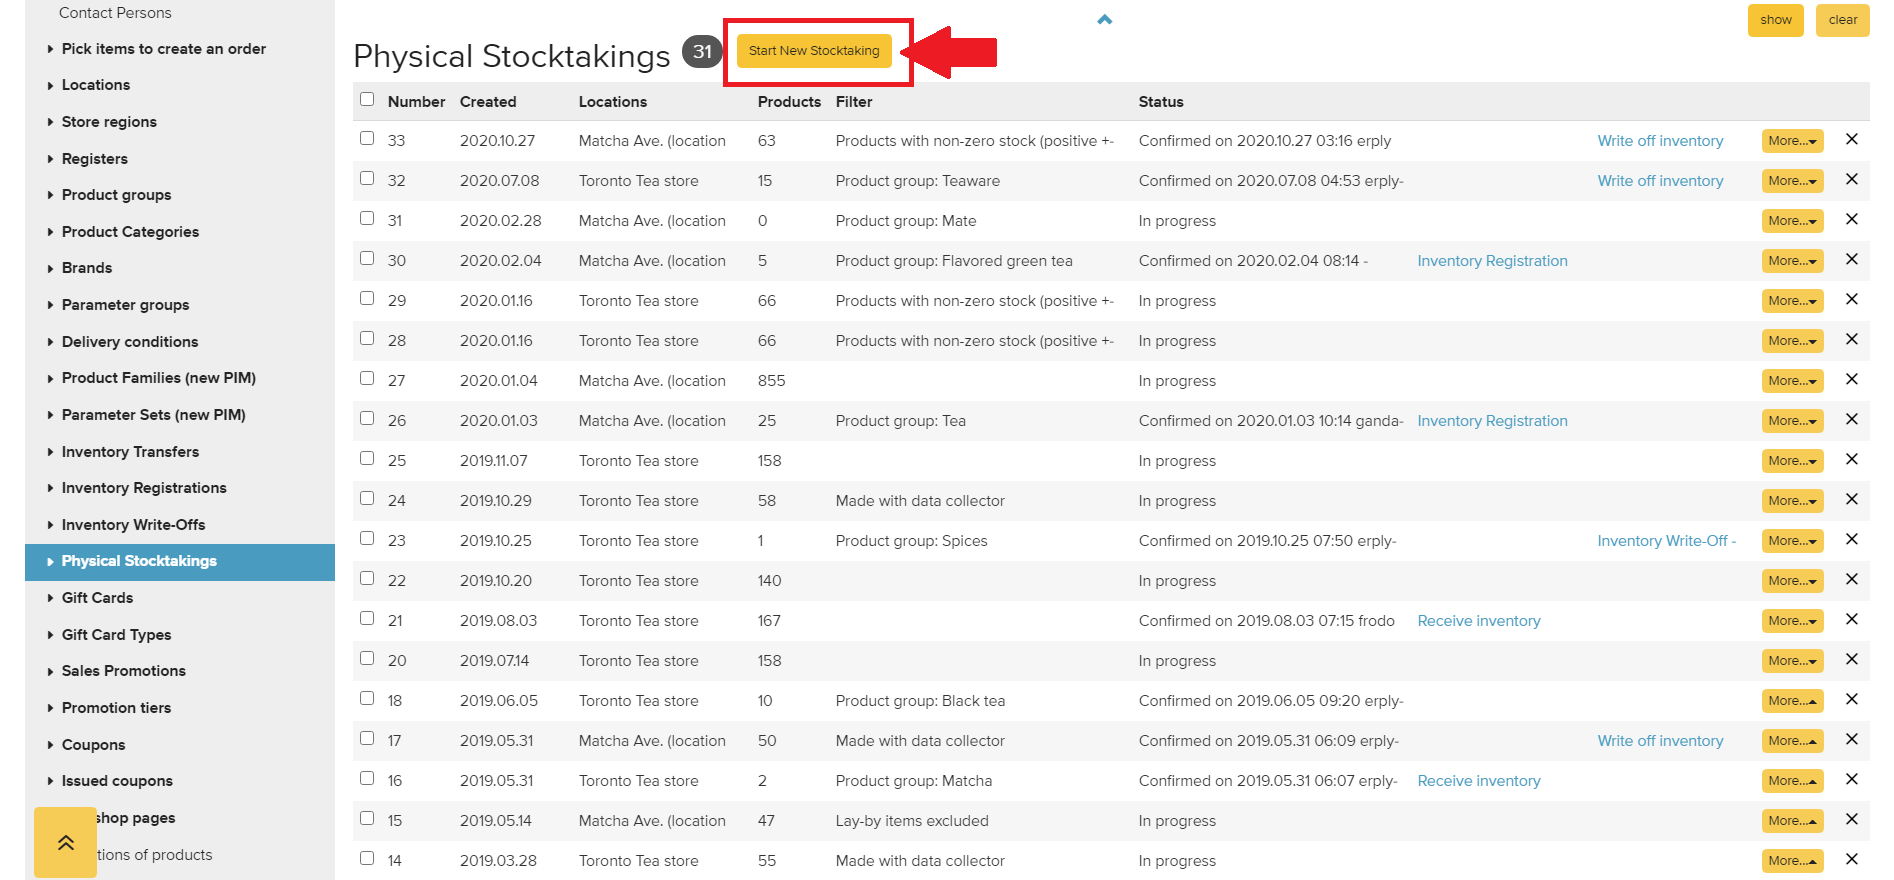
Erply will display a list of all physical stocktaking conducted in the past. To start a new physical stocktaking, select Start new Stocktaking.
Select the location where you’ll be conducting a physical stocktaking. You may also set filters to narrow down your stocktaking.
Filters can also be set up to only show products within a certain stock threshold, specific product groups, etc.
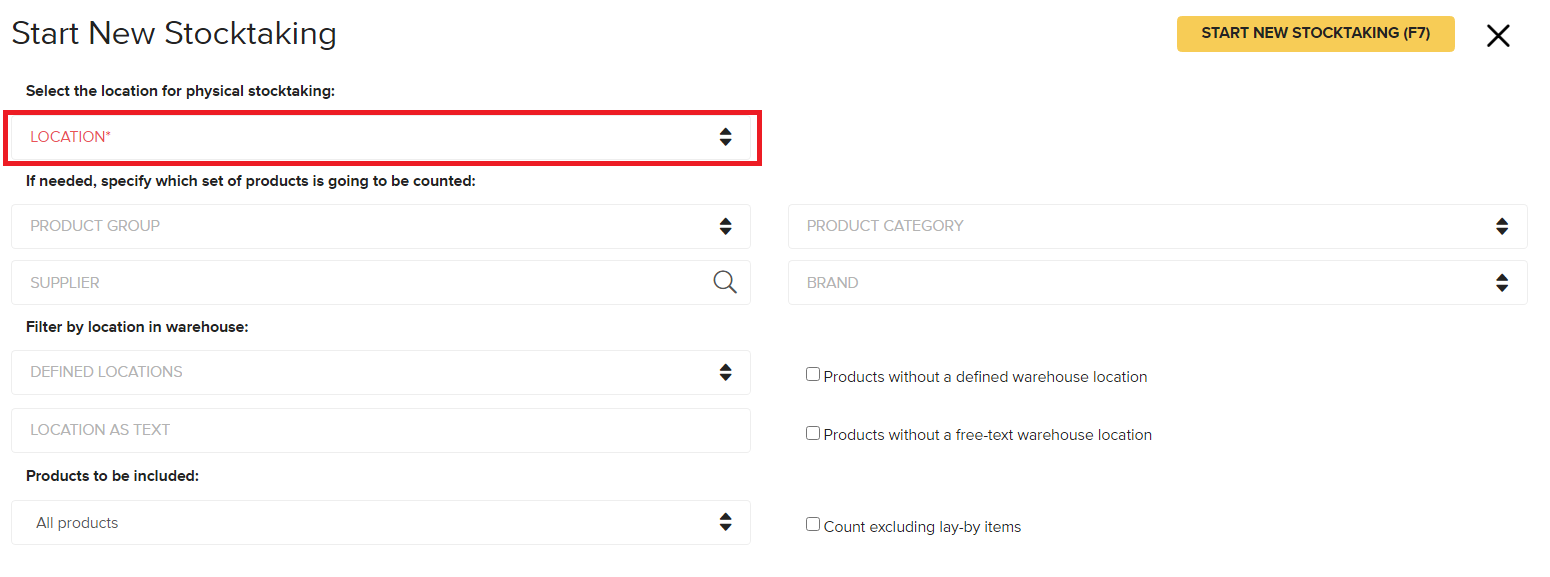
Click Start new stocktaking to begin.
A new stocktaking report will open. You will see a list of all inventory counts for each item in your Erply account.
If needed, you can Save the report to pause your work and resume at a later time.
Pro tip: You can print a physical copy of this list after saving!
1. Print the sheet through your browser’s printing option (Ctrl+P or CMD+P)
2. Return back to the main physical stocktaking list and click the More button on your physical stocktaking. Press Print Stocktaking Sheet.  |
Remember: These inventory counts will not update if you sell or receive items; it will only display stock counts from the time it was created.

Go through your inventory list and enter your manual counts in the Counted column.
The Layaway column accounts for items that are physically in your inventory, but are not available for sale. This related to items in layby, or prepayment invoices/sales orders
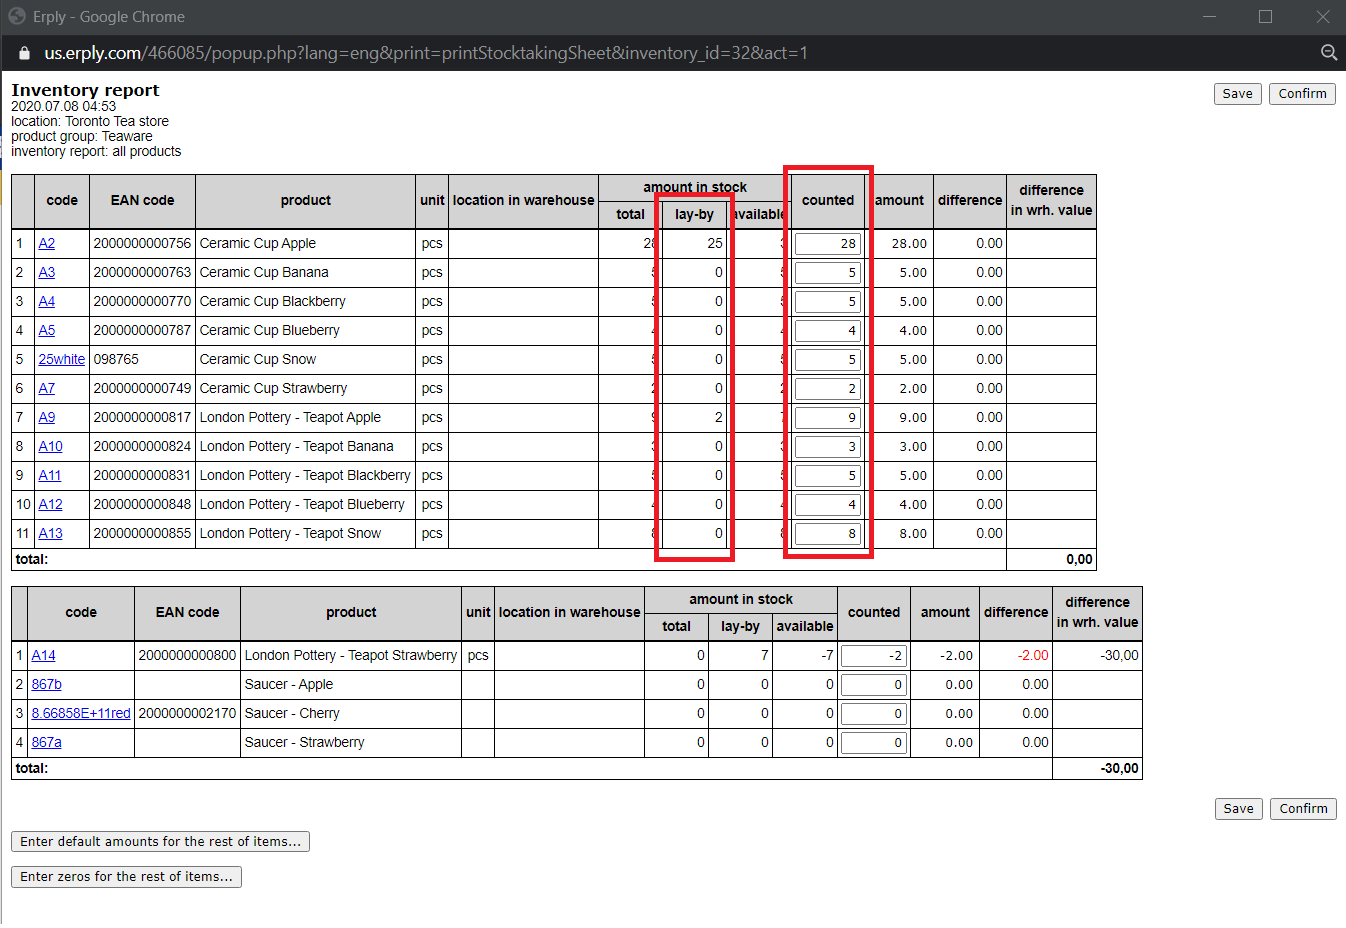
The bottom of the stocktaking gives you two options to autofill blank items.
Enter default amounts for the rest of items:
Enters the current inventory count in your Erply account to all rows with an empty “counted” column. This will not prompt an inventory registration or an inventory write-off.
Only use this when your physical count matches the inventory count listed in your Erply account.
Enter zeros for the rest of items:
Sets all rows with an empty “counted” column to 0.
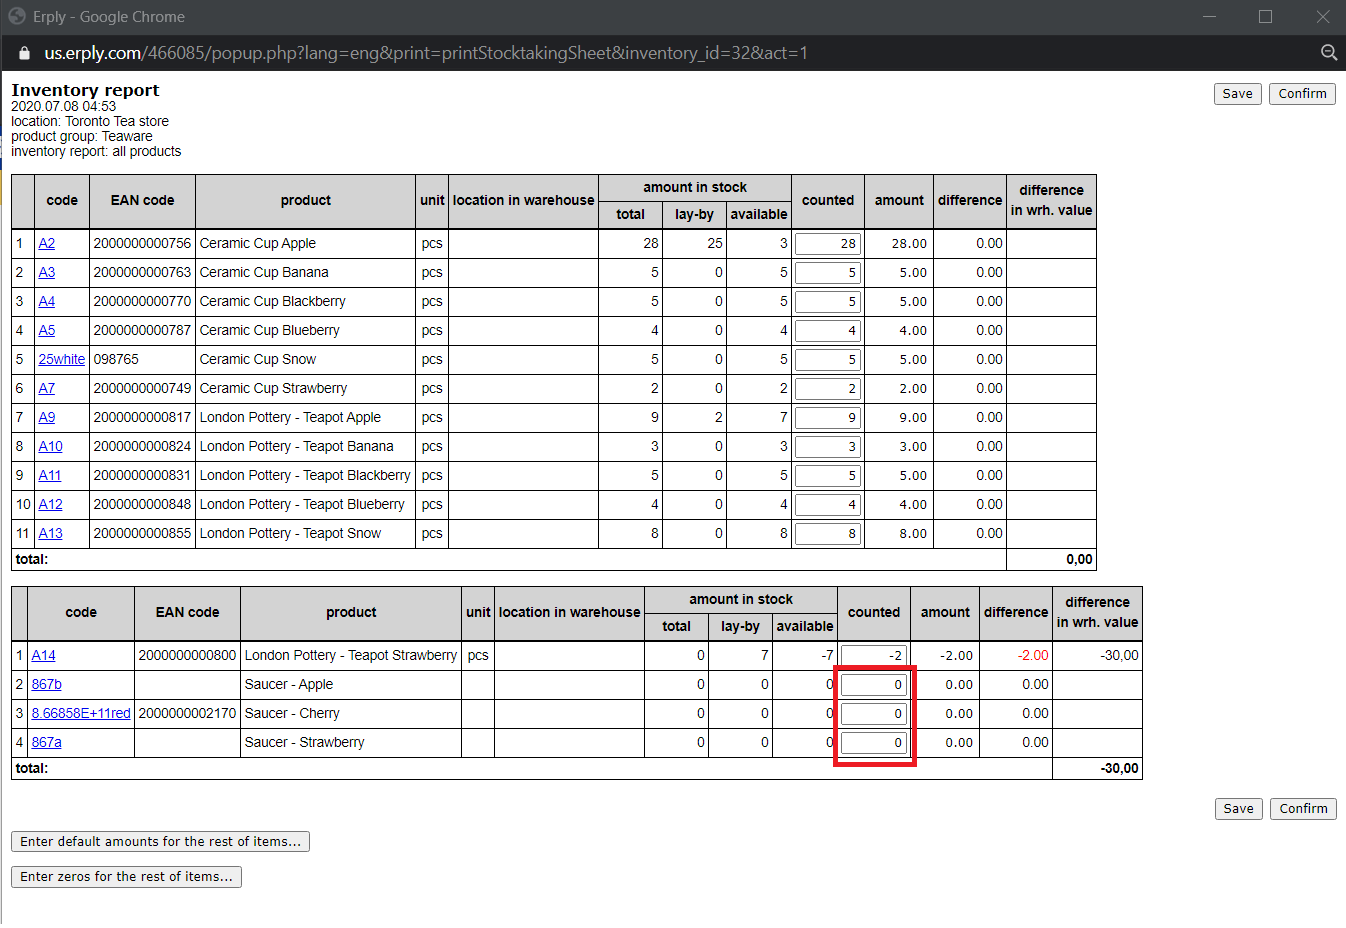
Save when you are done entering your counts. Be sure to save your document regularly until you’re done working with it

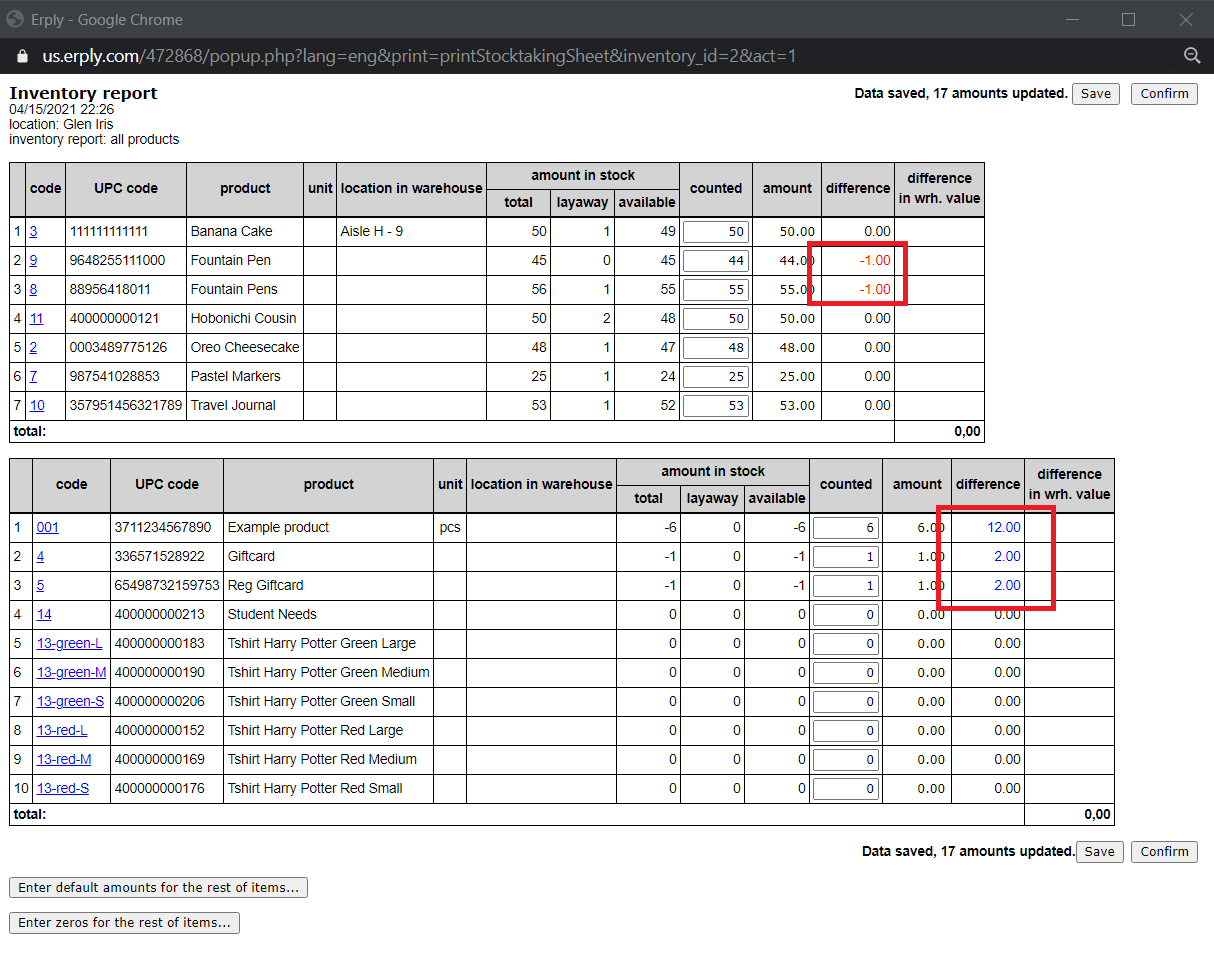
Once saved, the differences are listed and appear color coded:
Red: items counted below what is registered in Erply.
Blue: items counted above what is registered in Erply.
Once saved, your Stocktaking act will display in the list on the main Physical Stocktaking page.
Confirm the stocktaking when you are ready to move onto the next step.

The stocktaking will now be listed in your main physical stocktaking list.

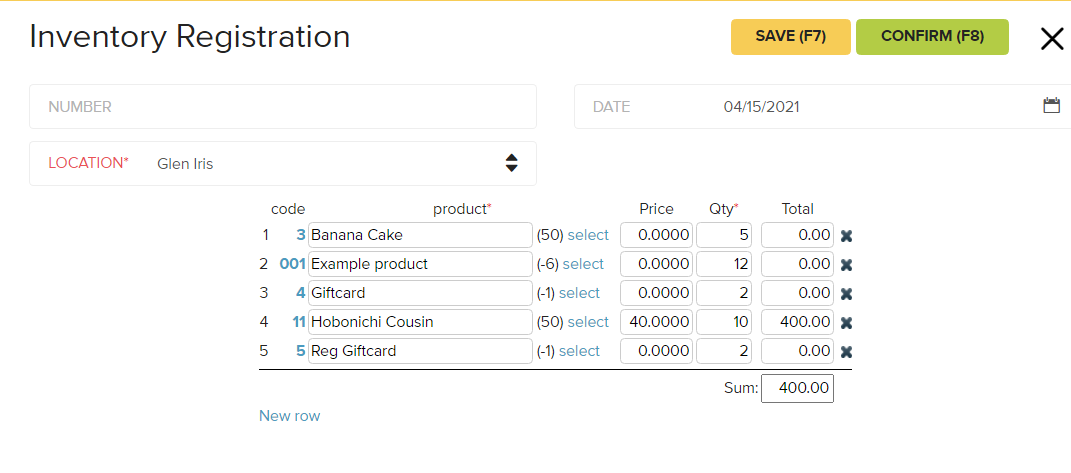
Two new documents will be created in your Erply account:
Inventory registration: A list of all inventory items where your count was greater than the amount registered in the system.
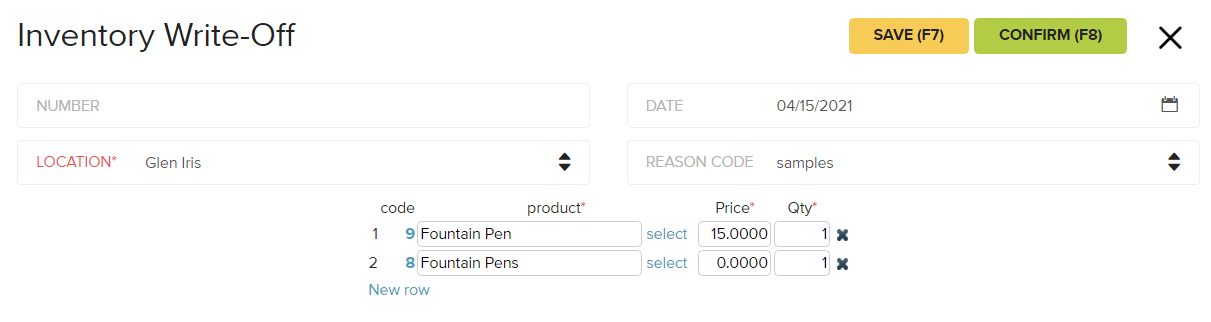
Inventory write-off: A list of all inventory items where your count was lower than the amount registered in the system.
Your inventory database has NOT been updated yet!
The final step is to locate each of these documents in your Erply account and Confirm them.
Your physical stocktaking will now contain links to the associated inventory registration and inventory write-off documents (if any needed to be created).
Click on these documents to open them up, then press Confirm. They also can be opened via the regular Inventory > Inventory Registration and Inventory > Inventory Write-off pages.
Once saved, you will notice that the documents are given a registration number:

Your inventory quantities have now been updated.
You can view these changes at any time by revisiting your Physical Stocktaking list and clicking on the stocktaking.
At this time, the new stock levels and inventory documents will be reflected on the warehouse report for affected items.